
Frontier guide · Monsters and references · 10 of 18
Monsters
The monster list, the status effects Frontier monsters inflict, and the special rules for monsters with their own tricks, such as Akura tails, Unknown invasions and Garuba Daora's shield.
Large monsters
This is the guide's list of large monsters. Names are the English names used in the guide. Menu and monster names may differ slightly in our client.
 Anorupatisu
 Abiorugu
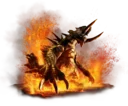 Akantor
 Akura Jebia
 Amatsu
 Akura Vashimu
 Barioth
 Baruragaru
 Basarios
 Berukyurosu
 Blangonga
 Brachydios
 Bulldrome
 Cephadrome
 Chameleos
 Congalala
 Daimyo Hermitaur
 Deviljho
 Diablos
 Black Diablos
 Diorekkusu
 Disufiroa
 Doragyurosu
 Dyuragaua
 Elzelion
 Espinas
 Orange Espinas
 White Espinas
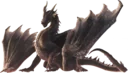 Fatalis
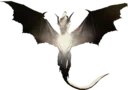 White Fatalis
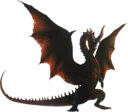 Crimson Fatalis
 Farunokku
 Forokururu
 Garuba Daora
 Gasurabazura
 Gendrome
 Giaorugu
 Gogomoa
 Gore Magala
- Gougarf
 Gravios
 Black Gravios
 Guanzorumu
 Gureadomosu
 Gurenzeburu
 Gypceros
 Purple Gypceros
 Harudomerugu
 Hypnoc
 Breeding Season Hypnoc
- White Hypnoc
 Hyujikiki
 Iodrome
 Inagami
 Khezu
 Keoaruboru
 Red Khezu
 Kirin
 Kushala Daora
 Rusted Kushala Daora
 Kuarusepusu
 Lao-Shan Lung
 Ashen Lao-Shan Lung
- Lavasioth
- Red Lavasioth
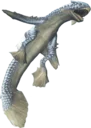 Aruganosu
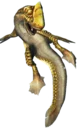 Goruganosu
 Meraginasu
- Mi Ru
 Monoblos
 White Monoblos
 Odibatorasu
 Kamu Orugaron
 Nargacuga
 Nono Orugaron
 Midogaron
 Pariapuria
 Plesioth
 Green Plesioth
 Poborubarumu
 Pokaradon
 Rajang
 Rathalos
 Azure Rathalos
 Silver Rathalos
 Rathian
 Pink Rathian
 Gold Rathian
- Unknown
 Raviente
 Berserk Raviente
 Rebidiora
 Rukodiora
 Seregios
- Shagaru Magala
 Shantien
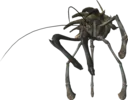 Shen Gaoren
 Shogun Ceanataur
 Taikun Zamuza
 Lunastra
 Teostra
 Tigrex
 Toa Tesukatora
 Toridcless
 Uragaan
 Varusaburosu
 Velocidrome
 Voljang
 Yama Kurai
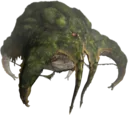 Yama Tsukami
 Yian Kut-Ku
 Blue Yian Kut-Ku
 Yian Garuga
 Zenaserisu
 Zerureusu
 Zinogre
 Stygian Zinogre
 Duremudira (also 2nd form)
The guide lists the Gougarf as one entry. On our site, see Lolo Gougarf and Ray Gougarf.
Small monsters


Frontier status effects
These status effects exist only in Frontier.
| Status | What it does | Caused by |
|---|---|---|
| Crystallisation | Instantly drops your stamina to the minimum and encases you in crystals. After a while the crystals explode violently, dealing heavy damage to you and those around you, unless you break out of them. A Mega Juice or Power Juice counters the stamina loss. To break out, mash buttons and move. | Akura Vashimu, Akura Jebia, Garuba Daora, Mi Ru |
| Frostbite | Your stamina drops faster when you do actions such as rolling, and the stamina bar itself shrinks, like being in a cold area without a hot drink. | Dyuragaua, Duremudira |
| Magnetism | Monsters can control your position with magnetic force: they can push you away and pull you towards them. | Rukodiora, Rebidiora, Gougarfs |
| Vocal Chords | Stops you from communicating in any way in game. | Chameleos |
| Blind | The screen is heavily covered by a black, goo-like texture, which makes it very hard to see. | Forokururu |
| Confusion | You gesture or dance at random. Counter it the same way as a normal stun, by rotating the analog stick or mashing buttons. | Poborubarumu |
| Deadly Poison | An extremely strong poison that Duremudira inflicts in its second phase. Only its own specific cure can counter it. | Duremudira |
Zenith monsters add more status effects. See Zenith.
Unique monster mechanics
Akura Vashimu and Jebia tails
Akura Vashimu and Akura Jebia each have specific requirements for cutting their tails. For Jebia, the same steps are needed to make its Tail Crystal Stub appear.
- Deal Impact damage to their claws and heads. This breaks the crystals on each section.
- Deal Cutting damage to the now broken crystals. The monster flips over and lies on its back.
- For Akura Vashimu, you can cut the tail as soon as it flips the third time: just deal cutting damage to the tail.
- For Akura Jebia, deal extra Impact damage to the tail. Eventually red veins show. At that point deal cutting damage and you can sever the tail.
With the tail severed, you get one carve from the tail itself and one more from the tail's crystal, as long as the crystal was not broken.
After the tail is cut, both monsters will eventually try to eat their own tail to recover HP. If they succeed, the tail is removed and you lose all the carves on it.
Akura Jebia also grows spikes on its body where the tail was severed. Breaking these crystals gives extra rewards. To break them, wait for the monster to try to eat its own tail, then spam bounce bombs underneath it.
Unknown invasion
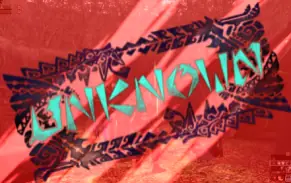
After you clear a normal quest that is not a gathering quest, there is a chance your next quest will be invaded by an Unknown (a Black Rathian). Everyone is forced back to the base camp, and after a few seconds an "UNKNOWN" banner appears. It replaces the quest you posted, and gives Unknown materials instead of the original quest's rewards.
- On an invaded HR3-4 quest, you can only repel Unknown, and it has one fewer rage phase.
- On an invaded HR5 quest, you can slay Unknown and it gains an extra rage phase. This also lets you cut its tail, which is impossible in lower rank quests.
- The invasion Unknown is weaker than the Supremacy version you can fight at SR300, and gives the same materials.
- Farming the lower rank version is difficult. It follows a pattern that is not public, so trying is probably not wise.
- There is a G Rank Heavenly Conquest version. It is a set quest and does not invade other quests. It has even more moves and rage phases than the normal and Supremacy versions. As a conquest it is always at the maximum level of 9999, so it always has its maximum defence and damage. To fight it you must be at G Rank and have made at least one Lv50 G Rank weapon.
Taikun Zamuza
Taikun Zamuza is a Carapaceon that starts the fight covered in a layer of rocks. Remove all the rocks on its body and it breaks down into the second layer of its cave. On the second layer, break all of Zamuza's body parts to move on to a third layer.
Each layer of the cave has its own mining spots, and the rewards you get depend on the layer you reach. It is very hard to get through all three layers on the lower rank versions, because the monster dies before it takes enough damage to break every part.
Gogomoa
Every adult Gogomoa carries a baby on its back. If you make the baby fall off and deal enough damage to it, the adult goes into a rage mode. In rage mode Gogomoa gets an aura and attacks much faster, but it also takes far more damage from hunters. That lets you kill it much faster, at the price of a harder fight. If the adult changes zones after it enters rage mode, it rejoins its baby.
If you attack the webbing during its webbing attacks, you can make the adult stagger and fall over. If you time attacks on the monster itself while it uses its webbing, you can cause a violent explosive reaction, shown by a huge orange flash. It deals heavy damage and can knock the monster out of the air or stagger it.
Espinas
Every version of Espinas is enraged in its own way. It always starts placid, with high defence against all damage types. After enough damage, it becomes enraged and actively attacks hunters, but you can then hit it more freely, because it takes more damage and your weapon bounces less.
All versions can have their horns broken and tails cut, but only while the monster is on low health. Focus on the tail after the horn breaks, or the other way round, to be sure of the rewards for both parts.
Pariapuria
Pariapuria is a fish-like monster that looks like a Tigrex. It eats any meat placed in front of it while it does a specific charge. Match the colour of its drool with the right type of meat (Raw, Drugged, Paralysis or Poison) during these charges, and the monster becomes bloated and starts to vomit. The vomit leaves piles of stone-like material that you can gather.
Some items only come from making Paria vomit, and some rare items are more common in the vomit piles than elsewhere. Everything you gather is on top of quest rewards and carves. Some quests give extra rewards for making Paria vomit.
Zerureusu
Zerureusu, or White Los (Zerureusu), has an ability called Adaptation. It adjusts its body to the type of damage it takes most:
- Mostly Impact damage: it hardens its head with crystals, which greatly lowers Impact's effect there.
- Shot damage: it hardens its wings.
- Cutting damage: it hardens its tail and legs.
It also uses different attacks depending on its adaptation mode, based on the hitboxes that change. For example in Impact mode Zeru can start a counter move. If too much damage is dealt to the head while it is in this counter stance, it retaliates violently against everything around it.
Gou (HR5) Zerureusu only starts to adapt at roughly 33% HP. G Rank Zeru starts to counter all damage types almost at once.
Garuba Daora
Garuba Daora is fought on an airship. It can do a massive area attack that can instantly cart a whole party.
- The tell: Garuba hops backwards while its crystal-covered parts glow.
- After the hop it swipes the air in front of it and creates a spherical shield around itself. Being inside the shield is the only safe spot in the arena.
- Outside the shield, a very fast damage-over-time effect will probably kill you at once.
- When Garuba opens the fight with this attack, it skips the backhop and swipes the air at once, making the shield and area effect.
You can avoid it with a superman dive, but it is very easy to get wrong, and you die once your invincibility frames end.
Red Rajang and Phantom Dora
If you post an HC HR5 or G Rank Rajang in the Volcano, or an HC HR5 Doragyurosu in the Snowy Mountains, there is a very low chance the monster is replaced by a Red Rajang or a Phantom Dora.
- Red Rajang can summon a large ball of energy and launch it at the ground, where it explodes over a wide area, like a Spirit Bomb.
- Phantom Doragyurosu is a Dora that dies once and then comes back to life, super powered.
Neither gives different materials from its normal version, but if you find and kill one you get a vanity item that shows you hunted it.
Aruganosu and Goruganosu
The Supremacy monsters Aruganosu and Goruganosu (also called Gold and Silver Lavasioth in the guide) are fought together in the Tower arena. They cannot be killed until both are at 1 HP.
When one is damaged down to 1 HP, it flops about constantly. If you take too long to lower the second one's health, it burrows under the injured one and launches it into the air, which revives it and heals it somewhat. Balance your damage between the pair, or you may end up only repelling because of the revivals.
Mi Ru (Unknown)
Mi Ru is a G Rank monster. It appears as a randomly assigned Urgent quest, given after you hunt normal G Rank monsters. The Urgent quest appears in its own section with nothing but Mi Ru in it. Finishing a Mi Ru Urgent quest in any way removes it from your list. You get only one attempt, so be sure to have a proper item set and the right gear equipped. If you fail, you can fight more normal monsters and try again later.
Written from the Monster Hunter Frontier guide by Fist (as saved in January 2022). That guide describes Capcom's old official servers; we reworded it, laid it out for Hunsterverse and added the "On Hunsterverse" notes (all of them: Hunsterverse vs the old servers). The pictures are from the original guide.