
Frontier guide · Things to do · 17 of 18
Regular Events
The Hunter Festival, Diva Defense and its Guild Interception, the Caravan and its gems, and Raviente: how each event works, what to hunt for and what the rewards are.
Event roster
Four things count as "events" in Frontier. Two are always available: Conquests and the Hunter's Road. Two run on a cycle: the Hunter Festival and Diva Defense.
Doing all four gives you Event Cycle Equipment. It is mostly outdated, but the decorations have many uses, and the weapons are still solid choices for a Level 50 G Rank weapon to unlock Shiten Conquests.
Event Cycle Equipment
There are three series of weapons, and three series of armour and decorations. You earn them by taking part in all of the running events. Any single decoration or weapon needs 40 of each event's material. Armour pieces also need 40, but you should never need them.
- Weapons: the Law (Light element), Sage (Wind element) and Truth (Darkness) series. All three have weapons in every category. They have high element and sharpness but fairly low raw by modern standards.
- Armour and decorations: the Ninfa, Uiru and Anju series. You will never use the armour pieces in the current game. Ninfa and Uiru decorations are often needed in solid sets. Anju is less likely to be needed.
| Event | Material | Requirement |
|---|---|---|
| Hunter's Road | Ancient Super Steel | 20x a week for reaching 20 stages on the Road. Traded from others at the Yellow NPC |
| Ultimate Conquests | Dragon Crystal Stone | Drops at variable rates across all four tiers of conquests, with higher rates at higher levels |
| Hunter Festival | Ceremony Lyrics | 80x for contributing at least 3,000 Souls |
| Diva Defense | Mirage Powder | 80x for earning at least 20,000 Score during the Prayer Chapter |
Conquests
Conquests are G Rank quests against levelled monsters. Conquest monsters come in Lv1, Lv200, Lv1000 and Lv9999 versions. See G Rank for more.
Scheduled Quests
On the Taiwanese servers, the Scheduled Quests changed every week after maintenance. Brand new monsters and content usually appeared as a Time Limited Quest before they joined the permanent quest rotation. Unique event weapons and armour were only available through Scheduled Quests. The guide's Google Document tracked live events, but it did not always cover smaller useful quests such as those for Gou Materials, so check what is on offer yourself. On Hunsterverse, see Events and the Quest catalog.
Hunter Festival
The basics
The Hunter Festival is a regular event that gives unique weapons, decorations and access to a point store. It has three weeks: Sign Up, Soul Collection and Winners' Week. Two teams, Red and Blue, compete by collecting Souls.
Sign Up Week
Sign Up Week has two parts: guilds are assigned colours, and the Hunting Competition runs.
Colour assignment
A normal guild member does not need to do anything. The guild leader, or the second or third in command, can sign the guild up at any point during the week. The guild is given a random colour, Red or Blue, which it keeps for the rest of the event. The colour shows next to a hunter's name in town once the guild is signed up.
Hunting Competition
The Hunting Competition runs at set hours. The quests are available from 14:00 on Friday until 14:00 on the following Monday (Taiwan time). You find them on the main non-G Rank quest giver, the Guildie wearing black, in the Official Hunting Assembly section while it is up.
The quests vary from contest to contest. These days they mostly mean fighting standard G Rank monsters in preset gear, with your choice of Origin weapon and three decorations for its slots. There is usually a Solo Quest and a Guild Quest.
- Solo quest: taking part at all gives you materials for Pugi Cuffs and Partnyaa Decorations. High placings give tickets for unique helmets, which you can wear as real armour or use for a transmog.
- Guild quest: mainly for boosting your team's points for the whole festival. It adds nearly a whole guild's worth of Souls to your guild's colour, which greatly improves your chance of winning, and adds one extra person's worth of Souls when Festival Point rewards are worked out. These quests often have a sub-objective, such as breaking a part or cutting a tail, so you may need to adjust your party to meet it.
For both quests the armour set is preset by the quest. You can be flexible with your build by using the slots in your weapon. The decorations you want depend a lot on your weapon type, so adapt to your weapon, the skills on the sets and your access to decorations.
The result of the competition is not shown until Winners' Week. It gives a booster pack of Souls to your guild and your guild's colour:
| Group contest placing | Souls to your guild | Souls to your guild colour |
|---|---|---|
| 1st to 10th | 5,000 | 50,000 |
| 11th to 30th | 2,000 | 20,000 |
| 31st to 50th | 1,000 | - |
Soul Gathering week
About Souls

Souls are the points you earn during Soul Gathering week. There are many sources, and you should use as many as you can every time you take part. After every quest, the messages show your current Soul count and how many the quest added. You can only carry 500 Souls at a time.
Souls decide which colour wins the festival. They also decide how many Festival Points you get to spend in Winners' Week.
If you are contributing, turn on auto-contribution in the options, or hand your Souls in often to the Festival Manager near the blacksmith. That way a disconnect or other problem does not lose them. To hand them in, talk to her while you hold Souls. To turn on auto-contribution, open the main menu, go to Options, then Other, and set the Soul auto-hand-in setting. (The guide says to toggle it to Off; check the setting in your own client.)
If you are not contributing, do the opposite: never talk to that NPC and turn auto-contribution off. On the Taiwanese servers, a guild that signed up for the Cappuccino rank was kicked from it if it had less than 5,000 Souls on the Wednesday before maintenance, even if the Souls were handed in by accident. The guide says that rule had been dropped by the time of the closure, but it is still polite to do your best.
Killing monsters
Every monster gives a fixed number of Souls, typically between 1 and 17. For most monsters you get the Souls as long as you hunt them successfully, which includes both captures and slays. Some are set to capture-only or slay-only. For example, the G Exclusive Midogaron is usually capture-only. You can check each monster's Soul count and requirements on the main Festival website.
Soul Gems
Soul Gems are items you take on a quest. They give an extra fixed number of Souls when you complete it. There are three values: 20 Souls, 40 Souls and 80 Souls. Only one gem is used per quest, so even with 99 in your pouch you only get 20, 40 or 80 extra Souls.
Where you could get them:
- Hunter's Road: you can buy 5x each of the three gems every week. The minimum time between festivals is three weeks, so you get 15x of each for every festival, a total of 2,100 Souls worth. The Tower Medal store also sells them (see Tower Medal store).
- Diva Defense: gives 25x 80-Soul gems for contributing on all 7 days of Prayer week, which the guide counts as 1,250 Souls worth. This may not line up with the festival cycle, but you should get 25 every other festival at the very least.
- The festival itself: gives 5x of each gem for 700 free Souls during Soul Collection week.
With all of the above, and using only half of the Diva Defense gems, you get 3,425 free Souls a festival. That makes it easy to finish with 5,000 or more using the daily options, without grinding secret quests.
Diva Song
Once you have finished Chapter 3 of the Diva questline, you can listen to a Diva Song. It gives at least +1 Soul on any quest, and +2 at maxed affection. That is not much, but it adds up with your other sources. Use a Diva Song before you start grinding a secret quest window.
Weapon Sigil
At G Rank you can put a special Soul Collection sigil in your weapon to add one extra Soul to any quest. You find the sigil on the White Monoblos B recipe at a 5% chance, and on any sigil that rolls outside its fixed percentage ranges. It is a small, fixed bonus that stacks with all other sources.
Secret Quests
Secret Quests keep the Soul totals of the two teams close until the end. There are always three Secret Quests a day. During the week they are only open to the team that is behind, and they open for two-hour windows at 06:00 / 14:00 / 22:00 Taiwan time. From 14:00 on Saturday until 06:00 on Monday, all Secret Quests are team neutral, so you can always use them. It is easy to reach 5,000 Souls just by joining one or two of these windows. They are also the surest way to get a secret, because from Monday on the secrets may all belong to one team if the score is lopsided.
Secret quests really are secret, and players have to find them. There is some logic to which quests appear, but you will do best by watching the busiest servers and checking forums. There are only a certain number of quests, so later on you can work through them to identify the quest if nobody is posting. Forum posts usually appear within the first 15 minutes of a secret. A first-time quest, or an awkward window like 06:00, can take longer.
In-game messages and chat for secret quests were in Chinese, so players sometimes needed their system locale set to Chinese to read them. Look for messages that state the Soul total. For example, 這裡! 逆轉99魂剛炎角火飯-3 means a secret quest worth 99 Souls (逆轉99魂) for HR5 Gou (剛) Varusaburosu (炎角火) with a food buff and 3 slots left (飯-3). The key parts are the monster name and the Soul total. If a monster has several quests at one rank, join one that is already posted to see which it is, or hope someone is spamming the quest name. You can also ask in global chat: 請問有逆任嗎? / 請問逆任是?. Ask on the most popular server.
Dailies
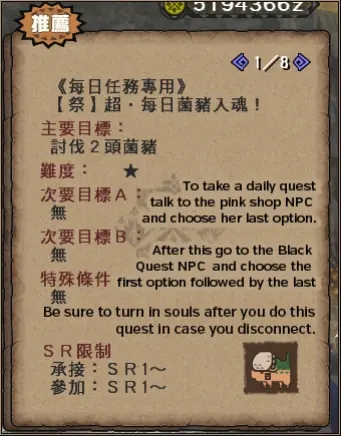
Each day you can take a daily quest that gives 200 Souls for killing two Mosswine. It needs one Purple Hunter Pass. You get 7 of them after you contribute at least a single Soul, from the Purple Festival NPC (Receive Rewards, then Personal Goals).
The quest is on the HR quest NPC. It is her first option (or the second, if you have not done the Extreme Style demo quests), followed by the last option.
Partnyaas
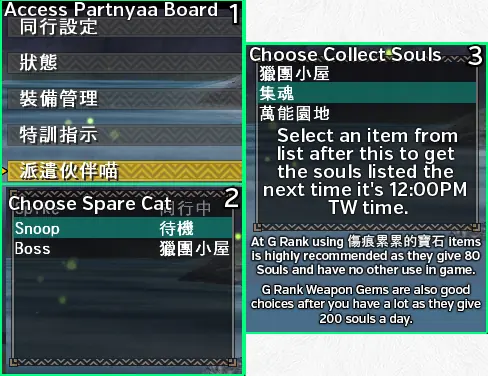
Taking a Partnyaa on a quest has a chance to give you some Festival Souls back. It is usually a handful, and very rarely up to ten. You can also send a Partnyaa out each day to collect a fixed number of Souls, based on an item you give it. Do this at the Partnyaa board in the Halk and Partnyaa area of your house (heart icon). Souls arrive at 12:00 (Taiwan time) the next day. At G Rank, items that are highly recommended give 80 Souls and have no other use in the game. G Rank Weapon Gems are also good choices once you have a lot, as they give about 200 Souls a day.
Winners' Week
Personal targets
While you contribute, a number of personal Soul totals act as achievements and give rewards. The first is 7x Purple Hunter Pass, given for contributing a single point. It is used for the Mosswine daily quest that gives 200 Souls. Claim your rewards at the Purple Festival NPC: Receive Rewards, then Personal Goals.
Other rewards include the Ancient Hunting Books that level Transcend, and the Ceremony Lyrics items used to craft weapons and armour that need all four cycling events.
Guild targets
Guild targets work like personal ones, but they are based on the total points the whole guild contributes. They give extra items for crafting and upgrading Festival armour and weapons, and for taking Winners Quests. After 700 points are contributed, everyone gets enough items for 700 Souls (3x each of the three gems). With the Mosswine quest items, that is enough for 1,900 to 2,100 Souls with no real effort. Claim them at the Purple Festival NPC: Receive Rewards, then Guild Goals.
Personal multipliers
To stop people putting in 1 point and leeching, there are personal multiplier tiers. The guild's Soul pool is divided by the number of contributors, but you get more back by contributing more:
| Contributed points | Personal multiplier |
|---|---|
| 5,000 or more | 3.0x |
| 2,000 to 4,999 | 2.0x |
| 100 to 999 | 1.0x |
| 99 or less | 0.5x |
The Cappuccino rank needed at least 5,000 Souls, so if you took part you always had the 3.0x multiplier. That requirement has been removed, but you should still get 5,000 Souls for the best return.
Festival Points
In the third week, your guild's total Souls give you a large amount of Festival Points. You can spend them on a huge range of items, including most consumables and materials in the game. Your share is your guild's total Souls divided by the number of contributing players. Every extra contributor divides the pool further.
Example: 6 people contribute 50,000 points in total. You contributed only 1 Soul, so you receive 4,166 Festival Points ((50,000 / 6) x 0.5). Someone who contributed 10,000 Souls gets 25,000 Festival Points ((50,000 / 6) x 3).
If you had not contributed at all, the person with 10,000 Souls would have 5 contributors in the pool and get about 29,999 Festival Points ((49,999 / 5) x 3). Your 1 point would have cost them 4,999 points. The guide's advice: either do not contribute at all, or really try, because otherwise you make everyone else's share smaller. The numbers ignore some other factors, but they are accurate enough to show why you should avoid contributing if you will not try.
You claim and spend points at the Festival Manager NPC. You can hold a maximum of 120,000 Festival Points, and they carry over between festivals, though the store only opens in Winners' Week. If the multipliers are high, spend any points left from earlier festivals while you claim, because you are likely to overflow.
Winners' Quests
If your team wins, you can go on Winners' Quests. You take them from the Cat NPC next to the Festival Manager. You need Festival Tickets or Festival Gems to take them. How many you receive depends on your performance in the previous week, and you can also buy both with Festival Points.
Winners' Quests are the only way to get Festival equipment: Festival weapons, armour and decorations. Many are very good and can be the key to finishing a set, because they have higher than normal points in key skills such as Thunder Clad or Drawing Arts.
| Item | What it does |
|---|---|
| Festival Ticket | Takes you on standard HR1-6 Winners Quests. These usually give back a herb, a key item for crafting a Festival Decoration, and Festival Memories, used to upgrade non-G Festival Armour (which you will mostly not do) |
| Festival Gem | Takes you on G Rank Winners Quests. These always give back Festival Coins or Festival Emblems, used to make G Rank Winners equipment. They also usually give materials for Decorations or Weapons, like the Ticket quests |
Every Festival decoration needs 50 Festival Gems and 5 Festival Emblems. Balance taking quests with keeping enough Gems to finish the equipment.
With MHF-Z there are Zenith Festival Weapons. They need 5 of their key material and 10 Festival Marks. You earn Festival Marks on Zenith Winners Quests, which cost 4 Festival Gems to take and fixedly give back 2 Festival Marks (with a 1% chance of extras). So a Festival Zenith Weapon costs only 20 Festival Gems. They are some of the best weapons available, and the only place Capcom consistently puts hybrid elements and easy access to Skill Slots Up.
These weapons need the same materials as other Zenith Weapons after their first tier. The final upgrade needs 2x of a Zenith's Rare, and 3x each of the semi-rare and GR800 breaks. So you still need to grind the related Zeniths quite a lot to finish them.
Diva Defense
The basics
Diva Defense is a lot like the Hunter Festival. You choose a Prayer Gem and hunt monsters to get Song Spheres, which power up server-wide Prayers. You pick one colour of Prayer Gem to contribute to each day, and you are locked to it until noon Taiwan time the next day. Your Song Spheres go to your chosen gem automatically. The total you contribute directly affects how much GCP you earn.
The event has two main parts: the Prayer Chapter (week one, collecting Spheres) and the Song of War Chapter (week two, using the Prayers). The Guild Interception runs alongside the Song of War Chapter and a final Greeting Song Chapter follows. The Diva Defense menu has these entries: Choose Prayer Gem, View Prayer Totals, View Monster Values, View Bonus Tasks, Utilise Prayer Gems, GCP Shop and View/Claim Rewards, Rankings, Event Explanation and Notices.
Prayer Gems
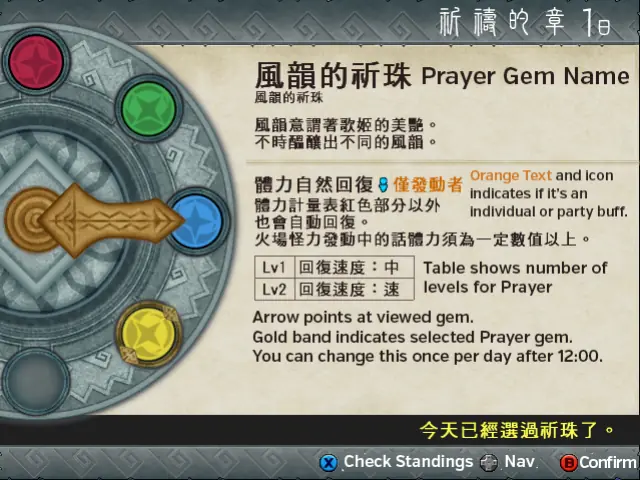
The actual buffs only work in the second week. How many times you can use them depends on the global Song Spheres on the server. When a Prayer is maxed out, you must choose another colour and you cannot contribute to the maxed one.
Each Diva Defense has up to four colours of Prayer Gem. Each colour has a different effect, based on the skills assigned to it. Which effect belongs to which colour changes every cycle, so check in game.
You choose your colour each day by talking to the Blue Guild Girl, who also handles things like Arena quests. You can change it once a day after 12:00 Taiwan time. Choosing your first colour does not count as a change, so on the first day you can contribute to two colours.
| Prayer Gem | Effect |
|---|---|
| Ringing Prayer Gem | Adds new items to the GCP store, based on level |
| Elegance Prayer Gem | Adds passive HP recovery to all quests |
| Heavy Thunder Prayer Gem | Elemental damage increases, based on level |
| Windstorm Prayer Gem | Sharpness does not decrease with blademaster weapons. Works for 5, 10 or 20 quests depending on level, during the prayer's active window |
| Cutting Edge Prayer Gem | Increases raw damage dealt by cutting weapons, by making hitzones weaker against that damage type |
| Status Length Prayer | Increases the duration of status effects on monsters |
| Rising Bullet Prayer Gem | Increases raw damage dealt by ranged weapons, by making hitzones weaker against that damage type |
| Severing Power Prayer Gem | Tails can be cut with any damage type |
| Powerful Strikes Prayer Gem | Increases the affinity of all weapons, based on the level of the song |
| Protection Prayer Gem | Gives Divine Protection, Goddess' Embrace or Soul Revival, based on level |
| Mobilisation Prayer Gem | Attack goes up with the number of human hunters in a quest |
| Unshakable Prayer Gem | Monsters cannot flee while in the same area as a hunter |
| Blunt Prayer Gem | Increases raw damage dealt by impact weapons, by making hitzones weaker against that damage type |
Prayer levels
Each day after 12:00, the most popular prayer is ranked up. This is based on server-wide contributions, so you cannot steer it towards your own preference. It also means the total level of all prayers cannot exceed 7. For example, with four prayers up that each have three levels, the two most popular will likely get max levels, the third will get one level and the least popular will get none.
Song Spheres
Gathering
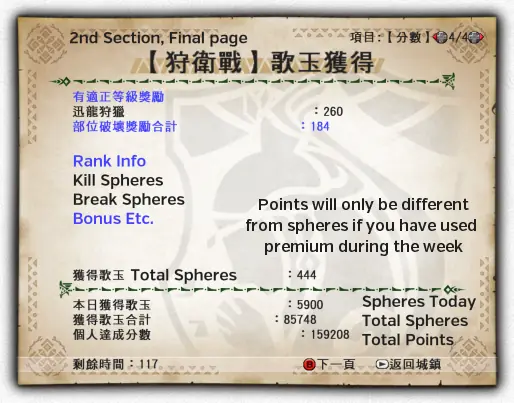
You gather Song Spheres by hunting monsters and breaking their parts. As in the Hunter Festival, each monster's reward is fixed but varies between events. The rank you hunt at also changes the Spheres you get, for both the kill and any breaks:
| Rank | Song Spheres |
|---|---|
| HR1-2 | 0.125x normal |
| HR3-4 | 0.25x normal |
| HR5 | 0.50x normal |
| HR6 | 0.75x normal |
| GR | 2.00x normal |
You can see the Spheres you contributed on the post-quest screen (second section, final page), in the town menu (Status, then Diva Defense status), and at the standard Blue NPC. Score is separate from Spheres: score gain is doubled on a Premium Course.
Consumable item Spheres
As in the Festival, items add Spheres. Hold one in your pouch when you clear a quest and you get a flat extra amount.
| Item | Extra Song Spheres on any hunt |
|---|---|
| Prayer Jewel [Ringing] | 200 |
| Prayer Jewel [Music] | 500 |
| Prayer Jewel [Sound] | 1200 |
Break Spheres
Every break you make on a monster gives extra points. A break has a fixed starting value, and each later break adds 0.10x of that value. The default is 20 Spheres, so in a G Rank quest breaks are worth 40 Song Spheres (because of the GR 2.00x). With three breaks, the first gives 40, the second 44 and the third 48, for a total of 132 extra Spheres.
Bonus Tasks
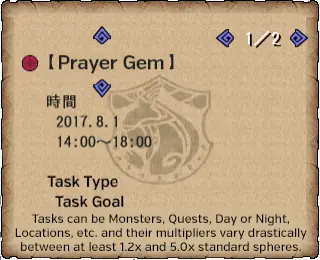
Each day, within certain windows, monsters, quests, locations and day or night quests can be set to give extra Song Spheres. You can check them with the Blue Guild NPC. The monsters change daily, usually give at least triple the normal Spheres, and have four-hour windows. Unlike secret quests, they are based on return time: if a window ends at 16:00 and you take a quest at 15:59, you get no bonus if you return after 16:00.
Rewards
You will probably need to claim each reward type more than once to get everything. You can only claim 33 items at a time, so if you have 60, claim twice.
The main rewards depend on your personal and your guild's contribution. Contributions are measured in raw Song Spheres and in Score. Score gain is doubled on a Premium Course, so it is separate from the actual Song Spheres. The reward menu has: Diva Defense, GCP Shop and View/Claim Rewards, View Contributions, Reward Requirements, Claim Rewards and GCP Store.
- Prayer Chapter: you can only claim Milestone and Daily rewards.
- Song of War Chapter: you can claim any unclaimed Milestone and Daily rewards, plus Rank, Guild Rank and GCP rewards, and use the GCP shop.
Milestone rewards
As in most events, you get rewards for your total contribution. This is the main source of Mirage Powder since the Caravan Festival was dissolved, and of all items tied to Diva Defense itself. They can include the materials for the Prayer Weapons, a fixed amount of GCP, and the items unique to the Caravan Festival and Diva Defense.
Daily rewards
You can claim daily rewards on every character on your account, so each cycle you can get up to three of whatever the daily cycle includes, including Diva and Prayer Weapon Gems. That needs extra character slots. For every day you contribute points you receive a set of Daily Rewards, and a chat notice tells you when you complete them. They do not change from day to day: there are 7 different rewards, and to get the last one you must contribute some Song Spheres on every day. They can include materials for Caravan equipment and for the Diva Weapons, which you can only get from the Diva questline and these rewards.
Rank rewards
- Personal Ranking Rewards: rewards related to your total score contribution on the server.
- Guild Ranking Rewards: rewards related to your guild's total score contribution on the server.
- GCP Rewards: meant to give GCP based directly on your personal score. The guide's author says this had never worked for them as of the third Diva Defense.
Song of War Chapter
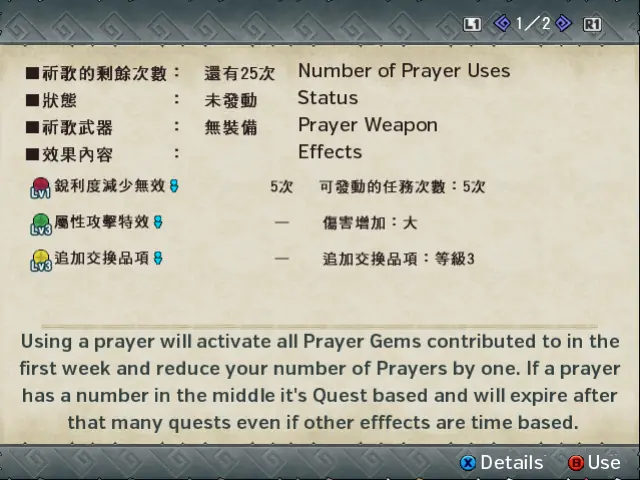
In the Song of War Chapter you can activate Prayers (Listen to the Prayer Song), based on the Song Spheres the colours collected in the previous week. How many times you can use the buffs depends on the total Spheres the server gathered.
All effects you contributed to are active at the levels they reached across the server as soon as you activate the prayer. You then have 60 minutes to use them and the Prayer Weapon buffs (see Prayer Weapons). After you activate a buff, the Diva Defense Event Icon pulses and gets a timer. When the timer runs out, you lose all Prayer effects, and any Prayer Weapon you use returns to its default form without the extra skills or sharpness.
GCP store
There are two kinds of GCP store. The standard one can also be reached at the Blacksmith and on the Pink Store NPC. The Diva one depends on the level of the Ringing Prayer Gem, and you can only open it if you contributed to its colour while it is one of the available Prayer Gems. Stock includes items from discontinued events, and things like HC and GHC carves. The Convert Items option works like it does at other NPCs, and turns GP tickets, Shiten Tickets and Gou Tickets into points.
GCP skills
GCP skills work like other extra skill sources such as Guild Food or Exotic Armours: they use none of your skill slots. You buy the skill you want, and it is active for a number of quests depending on how many you bought.
- In most cases you can only queue one skill type. If you buy 10 uses of Lone Wolf and then one of Focus+2, you lose all your Lone Wolf uses.
- Like Carving Talismans and Lucky Bags, these skills are only used up if you finish the quest. If you abandon the quest you do not lose a use.
- Level 0 skills such as Focus+2 are usually always available. They do not need an active Prayer or even a contribution.
| Prayer level needed | Skill | GCP |
|---|---|---|
| Level 0 (always available) | High Speed Gathering, Hunter Valhalla, Relief, Recovery Items Improved | 30 |
| Weapon Handling, Focus+2, Hunger Negated, Sharpening Artisan, Recovery Speed+2 | 60 | |
| Level 0 skills need no active Prayer and no contribution. | ||
| Level 1 | Status Immunity, Starving Wolf+2, Imperturbable, Combination Expert+3, Speed Eating, True Guts | 80 |
| Level 2 | Lone Wolf, Vampirism+2, Evade Distance UP, Stylish, Status Immunity [Myriad] | 100 |
| Good Luck | 200 | |
| Level 3 | Edgemaster+3, Evasion+2 | 100 |
| Great Luck, Encourage+2 | 500 | |
The guide marks the groups with "Level 1 Required", "Level 2 Required" and "Level 3 Required" headings. The grouping above follows its order; check the levels in game.
Prayer Weapons and Guild Interception
Prayer Weapons
Being on a Premium Course during Song of War week gives the buffs below. That makes Prayer Weapons the best weapons to use on Premium for Hiden grind, unless you have Raviente weapons that beat them.
You make Prayer Weapons from materials given as Daily or Milestone rewards. They are very easy to get the materials for, and are similar to a low-end Level 50 G Rank weapon. All of them share a visual theme, and their Chinese names start with the character 歌. There is also a gallery of the weapons, with names and materials, on the official Diva Defense site.
Weapons that only exist as G weapons (Switch Axe F, Tonfa) start fully maxed. Other weapons start at Low Rank (in the normal HR crafting section) and need upgrading to G level.
Newer runs of Diva Defense give Prayer Pebbles instead of the older Prayer Stones. You trade them at the Yellow Guild NPC at the counter with the HR and GR Quest NPCs, using the options Trade Items, then Diva Defense.
The weapons are listed below. "Extra" is sharpness, phial or shot detail as written in the guide. The guide does not explain every abbreviation (for example "L. Rod" in two rows).
| Weapon | Attack | Element | Extra |
|---|---|---|---|
| Long Sword | 2520 | 2000 L. Rod | |
| Hunting Horn | 2600 | 1600 Music | Purple Blue Red |
| Switch Axe | 2835 | 1000 Fire | Power Phial |
| Heavy Bowgun | 726 | Ice S. | N 12/12/12, P 6/0/0 |
| Dual Swords | 697 | 1500 Wind | |
| Hammer | 2678 | 2400 L. Rod | |
| Gunlance | 1161 | 1800 Blaze | Lv6 Norm S. |
| Bow | 612 | 1000 Music | (1)S3, (2)P3, (3)R4, (4)P4 |
| Great Sword | 2520 | 2400 Wind | |
| Lance | 1173 | 1600 Music | |
| Tonfa | 882 | 1600 Blaze | |
| Light Bowgun | 624 | Ice S. | N 9/9/12, P 0/6/6 |
| Switch Axe | 2889 | - | Power Phial |
| Sword and Shield | 756 | 1800 Music | |
| Switch Axe | 2970 | 1200 Ice | Stun Phial |
| Switch Axe | 2889 | 1400 Sound | Ele Phial |
| Switch Axe | 2889 | 2000 Light | Ele Phial |
| Hunting Horn | 2600 | 2400 Blaze | Purple Blue Red |
| Hammer | 2600 | 1600 Music | Long Length |
| Heavy Bowgun | 726 | Thunder S. | N 12/0/12, P 0/0/6 |
| Dual Swords | 697 | 1100 Sound | |
| Long Sword | 2520 | 1300 Music | |
| Light Bowgun | 624 | Thunder S., Dragon S. | N 9/9/12, P 6/6/0 |
| Gunlance | 1161 | 1200 Music | Lv6 Norm S. |
| Switch Axe | 2916 | 1000 Poison | Status Phial |
| Sword and Shield | 735 | 2800 Blaze | Long Length |
| Great Sword | 2448 | 1900 Sound | Long Length |
| Lance | 1138 | 2400 Blaze | Long Length |
| Tonfa | 882 | 1200 Music | |
| Bow | 612 | 1500 Blaze | (1)S3, (2)P3, (3)S4, (4)R4 |
Not available for trade at the time of the guide:
| Weapon | Attack | Element | Extra |
|---|---|---|---|
| Dual Swords | 714 | 1100 Music | V. Long Length |
| Lance | 1150 | 1600 Sound | V. Long Length |
| Long Sword | 2520 | 1300 Sound | V. Long Length |
| Hammer | 2600 | 1600 Sound | V. Long Length |
| Sword and Shield | 749 | 1800 Sound | V. Long Length |
| Great Sword | 2472 | 1900 Sound | V. Long Length |
| Light Bowgun | 749 | - | N 9/9/12, P 6/0/6 |
| Lance | 1184 | 880 Poison | Long Length |
What makes Prayer Weapons special is that they gain very strong buffs whenever a prayer is active. That can push them far ahead of other weapons if you build around them, and well past most weapons in the game.
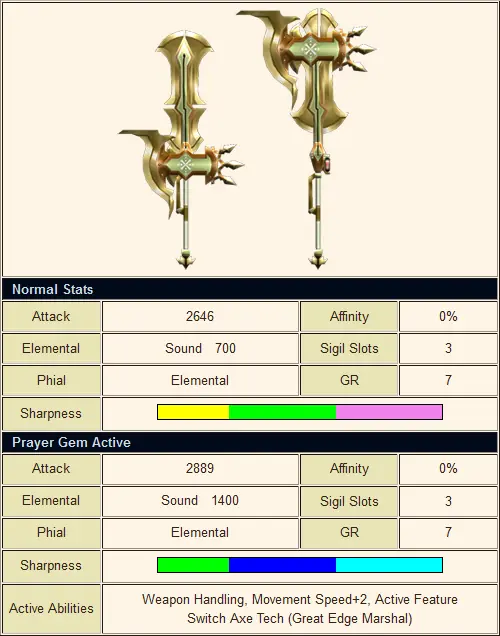
The Prayer buff does the following:
- True Raw +45
- Doubled Elemental
- Weapons Handling and Movement Speed +2
- Enables the weapon type's Active Feature
- Sharpness colours upgraded one tier
- Activates the special Dual Hiden skill
- Interception Points increased to 1.2x
The Dual Hiden is always on while a Prayer is active. That lets you drop your Hiden gems for specialised sets during short windows, or simply try Hiden without grinding for it. You need to listen to a Prayer for these abilities, so they have a limited duration. You will likely still get at least 3 hours of it a day, and if you use them only at the weekend, the buffs will probably cover all of your play time.
| Weapon | Active Feature |
|---|---|
| Sword and Shield | Status and Elemental attack increased 1.2x. This is internal only and does not change the value shown on your weapon |
| Dual Swords | Stamina and HP use lowered (0.5x) in any relevant demon mode |
| Great Sword | Unsheathe and Parry attacks gain +100% affinity, with the additional attack function of Critical Conversion |
| Long Sword | Full spirit bar buff effect increased (+10 atk to +40 atk) |
| Hammer | Stun damage increased 1.5x. Stacks with Sigil or Caravan Skills |
| Hunting Horn | Song duration 2.0x. Stacks with Flute Expert |
| Lance | Guard Skill goes up by 1 level. Activates Reflect +3 |
| Gunlance | Wyvern Fire and Shelling damage increased 1.5x. All Ryuuki finisher (explosion) effects are buffed |
| Tonfa | Head: KO damage duration 20s to 30s. Tail: Bleeding does 1.5x damage. Body: Sharpness return 15 to 20, and Gunner Attack Up 25 to 50 |
| Switch Axe F | Increases phial meter recovery by the main recovery mechanic (reloading or guarding) |
| Light Bowgun | Damage increased at critical distance (+0.1x), status damage 1.2x |
| Heavy Bowgun | Damage increased at critical distance (+0.1x) |
| Bow | Short Charge effect, which stacks with Auto-Reload (0.85x) |
Guild Interception
Guild Interception extends Diva Defense and runs alongside the Song of War Chapter. In practice it is a series of huntathon quests on the Interceptor's Base map. You fight a number of monsters in a row, based on pools defined by the quest route.
One of the Felynes from the Diva questline runs the event. It stands next to the Blue NPC who gives information on the Song of War Chapter. You take all Guild Interception quests there, claim rewards, check status and manage everything else about the event. The quests take place on the Interception Base map, a fortress.
You can carve each monster you slay, and it fades out gradually. There is time to carve three times, because you can still carve while it fades. The Diva herself appears at the basecamp. You can give her items, and she returns them when the quest ends.
The quests contribute to claiming grids on a hex board that guilds fight over. If you hold more than a certain number of hexes, you get special functions in your Guild Hall in the Song Chapter week, and flat material rewards for everyone in the guild, based on the hex count.
Menus
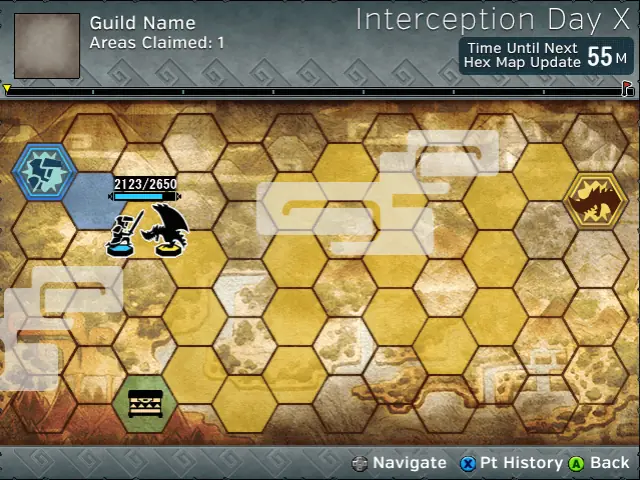
The menu entries are: Interception Quests, Bonus Tasks, Interception NPCs, View Interception Board, Confirm Stats, Confirm and Receive Rewards, View Interception Ranking and View Manual.
The Interception NPCs option lets you hire an extra Hunting Troop NPC who comes on all G Rank Interception Quests. You can customise the weapon class they use and how strong they are. Changing them costs GCP, but you can only do it once per day. Each hunter in a quest can have a Hunting Troop with them, up to 4 hunters and 4 troops in a quest.
The Interception Board shows how many hexes your guild has taken, the path the event will take, and when the next update of the board is.
The Branching Path to treasure was added in the Z2 update. When you route past a branching path that leads to treasure, you get a new type of quest option in the same section as standard quests. Finishing it and getting the points shown in the Board status on that hex gives an extra reward, which can include things like GCP, Guild Hall Cooking materials and Transmog Tickets. You claim these bonus rewards in the same place as progression rewards. You must complete the quest to claim them, so you can miss them if heavy grinding goes on while you are offline and the hex page moves on before you do the quest.
Quests
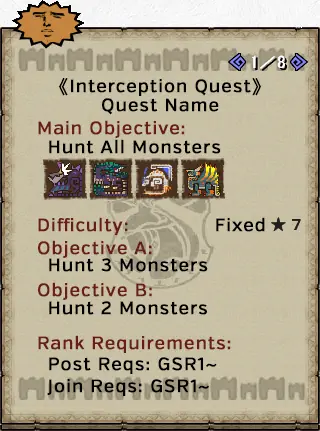
Interception quests are laid out like any other NPC quest. You can see the names and icons of the monsters involved, and the quest shows needed information such as the star rating for defence reduction.
Keoaruboru
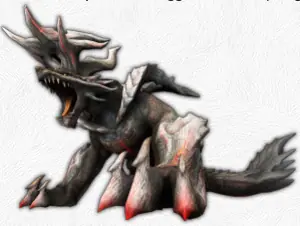
Keoaruboru is a huge Elder Dragon with urgent interception quests. It has the same body structure as Akantor and focuses on fire attacks. It triggers in a similar way to Duremudira and needs you to have earned 35,000 points, or a low-chance random roll.
It has breakable parts: Left Claw, Right Claw, Head, Back and Tail. You should always have a ranged user focus on the back, because every decoration needs 5 back breaks. Each urgent is cleared per person, so with four players you can chain four in a row. A proper hunt with all breaks gives around 5,000 points, so you only need to earn about 15,000 in the gaps between each set of four.
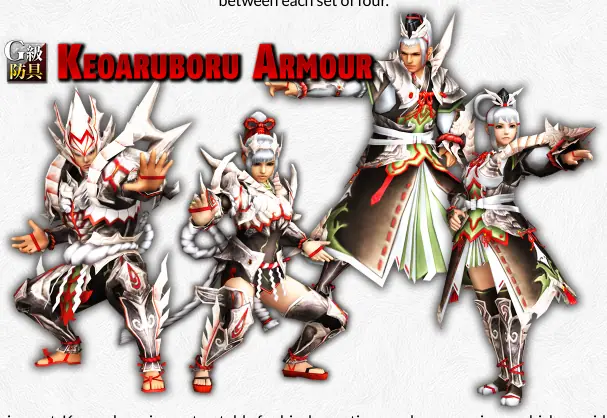
Keoaruboru is notable for its decorations and armour pieces, which give points in the new skill Rush. With Rush active you gain up to 130 attack, and you can run with your weapon drawn without using stamina, just by attacking or guarding continuously. The armour starts at GX level immediately and only needs common materials for Lv1, but the decorations need materials from all the breaks on the monster.
| Material | Amount for decorations | Where it drops |
|---|---|---|
| Keo Charcoal Hide | 18x | 32% Body, 10-12% all breaks |
| Keo Large Bone | 18x | 32% Carve, 8-10% all breaks |
| Keo Large Gem | 5x | 16% Body, 8% Tail |
| Keo Super Tail | 6x | 80% Tail |
| Keo Boiling Fluid | 9x | 20% Body, 12% Tail |
| Keo Burning Horn | 3x | 80% Horn break |
| Keo Large Claw | 3x | 80% Claw break |
| Keo Shaped Shell | 5x | 80% Back break |
There is some variance, but this gives you the rough totals you will need. If you get every break you can on every Keoaruboru, you should have little trouble finishing decorations.
Rewards
You can claim rewards while the event runs and in the final Greeting Song week. As you earn personal score, you unlock Notes. You use them to buy special materials that are limited to the event: exclusive transmog tickets, premade event decorations and, later, exclusive armour materials. Items cost 1 to 3 Notes each, and the most Notes you can expect to earn is 5. That is enough for a full set of transmog materials, but a full armour set, where each piece needs 2 Notes, takes several events.
Grouping up with members of your own guild and using Prayer Weapons multiplies your final Interception points. Premium buffs the prayer weapons themselves, but you still need to activate a prayer to get the extra multiplier.
| Multiplier | Value |
|---|---|
| 2 guild members | 1.1x |
| 3 guild members | 1.3x |
| 4 guild members | 1.5x |
| Prayer Weapon with Prayer active | 1.2x |
| Prayer Weapon without Prayer active | 1.1x |
| Prayer active, 4 members (stacked) | 1.8x |
| Prayer inactive, 4 members (stacked) | 1.65x |
Greeting Song Chapter
Special functions
Your Guild Hall can be upgraded with facilities, based on how many hexes you hold in the Interception event. The main gains are that you can listen to the Diva Song without gems, and that it applies at once to all hunters in the hall. There is also an exchange function that turns the Notes you earned the previous week into event-only items. You cannot use Notes without the new guild facilities, so if you want the unique items, take part and encourage others to do so.
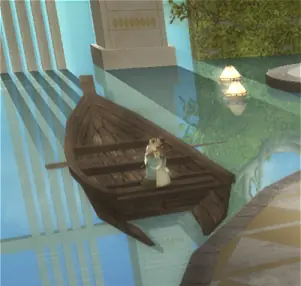
The special Guild Hall has few new functions. The biggest is the new boat with one of the Diva Cats. The cat has two abilities:
- Listen to Song: the Diva sings for everyone in the Guild Hall and gives everyone the Diva Buff.
- Note Exchange: trade Notes earned in the previous week for items.
Note trade items
Think carefully and verify what you spend Notes on. You cannot get more than a single decoration or two Z armour pieces each cycle, so a wrong purchase takes a long time to recover from.
| Item | Cost |
|---|---|
| Konpeki Blademaster Decorations GX1-5 | 1 Note |
| Konpeki Gunner Decorations GX1-5 | 1 Note |
| Dual Dance Blademaster Decorations GX1-5 (Zeru Unknown) | 1 Note |
| Dual Dance Gunner Decorations GX1-5 (Zeru Unknown) | 1 Note |
| Dual Dance Blademaster Decorations GX1-5 (Pink Azure) | 1 Note |
| Dual Dance Gunner Decorations GX1-5 (Pink Azure) | 1 Note |
| Dual Dance Blademaster Decorations GX1 (Gold Silver) | 1 Note |
| Dual Dance Gunner Decorations GX1 (Gold Silver) | 1 Note |
| Transmog ticket: No Helmet (1 piece) | 1 Note |
| Transmog ticket: White Azul (10 pieces) | 1 Note |
| Transmog ticket: Black Azul (10 pieces) | 1 Note |
| Transmog ticket: Uruki Robot helm (1 piece) | 1 Note |
| Transmog ticket: Male Insect (5 pieces) | 1 Note |
| Transmog ticket: Female Insect (5 pieces) | 1 Note |
| Transmog ticket: Kimono (5 pieces) | 1 Note |
| Transmog ticket: Chef (3 pieces) | 1 Note |
| Transmog ticket: Peach Indian (5 pieces) | 1 Note |
| Transmog ticket: Pink Indian (5 pieces) | 1 Note |
| Transmog ticket: White Indian (5 pieces) | 1 Note |
| Transmog ticket: Giaorugu-esque (5 pieces) | 1 Note |
| Katante Z armour material | 2 Notes |
| Rikante Z armour material | 2 Notes |
| Melente Z armour material | 2 Notes |
| Utante Z armour material | 2 Notes |
| Furante Z armour material | 2 Notes |
Ticket trade items
While the upgraded store is live, you can also trade for some items with Tickets from the Guild Store cat. These go straight to your inventory, not your box, which makes it awkward to get large amounts of items with smaller stacks, such as Quick Mega Juices.
| Item | Cost |
|---|---|
| Gunlance Coolant | 20 Tix |
| Fire-Resist, Water-Resist, Ice-Resist, Thunder-Resist and Dragon-Resist Drink (each) | 10 Tix |
| Move Speed Fruit | 20 Tix |
| Hawkeye Drink | 10 Tix |
| Random Ball | 10 Tix |
| Terrain Powder | 30 Tix |
| Quick Potion | 5 Tix |
| Quick Mega Potion | 15 Tix |
| Quick Mega Juice | 30 Tix |
Of these, only the Gunlance Coolant and the Quick consumables really matter. The others you can get by spending CP, or are worthless in the case of the Resist Drinks (+50 Res for 10 seconds).
Caravan
Caravan Area
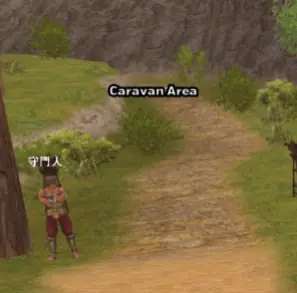
The Caravan Area, or Pallone, is next to the town entrance. You need to be Hunter Rank 17 to enter. It holds everything to do with Caravan Quests, Caravan Gems and Raviente.
Before you do anything Caravan-related, get a Caravan Gem. Enter the Caravan area and talk to Kashira, the woman near the bonfire. You then get a new icon of a random colour next to your name: that is your Caravan Gem.
Caravan Quests
The main Caravan Quests play like standard quest progression in the mainline games. You must complete all the courses in a star rating, then an urgent quest, to move on to the next star rating.
They are like the Epic Hunting Quests in other games. The difference is that you fight each large monster in a separate zone, and you may be able to take a break between hunts. Doing anything notable in a quest earns you CP: carving, gathering, killing monsters and breaking parts.
Compared with standard quests, monsters usually have a lot less health but hit much harder. All the quests in a sequence must be done with the same equipment and item pool. The only ways to get more items are to return to town when you are offered the chance, or to have a mission on the Pallone Hot Air Balloon. There you can talk to the man on the deck and spend the CP you earned on items such as potions.
Caravan Gems
The basics
You can get a Caravan or Hunter Gem as soon as you reach HR2. Enter the Caravan area (Pallone) and approach the bonfire. You are made to take a Caravan Gem, and your first colour is assigned.
To equip your Caravan skills, use a box that lets you change equipment, then choose Change Equipment, then Equip Hunter Gem Skills. This opens the skill equipping menu. You can equip up to 3 skills worth a total of 10 points. Active skills turn orange.
Gem colours (PP)
Your gem can be one of eight colours, and seven can be assigned to monsters: Peach, Brown, Yellow, Green, White, Purple/Blue, Cyan and Rainbow. Each day at 12:00 Taiwan time, the game rolls your gem colour and the monster colours, choosing one of the previous colours at random. Only your own gem can be Rainbow.
On quests you get extra points in these colours (PP), based on the monster's colour, your own gem's colour, and those of anyone who joins you. Every colour adds to its own pool, except Rainbow, which adds to all colours. Before G10 only one Rainbow gem counted and they did not stack. The guide's author had no information on this since G10 launched.
Obtaining colours
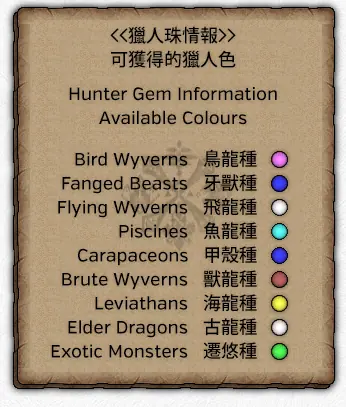
You earn colours just by having a Hunter Gem and hunting. The colour you gain depends on the species of monster you fight. You also gain a single point in your assigned colour from any gathering quest. To see the colours currently assigned, open the Hunter Gem information board next to the blacksmith in town.
If you have the colour assigned to the monster that day, you get double PP. If you have a Rainbow Gem, you get PP in all colours. So you should always try to have Rainbow active when grinding colours.
Efficient grind
The most important thing for grinding colours efficiently is a Rainbow Gem. Points in all colours cut the number of quests needed by a huge amount. Even if you min-maxed to get double on every quest, you would still need 3.5x as many quests as with a Rainbow Gem.
You can switch to a Rainbow Gem at any time by talking to the Gem Smith in the Caravan Hut, choosing Change Gem Colour, then Change to Rainbow. It costs 40,000 CP, or is free on Premium. That pairs well with a Hiden grind, where you want Premium anyway. On Hunsterverse every account has the Premium course (not tested in game).
Other things that multiply the PP you get per quest:
- Colour Charm: the easiest and most immediate. You get it from the Combination NPC for Medals. You earn 1 Medal every time you kill 10 of a single monster type, and the charm needs 40 Medals. Use it with one of the Impatience charms to cut the wait between quests while grinding colours.
- Elder Medicine Buff: a further 1.5x multiplier on the colours you gain. It applies automatically once a month on a schedule, but you can force it at any time by paying 100,000 CP to the elder at the top of the Caravan Hut.
- Hunter Soul Sigil: adds +1 to colours when used on a quest. You find it on the White Monoblos B and Yian Garuga recipes, and it can appear on any sigil by random chance. The gain is small, but it adds up with a Rainbow gem, and it is included in the pool for the extra colours from the buffs above.
- Premium Course: a flat 2x multiplier on all colour gain, and the Rainbow Gem is free.
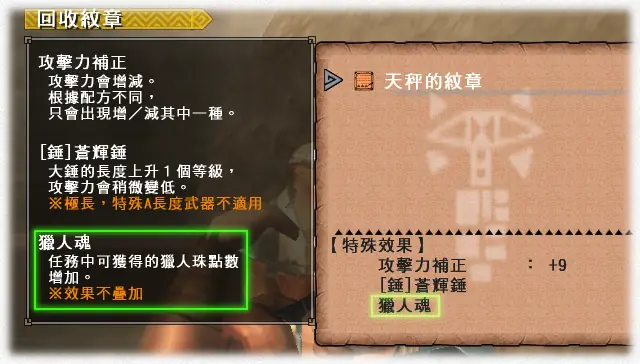
The best way to grind colours is to stack as many of these buffs as you can and do either map deliveries or iron ore deliveries. There are map deliveries in many sections. The Iron Ore delivery is in the HR1 quests section (named "Hunter Basics, Mining!"). Iron Ore lets you carry a stack of 99 and do the quest 33 times in a row without a break, or even visiting the supply box. It also counts towards unlocking the Green Armour Colour, and is probably the most efficient way to get it. You can buy Iron Ore for 5 GCP or 5 Festival Points.
Gem rank
You rank up your gem by filling every colour to capacity. The capacity depends on your gem's level: it starts at level 1 and rises when you first hit the total cap on colour PP. When all 7 colours are at the cap (for example, 259 in each colour at level 1), visit the Caravan Gem Smith to rank up.
| Level | Starting points | Ending points | Points to max | Upgrade cost and requirement |
|---|---|---|---|---|
| 1 | 0 | 259 | 259 | - |
| 2 | 259 | 962 | 703 | 100,000 CP |
| 3 | 962 | 1739 | 777 | 200,000 CP |
| 4 | 1739 | 2516 | 777 | 500,000 CP |
| 5 | 2516 | 3330 | 814 | 1,000,000 CP |
| 6 | 3330 | 4181 | 851 | 1,500,000 CP |
| 7 | 4181 | 5296 | 1115 | 2,000,000 CP |
| 8 | 5296 | 7047 | 1751 | 2,500,000 CP, GR700 required |
| 9 | 7047 | 8484 | 1437 | 3,000,000 CP, GR800 required |
The guide lists each cost beside its level without saying whether it is the price to reach that level or to leave it. The unlock points in the skills table below show where each skill appears.
CP farming
The basics
The Normal Caravan Routes give a good chunk of CP. Finish the 7-star Caravan Quests to unlock the Limited Routes. Only the person posting needs to have done this, and anyone can join a limited quest as long as someone has it available to post.
Limited routes rotate on a fairly fixed schedule, which the guide's Google Document showed. It could drift out of sync after a large patch. Days start from 12:00 midday: a route listed for the 21st is available from 12:00 on the 21st to 11:59 on the 22nd.
One Limited Route quest line has all three types of Fatalis. It is the best choice for a CP grind. Make a set with Carving and High Speed Gathering, and use a G Finesse weapon if you have one. Be careful when killing the Fatalis, because after their death animation you can end up with several carve zones clipping into the terrain.
G Rank Caravan Routes were added in Z2.3. They are a good alternative if you do not want to grind the normal quests and just want bursts of CP. They average between 50,000 and 90,000 CP per run, with variable times. The most profitable ones take longer than a Fatalis Trio.
Fatalis Trio
A Fatalis Trio takes around 10 minutes and nets about 100,000 to 150,000 CP per run. The total depends on how many carves you get and what you roll per carve.
- A G Finesse weapon multiplies CP by 1.20x.
- Premium multiplies CP by 3.00x, and also multiplies damage dealt by you and your Legendaries by 1.25x. That makes kills faster, so you can carve more, which raises your total after the 3.0x multiplier.
- If you roll an hour on the Daily Bonus, grinding the Fatalis quest for CP is a solid use of it. That comes to around 600,000 to 900,000 CP an hour, or 1.8 to 2.7 million an hour on Premium.
- The Log In Boost does not add to the CP gained in Caravan. But the extra carves at higher levels add CP to your final total. It could also give you extra carves if a carving hitbox clips into the terrain, though it is probably better used elsewhere.
Raviente runs
The other easy source of CP is joining Raviente hunts. It is not ideal unless you can find a group that wants to farm Raviente materials or CP. Do not try Berserk Raviente without proper gear, which means already having a decently ranked Caravan Gem. A Raviente earns 140,000 to 200,000 CP per kill and takes about 30 minutes, so around 280,000 to 400,000 CP an hour, with extra benefits. The guide's author is not sure Premium boosts this, but believes it is at least 2.0x. See Raviente.
Caravan skills
Caravan skills are extra skills you gain as you rank up your Caravan Gem, much like the food skills in the mainline series. There are two types.
- Passive skills are always on. For example, Negotiation, at some level, gives you a 1/8 chance of a discount of up to 25% on anything that costs Zeny or GZeny. That includes crafting, upgrading and buying items.
- Active skills are skills you set yourself. Each has a cost, and you can have up to 10 points' worth active. Examples are Courage, Weapon Art and KO Technique.
In the guide, skills marked in red were especially recommended, depending on your weapon and play style. Skills with three levels are written Small / Medium / Large (S / M / L), and the "Points to unlock" are the colour points your gem needs.
| Skill | Cost | What it does | Points to unlock |
|---|---|---|---|
| Recovery Items Up | 1 | Herb, Potion, Mega Potion and Lifepowder effect 1.1x. 100% Bitterbug and Antidote Herb effectiveness | 0 |
| Blunt Striker | 1 | Bowgun melee damage up (3x) | 1 |
| Courage | 1 | No flinching when monsters spot you | 37 |
| Lander | 2 | No recovery time after falling, and no egg loss on falling | 74 |
| Vine Superhero | 3 | No stamina used while climbing | 111 |
| Mining Expert | 3 | Pickaxes break less often | 148 |
| Insect Expert | 3 | Bug nets break less often | 185 |
| Vine Master | 3 | Getting hurt while climbing does not make you fall | 222 |
| Combination Technique | 1 / 2 / 3 | 10% / 15% / 20% extra combination success rate | S 555, M 1221, L 1998 |
| Riser | 1 / 2 / 3 | 1.5x / 2.0x / 3.0x iframes during the rising animation after taking a hit (the gem pages list Large as 2.0x) | S 592, M 1258, L 2035 |
| My Tore Celebrity (Pugi Farm) | Auto | The garden manager's affection goes up 1.5x / 2x / 3x the usual values | S 629, M 1295, L 2072 |
| Natural Recovery | 8 / 9 / 10 | The "Sleep" gesture refills your red health 5 / 10 / 15 times | S 666, M 1332, L 2109 |
| Master Carver | 8 / 9 / 10 | When you roll the top item in a carve table and it is below 51%, you have a 1/10, 1/9 or 1/8 chance to reroll with that item removed from the carving pool, with a maximum of 10, 15 or 20 triggers. Example: a G Rank Gravios body top carve at 55% is not rerolled, but a G Rank Gravios tail top carve at 49% would be | S 703, M 1369, L 2146 |
| Secret Healing Technique | 3 / 4 / 5 | 1/12, 1/11 or 1/10 chance of not using up a healing item (up to 5 times a quest) | S 740, M 1406, L 2183 |
| Negotiation | Auto | 1/8 chance of a 10% / 15% / 25% discount on buying things | S 777, M 1443, L 2220 |
| Gallery Celebrity | Auto | 5000 / 7000 / 10000 extra Gallery Points on evaluations | S 814, M 1480, L 2257 |
| Garden Celebrity | Auto | 1.2x / 1.3x / 1.5x items from garden tools | S 851, M 1517, L 2294 |
| Last Minute Ace | 5 / 6 / 7 | In the last 5 minutes of a quest you get 80% / 90% / 100% affinity but take 1.3x damage | S 888, M 1554, L 2331 |
| Goddess of Luck | 8 / 9 / 10 | A chance to take no damage on hits (stacks with Divine Protection, Diva Buff and Girly Charms): S 1/10 chance, 5 times; M 1/9, 10 times; L 1/8, 20 times | S 925, M 1591, L 2368 |
| Hot Master | 5 | Gives the effects of Heat Cancel | 1646 |
| Cold Master | 5 | Gives the effects of Cold Cancel | 1664 |
| Weapon Art | 5 / 6 / 7 | Adds a share of your weapon's true raw as a buff: S 1.01x, M 1.025x, L 1.05x attack on all weapons. Example: an SnS with 700 Raw has 500 True Raw, so +25 True Raw for 735 total attack | S 1702, M 2479, L 3256 |
| Bonus Art | 5 | Food effect is not lost after fainting | 3293 |
| KO Technique | 3 | Stun damage dealt x1.1. Stacks with the sigil | 3459 |
| Art of Dancing | 2 | The "Dance" action gives +10 attack for one minute. Uses the same buff slot as Power Seeds | 3718 |
| Unstable Defender | 3 / 4 / 5 | 90% damage reduction and a 20% / 25% / 50% chance of no damage while blocking | S 3829, M 4680, L 5531 (GR700) |
| Rousing Attacker | 3 / 4 / 5 | Attacking a monster at 50 health or less gives a 40% chance to regain 10 HP. Cannot trigger more than once every 10 seconds. Up to 10 / 15 / 20 times | S 3940, M 4791, L about 6100 (GR700) |
| Perfect Defense | 1 / 2 / 3 | Blocking within 3 / 4 / 4 frames of a hit means no stamina or sharpness loss and no knockback, and lets you evade straight after the block. Large also adds a Reflect effect, stronger than Reflect+3, on a perfect block (motion value 72, no element, no critical hits) | S 4050, M 4901, L 6016 (GR700) |
| Revenge! | 3 / 4 / 5 | After getting up from a hit, a chance to gain 25 attack, 50 defense and no minor knockback for 20 seconds. The chance is 1x / 1.5x / 2x your health loss percentage. Counts as a Power Pill for buff purposes and does not overlap | S 4144, M 4995, L about 6100 (GR700) |
| Shooting Rampage | 7 | Bow and Bowguns get an extra 1.1x of your weapon's true raw as a buff. For bowguns, your accuracy right after shooting is lowered by 1.5x. Example: a Bow with 600 Raw has 500 True Raw, so +50 True Raw for 660 total attack | 4421 |
| Cafeteria Regular | Auto | A chance to not use up food when preparing buffs for a quest | about 5530 (GR700) |
| Combination Celebrity | 2 | Combining items has a chance to give double the usual quantity | about 6220 (GR700) |
| Wild Awakening | 6 | Hot Master and Cold Master combined | 7200 |
| Decisive Hunter | 7 | Weapon Art [Medium] and KO Technique combined | 7700 |
| Instant Guard Stance | 6 | Weapon Art [Medium] and Perfect Defense [Medium] combined | 8075 |
| Self-Defense | 8 | Weapon Art [Medium] and Unstable Defender [Medium] combined | 8075 |
| Prepared Stance | 3 | Do the "Prepare for Battle" gesture for about 30 seconds and the attack ceiling on your current weapon type rises for a fixed time | 7700 |
| Spear Angel | 3 | More damage from Ballistas when you play support on Berserk Raviente | 7380 |
| Shield Angel | 3 | Less damage taken when you play support on Berserk Raviente | 7200 |
| Elite Flame | 2 | Raises the Friendly Fire (heat up) meter over time instead of by friendly fire, when fighting Berserk Raviente | 7380 |
Match your skills to your weapon and the quests you are doing. For Raviente or Duremudira you almost always want Bonus Art. Hammers and Tonfas always gain a lot from KO Technique. Weapon Art and Shooting Rampage give a buff based on your weapon's base true raw that is then multiplied by everything, such as Adrenaline or Combat Supremacy, and it adds up quickly.
Active skills are strong, and they do not use the same slots as normal skills, so there is no reason to ever leave them off. It is well worth ranking up your gem for things as strong as 5 to 10% extra true raw on your weapons and keeping your food buffs.
Gem skill pages
If your gem is below level 8, you have fewer pages. The skills you do have are in the same order as below.
| Page | Skills |
|---|---|
| 1 | Cafeteria Regular, Negotiation, My Tore Celebrity, Gallery Celebrity, Garden Celebrity, Recovery Items Up, Blunt Striker, Courage, Combination Technique [Small], Riser [Small] |
| 2 | Perfect Defense [Small], Lander, Vine Superhero, Vine Master, Art of Dancing, Combination Celebrity, Combination Technique [Medium], Riser [Medium], Perfect Defense [Medium], Elite Flame |
| 3 | Mine Expert, Insect Expert, KO Technique, Combination Technique [Large], Riser [Large], Secret Healing Technique [Small], Perfect Defense [Large], Unstable Defender [Small], Rousing Attacker [Small], Revenge! [Small] |
| 4 | Hot Master, Cold Master, Prepared Stance, Shield Angel, Spear Angel, Secret Healing Technique [Medium], Unstable Defender [Medium], Rousing Attacker [Medium], Revenge! [Medium], Weapon Art [Small] |
| 5 | Bonus Art, Secret Healing Technique [Large], Last Minute Ace [Small], Unstable Defender [Large], Rousing Attacker [Large], Revenge! [Large], Last Minute Ace [Medium], Weapon Art [Medium], Wild Awakening, Instant Guard Stance |
| 6 | Shooting Rampage, Natural Recovery [Small], Master Carver [Small], Last Minute Ace [Large], Weapon Art [Large], Decisive Hunter, Natural Recovery [Medium], Master Carver [Medium], Goddess of Luck [Small], Self-Defense |
| 7 | Natural Recovery [Large], Master Carver [Large], Goddess of Luck [Medium], Goddess of Luck [Large] |
On the gem pages, Elite Flame is described as raising the Friendly Fire meter over time on Caravan quests, and Shield Angel and Spear Angel apply to support on Berserk Raviente.
Caravan Gem Smith
- Maintain Gem
- Gems need regular maintenance to keep their skills active. Choose Maintain Gem on the Gem Smith. It is free, but you must do it every 30 days to avoid decay and skill deactivation.
- Upgrade Gem
- Once you hit the cap for your current level in every colour, choose Upgrade Gem. Your gem goes to the next level and you can gain colour PP again. New skills unlock as you raise all colours, and you keep the old ones.
- Change Gem Colour
- Two choices: Randomised Gem Colour changes your gem's active colour, and Rainbow Gem Colour forces it to Rainbow, which gives points in all colours.
- Premium options
- By spending Lottery Coins you can add +100 PP to colours. The guide's author calls this a big waste of money compared with using Premium to grind with a Rainbow Gem, and says to ignore it unless you want points at once and have a lot of spare money.
Pioneering System
The Pioneering System is a customisable map where you set up facilities to develop it and gather extra and exclusive materials. It is mostly obsolete, with two main uses:
- Easier-than-usual quests for grinding Ribbons or Merits at G Rank.
- More Contribution Points in a Raviente. A Level 5 Pioneer Map gives an extra 50,000 points per Raviente run. That is a whole extra phase, or about two or three broken parts' worth, depending on the Raviente type, and very notable.
You reach it at the Cat behind Kieru in the Pallone Caravan area. The menu has: Pioneering Management, Pioneer Map Management, Worker Management, Quest Settings, Migration, Reset and Receive Rewards.
Using the menu
The guide had not written this in full, but it is mostly obvious. Choose a map spot, choose a balloon type, then choose the level to work on. After you queue the upgrade, go into Migration and use the 150,000 CP option to finish the upgrade at once. Then repeat.
Quick maxing out
You get a Lv5 flag based on the total number of levels you have, with each level weighted differently. If you finish with the Snowy Mountains as your final location, you reach the requirements for a Lv5 flag sooner than anywhere else.
A Lv5 flag needs a number of points: 51 for normal maps and 41 for Snowy Mountains. Level 3 facilities are worth 10 points, Level 2 are worth 5 and Level 1 are worth 1. The Snowy Mountains needs 10x Lv3 facilities, 5x Lv2 facilities and 1x Lv1 facility. If you finish in another location, you need at least 10 extra points to count as Lv5. The whole job costs 6.5 to 9 million CP.
Materials (quantities are per facility):
| Facility | Materials |
|---|---|
| Snowy Mountains Lv1 | Silver Cordgrass x10 (buyable), Paintberry x10 (buyable), Huskberry x10 (buyable) |
| Jungle Lv1 (all buyable) | Blue Mushroom x10, Day Herbs x10, Sunset Herb x10 |
| Snowy Mountains Lv2 | Purse Grass x5 (from Snowy Lv1 gathering, doubled in Mocha pots), Sleep Herb x5 (buyable), Armour Seed x5 (buyable) |
| Desert Lv2 | Utility Grass x5 (Desert Lv1 gathering, Caravan Festival), Dragon Toadstool x5 (buyable), Sliced Cactus x5 (buyable) |
| Snowy Mountains Lv3 | Overturned Grass x5 (Snowy Lv2 gathering), Cracked Pot x10 (Pickled Purse Grass, doubled in Mocha pots), Dandelion x5 (GCP, non-Pioneer gathering) |
| Jungle Lv3 | Yellow Flower x5 (Desert Lv2 gathering, Caravan Festival), Silky Grass x5 (Snowy Lv2 gathering, Jungle Lv2 gathering), Exciteshroom x5 (normal gathering) |
| Desert Lv3 | Yellow Flower x5, Silky Grass x5, Exciteshroom x5, Black Sesame Mushroom x5 (Jungle gathering), Demon Cactus Flower (Desert Lv2 gathering), Dandelion x5 (GCP, non-Pioneer gathering) |
The guide's list appends figures such as "(80x)", "(40x)" and "(30x)" to the Lv1 and Lv2 materials. They are probably the number of facilities (or total items) those materials cover, but the guide does not say. The Desert Lv3 list is garbled in the guide, so check the real requirements in game.
Process:
- Choose Snowy Mountains as your main base location, and create a gathering facility on any map spot.
- Choose Jungle in Migration, then the first 70,000 CP option. This skips the waiting period and completes the Lv1 upgrade at once.
- Pick any other spot in the Jungle and start a facility there, then migrate back to the Snowy Mountains. Do not use Areas 9 and 10. They do not exist in the Snowy Mountains, so they would be wasted.
- Repeat steps 2 and 3 until you have Lv1 collection bases in all zones in the Snowy Mountains.
- Use a Pioneering Quest to gather Purse Grass until you have enough, and queue the first Lv2 upgrade.
- Migrate from Jungle to Desert with the third 150,000 CP option. As before, this skips the waiting and upgrades to Lv2 at once. If you have enough Utility Grass, start an upgrade right away and migrate back. Otherwise, gather some in the new desert pioneer quest first. Repeat until everything is at Lv2.
- Use a mix of the next two options, as suits your needs and materials.
- Use Mocha pots to mass-produce Cracked Pots while you gather Overturned Grass. Queue an upgrade, migrate to any location with the 150,000 CP option, and at once migrate back.
- Swap between the Snowy Mountains, Jungle and Desert depending on the materials you have, doing the matching gathering to upgrade each, until you get a Lv5 flag.
The Gook Mocha Pots can turn 1 Purse Grass into 2 by cooking it for 3 quests (Green), or into a Cracked Pot by cooking it for 6 quests.
Raviente
The guide's author points readers to Foxxy's guide for more current information on the meta, phases and communication.
What it is
Raviente is a big snake. You hit it until it dies. Ravientes are hunted per server, with a single HP pool. Even so, you fight it in groups of 4: at most 2 groups at HR2 and HR5 (8 players), and 8 groups at G Rank (32 players).
Raviente content lasts until roughly the true endgame. You need it to get the very best armour decorations and weapons, and it is one of the big time-consuming grinds. You can start from HR2, but the weapons and equipment from Raviente do not really matter until you already have endgame gear.
Posting or joining a Raviente

You start Ravientes at Kieru, the same NPC who gives out Hunter Gems (also called Pearls or Caravan Gems). Talking to her opens a menu:
- Join / Start / Quit Raviente
- Claim Rewards
- Pioneer Quests Help
- Caravan Gem Help
- Caravan Help
- Raviente Help
Sign up phase
Ravientes do not start like normal hunts. A set number of hunters must opt in first. Ravientes are advertised to everyone on the current server in the top left of the screen. An icon with a Raviente's head means someone has hosted a Raviente in the Caravan area and is recruiting. The icon changes with the Raviente type, and it also shows the minimum number of players needed:
| Raviente | Players needed |
|---|---|
| HR2 | 4 to 8 |
| HR5 | 4 to 8 |
| G Rank | 24 to 32 |
If you join a Raviente party, a clock icon appears next to the Raviente head icon. It shows when the quests become available automatically, if you have at least the minimum number of players. It starts at 12 and counts down to 9. If it reaches 9 without enough players, it goes back to 12 and starts again. This repeats until the Raviente starts or is cancelled. Members of a Raviente party also get a new icon in place of their Caravan Gem.
The wait is optional. As soon as a Raviente has the minimum number of players, the organiser can start it at once. That is very useful for HR5 hunts.
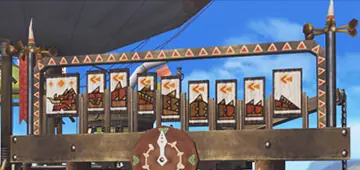
Recruitment
You probably will not have 8 to 24 guildmates online at all times, so it helps to know how to advertise a Raviente. Pasting text in game can be fiddly, so make sure you can do it. Things worth trying: copy from a browser (any mainstream browser except outdated Internet Explorer), copy from Character Map (start it with Start, Run, charmap.exe), or copy from Microsoft Office, LibreOffice or Apache OpenOffice.
| Term | Meaning |
|---|---|
| 大巖龍 | Raviente (HR2) |
| 大巖龍狂暴期 | Violent Raviente (HR5). The guide gives this and the next name both as "Silver Raviente" |
| 大巖龍猛狂期 | Berserk Raviente (G Rank) |
| HR2大蛇 | HR2 Ravi (HR2 Great Snake) |
| 白蛇 | HR5 Ravi (White Snake) |
| G大蛇 | G Great Snake |
| 支援 | Support |
| 討伐 | Slayer |
Examples: 這裡!白蛇 -3 means "@Here HR5 Raviente 3 slots". 這裡! 棘龍 分區2 白蛇棘龍 2/8 means "@here Espinas 2nd Server HR5 Raviente 2/8". 我會支援? means "I'll support?".
The guide advises against starting G Rank Ravientes yourself, because you need a good grasp of Chinese to organise everyone properly.
Quests and points
HR2 and HR5 Raviente both have 9 hunting quests and a single carving quest. Finishing these quests and breaking parts gives Contribution Points. Your extra Raviente Gem rewards depend on them.
| Action | Points |
|---|---|
| Complete a phase | 50,000 |
| Break (head, shell, tail or crystal) | 20,000 |
| Support break | HR2/HR5: 30,000. G Rank: 40,000 |
| Fainting | -1,000 |
| Pioneer Flag / Bond Points: Level 5 flag, or Bond Points used | 50,000 |
| Level 4 flag | 30,000 |
| Level 3 flag | 20,000 |
| Level 2 flag | 10,000 |
| Level 1 flag | 5,000 |
Reward tiers are set by your total points: 1,000,000+, 900,000+, 800,000+, 600,000+, 400,000+, 200,000+, 100,000+, 10,000+ and under 10,000. The guide's table of how many gems each tier gives was lost in the extraction. The tiers give gems in steps, so a higher tier is always better.
The Pioneer system is covered under Pioneering System. Bond Points come from taking part in the Hunter Festival, at roughly 1.5x your own reward. You can stack up to 9 full Level 5 flag rewards at once, to use across 9 Ravis, and you need to renew them after those 9 (or before you do all 9).
For HR5, aim for at least 2 breaks per quest and 2 support breaks, to reach the 1,000,000 bracket with Pioneer or Bond Points added. Missing 1,000,000 costs you tens of 100g gems. At G Rank, try to get everything you can in each run: 2 breaks per run without Determination and up to all four with it (Crystal, then Head, Shell, Tail).
HR2 and HR5
Hunting phase
When the Raviente starts, the terrain in the Caravan area changes and a new board appears above the quest board to show that the Raviente is active. This phase lasts up to three hours. From here you can post quests and support.
There are two main roles: Support and Slaying.
Slaying
Join a normal Raviente quest posted by the Blonde Caravan Quest NPC and hit it until it dies. Both HR2 and HR5 Raviente have 9 phases. You visit three different islands at least three times each, and each has different properties and environmental hazards.
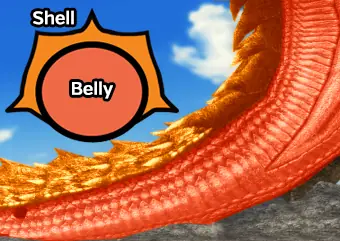
To break the shell, remember that it is literally a case around a centre hitbox. If you are gunning, shoot parallel along the side of Raviente, or upwards towards the top of it, not straight into it.
Each quest starts in a Balloon with an NPC who sells items for CP:
| Item | Stage | Effect |
|---|---|---|
| Attack type: unfavourable / favourable, and normal element: favourable | 4+ | Raviente gains more resistances as the fight goes on. These tell you your best options for element or physical damage. Not very useful |
| Corrosion Knife | 7+ | Lowers Raviente's defence against physical hits, if it hits the head |
| Cat Balloon Whistle | 4 to 6 | Summons a blimp that shoots Raviente 30 times, dealing explosive damage |
| Cat Ballista | 4 to 6 | Summons a Cat to use a Ballista across 180 degrees in front of where you placed it. Fairly low damage |
| Geyser Bomb | 4 to 6 | A bomb you place on a Geyser. Roughly a G3 bomb |
| Underground Sonic Bomb | 4 to 6 | A sonic bomb to use when Ravi is underground. It makes Ravi come out head first, leaving his head open to attack. The more you use, the longer the stun lasts |
| Signal Flare | 4+ | Bombards the area where you place it. With 4 placed, it can stun Raviente at once, but it needs good positioning, timing and coordination |
| Strength Ball | 7+ | Cancels Raviente's suction attack if timed right |
| Strength Needle | 7+ | Buffs anyone it hits by 17 attack |
| Elemental Throwing Knives | 7+ | Elemental knives. Fairly weak and not very useful |
Support
At HR2 and HR5, support roles are almost completely passive. The main task is to deliver items to a Felyne who appears next to the Equipment Tent. Those deliveries power 4 abilities for the hunters in quests. If you want to play Support, bring large stocks of these items in advance so deliveries are easier.
| Ability | What it does |
|---|---|
| Resurrection | Revives fainted hunters. Enabled by default, and refreshed by using Mega Potions |
| Destruction | Breaks parts, based on the damage the hunters do to the parts in their quests. Uses Large Barrel Bombs |
| Sedation | Pushes Raviente out of rage mode. Triggered by using Tranquilizers |
| Poison | Damages Raviente over time. Fuelled by supporters using Toadstools |
| Recovery | Heals hunters who run low on health. Enabled by default and does not need refreshing |
Apart from Destruction support, these support tasks do not give points to your party. If nobody is dedicated to support, take turns with the support tasks, alternating between all hunters and giving any extras to whoever is furthest behind on points. It is poor form to snipe support to get your own points without thinking of everyone else. If there is a 9th phase, work out who has the fewest points and let them do the final support task. Otherwise, type @dice in chat and go with the highest roll.
High level runs
With a group of G Rank players, use a setup like G Rank Raviente. Have a gunner, ideally LBG or HBG for consistency, focus entirely on the shell while everyone else breaks the tail. That should guarantee two breaks per round, and possibly three if everyone stops attacking once the tail is broken so the gunner can shoot the head. These runs should give at least 90,000 per round. With Destruction support and the pioneer (or bond point) buff, that pushes you to at least 950,000. You can easily reach 1,000,000 with extra breaks in the carving phase, or with an extra round.
Hitboxes
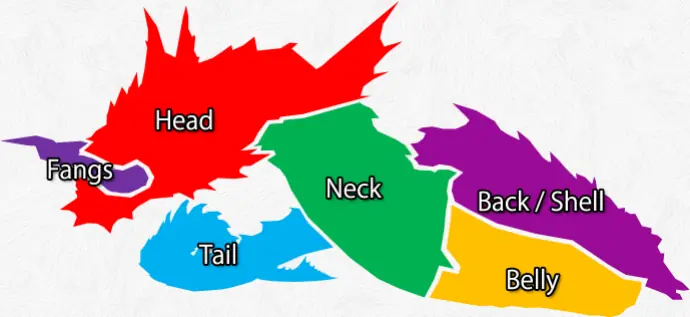
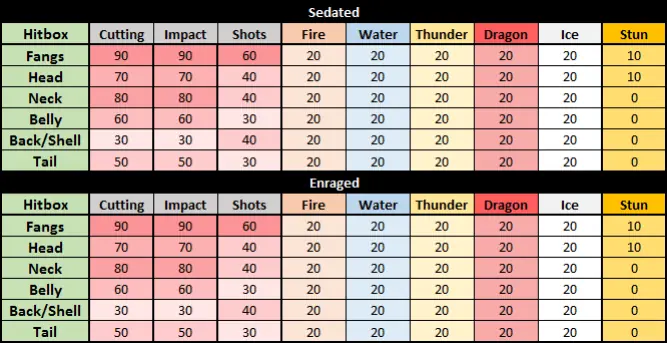
Raviente is a series of giant moving hitboxes. They adjust to the elements and damage types they take, so you do best with a balanced team and dual-element weapons such as Light.
Premium and Raviente
All Ravientes are affected by Premium for weapon gems. In the carving phase it adds an extra stack of 50 100g or Gg gems, and it doubles all gems from Kieru after you claim additional rewards. If you get 1 million points each round, that is 330 100g gems per HR5 Raviente instead of the usual 190. Even bad Berserk Raviente runs give 200 Gg gems with this, slightly more than a perfect run without Premium. On Hunsterverse every account has the Premium course, so this bonus should apply (not tested in game).
Berserk Raviente (G Rank)
G Rank Ravientes are usually organised much more tightly than the HR2 and HR5 ones, but they follow the same pattern.
Expected gearing
Everyone in a Raviente group is expected to have Hiden in the weapon they use. If you do not have Hiden, or even something as optimised as the cookie-cutter sets in the armour section, you should not be doing G Raviente at all. It is wise to wait until you have several Hiden setups and a good variety of Level 50 weapons before thinking about the Raviente grind. If you will not do the Hiden grind, pretend Raviente does not exist and ignore it.
- To follow the meta for groups without Determination, you want Hiden in Hammer, LBG, DS and/or Hunting Horn. Groups going for the meta are easy to spot, because they advertise only for specific weapons. If a host only posts -3 / -2 / -1 or similar, they probably do not mind about the Hammer / HH / DS / LBG standard.
- Groups always use SR Adrenaline food. Make sure you are comfortable with Adrenaline runs before even considering Berserk Raviente.
- The Cycling Event Equipment is excellent for Raviente. It has high Cyan Sharpness and the Light element, so you can boost both Fire and Thunder with Blazing Grace+2 and a Zinogre armour piece.
- Raviente takes less damage from the types dealt to it. If your group had 4 DS users, it would soon take much less Cutting damage, which lowers your chances of breaks. So the ideal team has 1x Ranged, 1x Cutting, 1x Impact and 1x Hunting Horn, even outside the meta.
Skill setups: get all the DPS skills you can, plus Hiden. The vague starting meta is GS, Hammer, LBG and Hunting Horn groups, varying for real endgame groups. In short: GS > SnS, Lance, HBG > GL, LS > Tonfas, Bow.
Starting process
Recruitment. Do not join Ravientes or Raviente trains that are already running unless they have at least 4 slots and do not fill up within a couple of minutes. If a running Ravi is at 31/32, someone has probably disconnected and you would be taking their place, which will get you shouted at.
The first phase of any Raviente is recruiting the 24 to 32 players needed. For Berserk Raviente, almost all groups recruit Support Teams before any hunters. Support is the most vital role, and this stops anyone sniping a Hunter spot before hunter sign-ups open. If a Berserk Raviente sits at 4 to 5 players, a support team is almost certainly organising itself. When hunters may join, the organiser will say something like 戰鬥組報名! or 其他人都!, meaning everyone who does not want to be support should join.
If you cannot follow the Chinese, watch for the number rising quickly past 5. Busier towns have a small window to join and fill up fast, which is why support teams always join first. At weekends the window can be tiny, so watch chat and be ready in the menu if you want to join a weekend Ravi train.
Roles
There are two main roles: Supporters and Hunters. Parties almost always want 4 Support members, and everyone else is a Hunter. The guide generally does not recommend trying to be a Supporter. It takes a lot of communication with the organiser, and it is very important to do it right so the hunt goes faster.
Supporters
Supporters keep on top of Raviente's rage, trigger special part destructions, and provide carts for the hunter group. Efficiency matters a lot. Each time Ravi enters rage mode, it lowers the weakness value of all hitboxes by 10. That is enough to push some hitboxes out of exploit weakness range, and it is one of the biggest DPS losses short of missing a member. So you almost always want a team that stays on top of Sedating Ravi. Resurrection and Destruction support also need good management, so hunters can cart without failing the quest, and to add to the point pool for all hunters.
The guide suggests leaving this role to native speakers, because you must coordinate with the organiser. It says a guide to Support would be written later.
Hunters
The generally accepted best setup is 1x Hunting Horn, 1x Impact, 1x Cutting and 1x Shot weapon. The usual best set is HH, Hammer, Dual Swords and a Light Bowgun. A Great Sword works fine as the cutting weapon, and HBG has its own niche.
The reason is that Raviente gradually builds up resistance to any type of damage you do to it. A party of four of one type ends up with much less damage over time. Most parties like Hammer, Dual Swords or Great Sword and a Light Bowgun, which are the best choices for a normal party for DPS and for guaranteeing the most points from part and crystal breaks.
Another niche is a party of four Heavy Bowguns. They spam compressed Elemental Shots. These do next to no shot damage, so the usual downside of stacking one weapon does not apply, and HBG users often go in fours. The downside is that you will almost never get Crystal breaks, so you lose points.
Other setups can clear the quests, but with random players they will most likely follow the guidelines above, even if they use other weapon types. However much you like Tonfas, they are not valid replacements for an HH or Hammer user in KO output or sheer added DPS.
Preparation time
Once the Raviente has recruited enough people, the host usually starts it so Support can get going while everyone else organises. Hunter teams that are already organised will group up, and the rest will recruit. LBG users are usually the ones hosting parties, and they keep their team on point and recruit other players.
As a host, you can advertise spots for the hunter types you need with -1 followed by 笛 (HH), 斬 (Cutting), 打 (Impact) or 彈 (Shot). You can show how many of a type you have already with a message like 已有一斬一打一彈 (already have 1 Cutting, 1 Impact, 1 Shot). You can ask for specific weapons with 戰組缺 1笛/弩 (hunting group missing 1 HH, 1 Bowgun). If you are posting Adrenaline, add 火飯 to the message, because it is not always a given, though it is more common than not. You can mix and match all of these.
If you are a stray hunter who wants a group, post something like 雙劍求組 (DS seeking group) or 大錘或笛求組 (Hammer or HH seeking group).
After the support team has done its job, all the hunting teams can start to enter. You know when by the +40000 points message, or when a member of the Raviente group asks the hunting teams to enter.
Hunting phases
Without Determination you are unlikely to get more than three breaks in a G Raviente. That matters little when you grind decorations, but it makes weapon grind slower. If you never get extra Gg gems, you will need to fight roughly 80 additional Ravientes per Lv100 weapon.
Berserk Raviente has five phases. They all happen in the same arena, which Raviente damages across the five, so it turns from an underground volcano into a lava-filled wreck, and Raviente gains new attacks.
Breaks
The biggest factor in each of the five phases is how many breaks you get per round. There are 4 breaks each round: Shell, Tail, Head and Crystal. Each shows a +20,000 contribution point message when destroyed. The message appears noticeably earlier for the current arena host, so if that is you, signal when a break happens so people can switch targets. It is usually obvious what breaks, but if your party splits its focus and you are unsure, compare with these pictures. All breaks leave some frills tattered.
Shell is located just where the shell starts on Ravi's back, a good distance from his head.
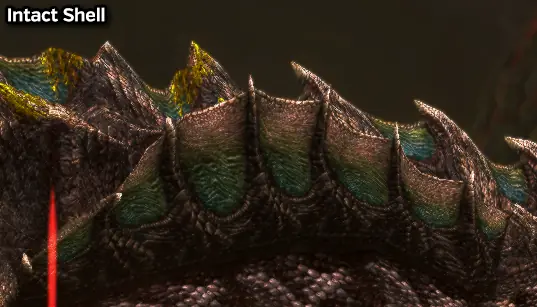
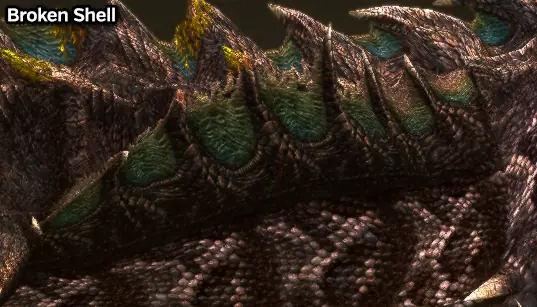
Head is basically Ravi's ears, directly behind his jawline.
Tail is at the very tip of his tail and fairly obvious.
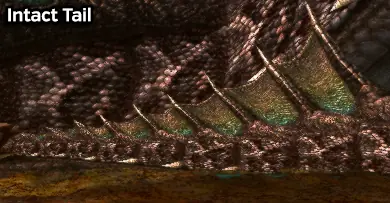
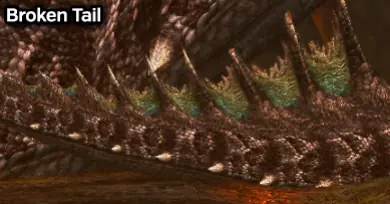
Weapon conduct
- LBG
- Bowguns should focus on the shell from the moment Raviente enters the arena until it breaks. Do not try to help break the crystals. If you are the area host, which is typical, always signal when you see a +20,000 points message (not counting crystal staggers), so people can move efficiently and not waste DPS on broken parts. Shoot along the length of Ravi's shell, because the centre of his body is the Belly hitbox and does not count towards breaking the shell.
- Hunting Horn
- Ideally bring a HH with Paralysis Immune, Attack Up Large and Infinite Stamina. Buff people, hit the parts that need hitting and help KO the head. Whenever Ravi does the circling attack, trigger Paralysis Immune and Infinite Stamina if you can. It is also good to hit the Crystals if your group composition allows it.
- Dual Swords
- Focus on shredding the shell and tail when needed while keeping up your sharpen chains for DPS. Bring plenty of whetstones. It is hard to manage and play well with a proper setup that includes Combat Supremacy.
- Hammer / Great Sword
- As Ravi enters by circling the arena, he makes a ramp in the middle-left of the map, marked by rapidly exploding rocks. Use this ramp to climb onto Raviente's back. On its back is a green/yellow crystal that erupts with paralysis about every 20 seconds. These crystals are the priority target for all the hard hitters (HH, Hammer, GS). Breaking one gives +20,000 points and staggers Raviente for a good while. If you stagger Raviente, go to its head at once as it falls. This is where Hammers and HH matter most, because they can KO Raviente, which makes it repeat the stagger at once. Also break the head while you hit it for the KO (+20,000). Then it is time to go back to the Shell, or to the Tail if it is already broken.
- Heavy Bowguns
- The HBG meta is to spam compressed Elemental Shots. You deal next to no shot damage, so your group composition does not matter, and HBG users often all go together. These groups are generally banned in the serious player servers. 7 HBG users doing the meta can tear through a Raviente in about 17 minutes, which robs most teams of most breaks.
- Others
- Other weapons are mostly about copying their closest equivalent above. With SnS you want as much element as possible, but it is basically a worse DS. Bow sits between HBG and LBG but is far less effective than either, because it cannot use Combat Supremacy. LS, Lances and Gunlances are mediocre in general and lack the burst damage of GS or Hammer and the DPS of DS. Tonfas lack the burst damage and high KO of a Hammer and the party-wide buffs of a Hunting Horn, so they are the weakest impact choice.
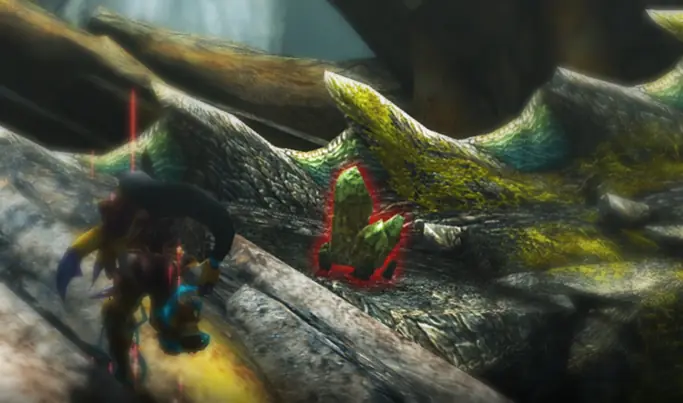
Phase notes
- Phase 1
- Ravi always starts with a spiral around the arena, which leaves the crystal vulnerable almost at once. Hard hitters should climb on and break it as soon as it is safe.
- Phase 2
- Raviente always emerges from the ground just above the centre pool of water, causing a tremor. You can evade this to fill Thunder Clad meters, then dive into Raviente's body for a second fill. Both also trigger Stylish Assault if you have it. After emerging, Raviente goes into his rest position and hits his tail against the arena. Water geysers erupt across the arena, then the whole arena explodes and is covered in water balls that home in on anyone still there. The eruption launches you and makes Raviente eat you. This gets past all forms of one-shot prevention and cannot be avoided. It is common to Farcast out after the first geysers start, or after the eruption, to be in position to attack the shell once Ravi lands from the eating animation.
- Phase 3
- Raviente starts already coiled around the arena and at once uses Explosive Powder from under his head, with the usual fireballs. You can evade both the powder explosions and the fireballs to get Thunder Clad and Stylish Assault charges. From Phase 3 Ravi can slam his head into the ground, causing an AOE around it. If it is charged for a long time, it is a single hit. If he does it quickly, it makes multiple pellets erupt outwards and can kill you through chip damage. Always dive this one.
- Phase 4
- Raviente emerges just above the centre pool of water again, causing a tremor, the same as Phase 2. It still fills meters and triggers evasion-based skills. After emerging, Ravi floods the arena with lava by lifting himself up and slamming down. You avoid it by standing on any crater filled with water. It does nothing to stop projectiles for gunners. You can evade into the lava as it disappears to trigger evasion-based skills, just like the tremor. From this phase on, Ravi can hit the arena with his tail to rain down Lava Balls, the same as in the next phase's intro. They cause damage over time on hit. Sprinting at full speed with Absolute Defense active avoids them killing you, and Small Barrel Bombs can launch you clear past them.
- Phase 5
- Phase 5 copies the intro of Phase 2, and you can evade the eruption to trigger evasion-based skills. All the water-themed attacks are now lava-based. The big change is that, unlike the water balls that rain down after the arena explodes, the Lava Balls do damage over time. You can tank them with Absolute Defense if you run at full speed, and they will not kill you. If you use Determination, the best way to evade them is to launch yourself with Small Barrel Bombs and abuse iframes. Unlike the other phases, when Ravi coils around the arena he starts forming a giant ball of fire. If it finishes, he raises it and drops it into the arena, killing anyone who is not at the map edge behind his tail tip. While he does this, attack the head to help Support break it completely and to get points for the break. In this phase the Crystal is on top of Ravi's head, and breaking it cancels the giant ball of lava.
Crystal notes
The crystal on Ravi's back moves further along his back each phase, so you need to go further and have more efficient DPS each time to break it. In the final phase the Crystal is on top of Ravi's head. If you fail to stagger him, he drops a giant ball of flame into the arena and nukes it. You can avoid it by Farcasting, or by hiding behind the tip of his tail at the map edge. The final crystal is weaker than the others. While Ravi circles the arena, always use Dash or Mega Dash Juice and a Movement Speed Seed (CP, Caravan Store) to reach crystals quickly.
Points notes
Standard phases give 50,000 per clear and 20,000 per break, including the crystal on Raviente's back. That means up to 130,000 per standard run, with 90,000 as the baseline "good" value. Each break by a Support squad also gives 40,000, and the usual 50,000 Pioneer Flag (or Bond Points) bonus applies at the end of the whole set of hunts, as it does for HR2 and HR5.
You always earn at least 500,000 points if you go on every quest in a Raviente. It is very uncommon to reach 800,000 or more without a group using Determination. This has almost no effect on the armour grind, but it means you only get 50 to 60 extra 100Gg gems per Raviente before you have the skill and can join such a group.
Hitboxes
As for HR2 and HR5, Raviente's hitboxes adjust to the elements and damage types they take. Aim for a balanced team and dual-element weapons such as Light.
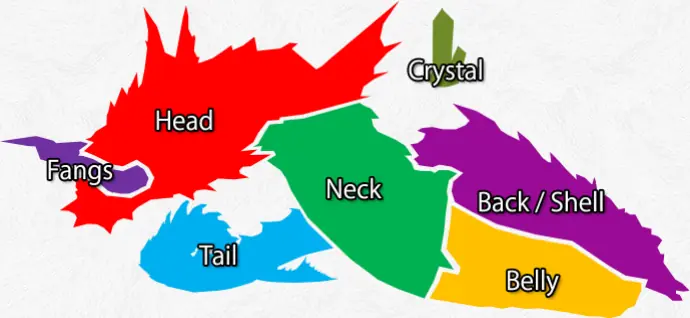
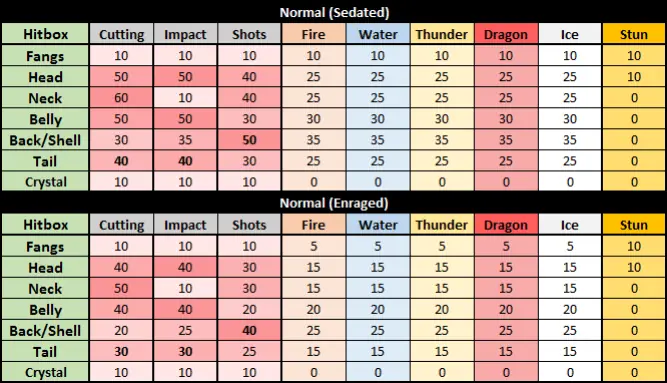
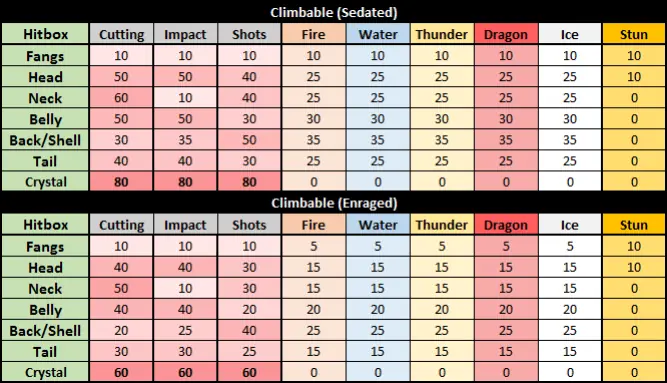
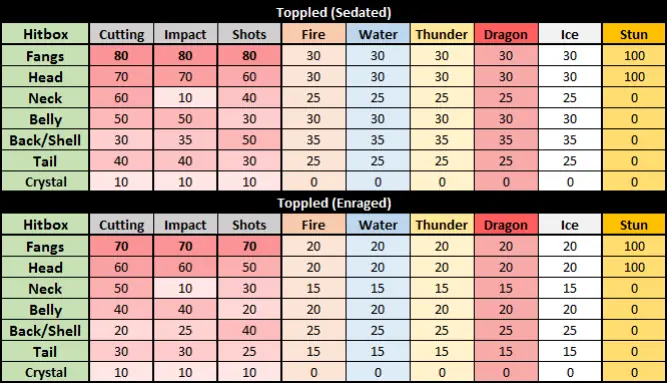
Carving phase
Always join full teams for the carving phase. You get more rewards that way.
After a Raviente dies, you can sign a new quest, the Carving Phase. You can post it within 24 hours of the Raviente starting. You have three minutes to carve Raviente's corpse. Each version of Raviente has its own unique items. HR2 and HR5 share most of their items, but HR5 has its own low% carve and higher rates for the items that are rare on the HR2 carve table.
To make the most of this short time, get skills that raise your returns. These are commonly used:
| Skill | Why |
|---|---|
| High Speed Gathering | Should always be used. Can be found as a Tower Weapon decoration |
| Movement Speed UP+2 | Makes you move faster. A G Finesse weapon can also give the effect of Movement Speed+1 |
| Peerless / Runner+2 | Lets you run between parts without stopping. Can be found as a Tower Weapon decoration |
| Carving Expert | Grants an extra carve. Each spot already has 9 carves, but this can help you get the last Horn you need. Can be found very rarely as a Tower Weapon decoration |
| Great Luck | Adds a chance of extra rewards. Can be found very rarely as a Tower Weapon decoration, or on the Frontier Point Yukumo Set (needs Lottery Frontier Points) |
For G Rank Raviente, a set with all of these skills is highly recommended. You need several thousand of the core materials for any Ravi set, and you want to get the most from every one you kill.
After the carving quest, talk to Kieru again and choose the second option. This collects your rewards and lets you join future quests. You cannot join another Raviente until you do this.
Additional breaks
Even when the Raviente is dead, you can still break all its parts during a carving quest. This is a bit glitchy and the host of the carving quest should do it. Attack all the parts until you get the +20,000 message (for example with GS charges), then Farcast back to the balloon to trigger the breaks for party members. Everyone gets an extra 60,000 points, which helps you reach the million threshold. You need high damage for this. An endgame G Rank GS set with Hiden and Combat Supremacy does it within 2 minutes, but lesser sets probably cannot.
Raviente weapons and armour
Raviente weapons
All Raviente weapons start from a common source, crafted with HR2 Raviente materials. These bases upgrade into one of three HR5 upgrades, and each of those upgrades into any final weapon. Before the G Rank upgrade your choices do not really matter. But when you start a G Rank weapon you are locked to that single weapon, and you cannot change your mind later. You cannot switch between paths without starting a brand new weapon from HR2 Lv1. Choose your final upgrade carefully.
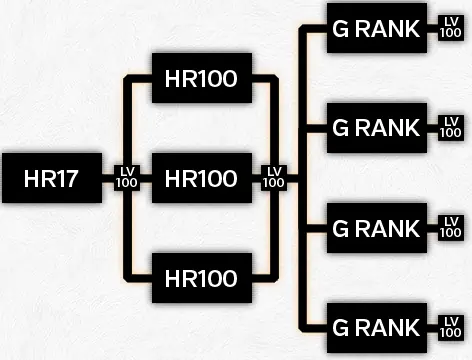
Upgrading
Unlike standard weapons, Evolution or Raviente weapons have levels and use g or Gg points to upgrade. You get these points by converting the types of gems you get from the different Ravientes. Three gems come from HR2 and HR5 and can only upgrade pre-G Rank weapons. Three others come from G Rank and can upgrade both G Rank and non-G equipment.
| Gem | Points |
|---|---|
| Ravi Gem (HR2/HR5, first tier) | 5g |
| Ravi Gem (HR2/HR5, second tier) | 20g |
| Ravi Gem (HR2/HR5, third tier, the "100g gem") | 100g |
| G Rank gem, first tier | 5Gg or g |
| G Rank gem, second tier | 20Gg or g |
| G Rank gem, third tier (the "100Gg gem") | 100Gg or g |
You convert gems into points at the Blacksmith, in Weapon Crafting, then Evolution Upgrades. The options are Upgrade Evolution Weapon, Convert Gems to g Points and Convert Gems to Gg Points. After you upgrade a weapon to Lv100, you can upgrade it to the next tier, which uses real materials again. You do this whole process three times to get a finished G Rank Raviente weapon.
When fully upgraded, Raviente weapons are among the very best in the game, ahead of most weapons for Raw and Element. They are also one of the grindiest things in the game. You will need this much:
| Equipment | Points total | 100g gems | 100Gg gems | Estimated Ravi runs | Estimated runs on Premium |
|---|---|---|---|---|---|
| HR2 Lv1 to 100 | 256,540 g | 2,566 | - | 14x HR5 / 19-26x G | 9x HR5 / 11-13x G |
| HR5 Lv1 to 100 | 1,496,150 g | 14,962 | - | 79x HR5 / 107-150x G | 52x HR5 / 63-75x G |
| HR2 Lv1 to HR5 Lv100 | 1,752,690 g | 17,527 | - | 93x HR5 / 125-176x G | 54x HR5 / 74-88x G |
| G Rank Lv1 to 100 | 2,795,000 Gg | - | 27,950 | 200-280x G | 117-140x G |
HR5 run counts assume at least 1,000,000 points per run. Getting less can greatly increase the time needed. For G Rank, the first figure is the lowest possible and the second the highest. Without Determination and a Raviente weapon, you will likely be much closer to the second figure.
Final weapons
Each weapon has 4 final upgrades, and they differ in different ways for each weapon type, so check the final stats on a site like Ferias before you choose. For example, the Great Sword has Raw, Elemental, Balanced and Affinity-focused finals. By numbers, the Raw version is better than the Affinity version, even with Critical Conversion. But it is only Normal Length, while the Affinity one is Very Long. In many situations the Affinity weapon ends up better, just from the length. Similar trade-offs exist for all weapons, so think about the skills you will use and how you will fight.
For usability, most of these weapons start to pass normal G Lv50 weapons in raw at about G Lv70, and at Lv100 they have the highest Raw values of any weapons.
Raviente armour
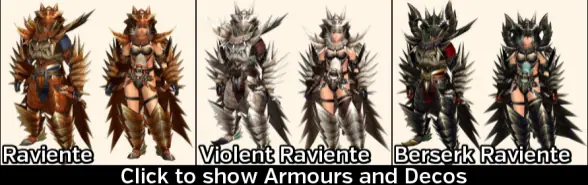
There are three kinds of Raviente armour, one for each tier of Raviente (HR2, HR5, G Rank). All three upgrade to GX level and can then be turned into G Rank decorations for any set. The main reason to make them is to get the skill Determination, a very powerful hybrid skill that opens up half a dozen armour skill slots, enabling sets that are impossible to make without it.
The HR5 armours are not worth crafting for new players, because of the grind and because they are not very good. Zinogre, Brachy and Gou pieces have far nicer skill points for much less work.
Grind scale
A set of Raviente armour is one of the biggest time investments in the game. You need about 400 Berserk Raviente runs to finish each set, each taking about 30 to 45 minutes with a good group. Premium helps a lot with weapon upgrade gems and a little with materials.
The biggest problem is the 24-player requirement, which means you need to be active during normal Taiwan hours to hunt these Berserk Ravientes. Raviente groups can run at any time, and were previously common from around 13:00 to 18:00 and 19:00 to 01:00 each day.
The grind is at least 250 Ravis, so even if you get everyone into most Ravis, a single decoration set takes about 1 month. With no life and trains available, you can get a set in about 15 days.
It is one of the longest undertakings in Frontier. It pays off in the long run, because with Determination you can drop Attack, Issen, Expert, Exploit Weakness, Elemental Exploit, Blazing Grace and Absolute Defense from any set. Raviente weapons other than LBG and HBG also have around 50 to 100 more True Raw than the next best equivalents.
Determination
Determination is a skill found only on Raviente armours and decorations, and it is the single strongest skill in the game. It gives Attack +100, Affinity +100%, Critical Multiplier 1.5x, Adrenaline +2, Sharpness +1, Critical Shot, and Exploit Weakness and Elemental Exploiter with no hitbox requirements.
The lack of requirements on Exploit Weakness and Elemental Exploit is very strong. It lets you force an element to do damage to a monster that would otherwise be immune to it, and deal more damage when you hit any spot on a monster.
The downside is that it disables all the usual one-shot protections: Guts, Great Guts, True Guts, Absolute Defense, Guts Tickets, Mega Guts Tickets and Soul Revival are all disabled. Divine Protection still works.
The skill lets you drop these skills if you use it: Issen, Expert, Exploit Weakness, Compensation, Edgemaster, any source of Adrenaline+2, any lesser attack skill, Critical Shot or Precision+2, Dissolver. Some setups let you drop more or fewer skills. If you drop Compensation, you want Evasion+2 from somewhere: in parties you can get it from Encourage+2, but solo you need another source. Gunlances still want Blazing Grace if shelling or using Wyvern Fire. The extra 100% affinity and 1.5x Critical Multiplier is a massive buff. You may not want Critical Conversion despite the obvious synergy, because newer skills give more DPS than the added raw.
Extreme Raviente
Extreme Raviente is Z2.3 filler content. It adds a second set of Berserk Raviente armour with ten new decorations, and it extends the grind on (most) evolution weapons by another 100 levels, up to Z100 and 400 levels in total. These weapons all gain Skill Slots Up+1 but do not gain the Part Breaker effect of other Zenith Weapons.
Fight changes
They gave it more health. That is the only thing they changed.
Reward changes
You get up to 450 Gg gems for a perfect Raviente, up from 140. The bonfire NPC gives 80x extra Gg gems, up from 50x. There are two new low% gem carves, and existing carves come in stacks by rarity (2x for rares up to 6x for commons). It takes longer, but you get at least three times the rewards of a standard Raviente for perfect play, and even poor play gets more than a normal Berserk Raviente. This was before the introduction of 4 to 8 player Berserks, so efficiency may change.
For the grind scale: finished Z100 weapons need 479,250 gems. With only perfect Ravientes and Premium running, that is 453 Extreme Ravientes. Expect about 700 hours of your life if you want to grind it without spending money.
Equipment
Armour sets
| Piece | Skills |
|---|---|
| Blademaster Head | Strong Attack+5, Determination+2, Lavish Attack+4, Stylish+5 |
| Blademaster Chest | Strong Attack+5, Determination+2, Point Breakthrough+4, Charge Attack Up+5 |
| Blademaster Arms | Strong Attack+5, Determination+2, Rush+4, Thunder Clad+4 |
| Blademaster Waist | Strong Attack+5, Determination+2, Obscurity+4, Fortification+5 |
| Blademaster Legs | Strong Attack+5, Sword God+5, Determination+2, Abnormality+5 |
| Gunner Head | Strong Attack+5, Determination+2, Ceaseless+4, Flash Conversion+4 |
| Gunner Chest | Strong Attack+5, Determination+2, Rush+4, Vampirism+5 |
| Gunner Arms | Strong Attack+5, Determination+2, Lavish Attack+4, Mounting+5 |
| Gunner Waist | Strong Attack+5, Determination+2, Spacing+4, Drawing Arts+6 |
| Gunner Legs | Three Worlds Protection+5, Strong Attack+5, Determination+2, Skilled+5 |
Decorations
Every Extreme Raviente GX decoration gives Determination+2 and Strong Attack+3, plus:
| Decoration | Other skills |
|---|---|
| Blademaster GX1 | Lavish Attack+2, Stylish+3 |
| Blademaster GX2 | Point Breakthrough+2, Charge Attack Up+3 |
| Blademaster GX3 | Rush+2, Thunder Clad+2 |
| Blademaster GX4 | Obscurity+2, Fortification+3 |
| Blademaster GX5 | Abnormality+3, Sword God+3 |
| Gunner GX1 | Ceaseless+2, Flash Conversion+2 |
| Gunner GX2 | Rush+2, Vampirism+3 |
| Gunner GX3 | Lavish Attack+2, Mounting+3 |
| Gunner GX4 | Spacing+2, Drawing Arts+4 |
| Gunner GX5 | Skilled+4, Three Worlds Protection+3 |
Written from the Monster Hunter Frontier guide by Fist (as saved in January 2022). That guide describes Capcom's old official servers; we reworded it, laid it out for Hunsterverse and added the "On Hunsterverse" notes (all of them: Hunsterverse vs the old servers). The pictures are from the original guide.