
Frontier guide · Getting started · 1 of 18
Basics and Getting Started
A friendly start to Monster Hunter Frontier Z: what the game is, how to get going, your first steps from Hunter Rank 1 to 7, daily routines, controls and chat, and where to read next.
Welcome to Frontier
Monster Hunter Frontier Z (MHF-Z) is an online Monster Hunter game with a long history and a lot of content. Its main parts are:
- Hunter Rank (HR) 1 to 7. HR1 to HR4 are very easy compared to the rest of the game and mostly work as a tutorial. The game ramps up at HR5. HR6 holds the old "endgame", and HR7 leads to G Rank.
- G Rank (GR). A free-form rank where you hunt for better gear. Quests at GR200 and above are called Zenith.
- Style Rank, Hardcore monsters, Transcend, Hiden, the Caravan, Raviente and the Hunter's Road are some of the systems that give Frontier its own flavour. Each has its own page in this guide.
This page walks you through the early game in order. Frontier has some old-school limits: you can only equip things in your house or at the Blacksmith, you cannot combine items after you sign for a quest, and you cannot restock or change equipment during a quest. In general you commit more to each quest than in newer Monster Hunter games, so think before you leave.
If you only know Monster Hunter: World, remember that this is a much older style of game. Take your time and read the other pages when you need them.
Where to go next in this guide
The guide is split into pages. Pick what you need:
- Setting up the game: the Play page (Windows, Linux / Steam Deck, or bringing a character from another server).
- Your first weeks: stay on this page, then read Hunter Rank and Style Rank.
- Menus and town people: Menus and Town NPCs. Your house, Partner and Partnyaa: House and AI Companions.
- Items and gathering: Items and Materials. Gear and box: Equipment and Item Boxes.
- Gear and builds: Weapons and Sigils, Armour, Decorations and Skills and Transcend.
- Food and quests: Quests, Food Buffs and Bentos. Your guild: English Guild and Guild Hall.
- Monsters and tools: Monsters and Tools and References.
- When you reach G Rank: Starting G Rank, G Rank and Zenith.
- Events: Regular Events (Hunter Festival, Diva Defense, Caravan, Raviente) and Hunter's Road.
On our server you can also use the monster field guide, the item and equipment catalog, the quest catalog and the armour set builder.
Getting started: install, account and character
The main menu
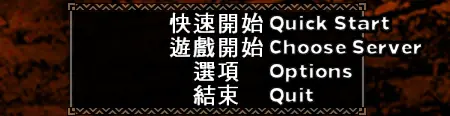
When the game starts, you see a menu with four options:
- Quick Start picks a server for you.
- Choose Server lets you pick a server to join and see which servers your friends are on.
- Options
- Quit
Character creation happens after you choose either Quick Start or Choose Server. On your first launch you have no character yet, so the launcher asks you to log in with your newly assigned ID.
Character creation
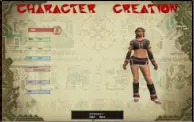
The options are in English. Each section has a master selection option, with filters for individual sub-types (for example dark skin, long hair, light skin). Select randomises your character. The right stick, or K and ; on a keyboard, turns your character around.
After you design your character, you choose which weapon type you start with. This is only what you carry at first and you can change it later. As in mainline Monster Hunter, every character starts with the basic version of each weapon in the box.
You start with an HR5 weapon (a Gou weapon). HR1 to HR4 are very easy compared to the rest of the game, and content ramps up harshly from HR5 onwards. The Urgent quests are scaled down so you can solo them. You can make a new weapon from scratch and switch off NPCs (see Menus) if you want to stretch out the earliest stages, but that is not generally recommended: every monster from the first four rank bands is available again at HR5, gear essentially starts over (like High Rank in other games), and you unlock three of the four weapon styles for every weapon at HR5. The guide's author calls HR1 to HR4 about the equivalent of Low Rank at best.
Your first servers
After you confirm the news posts, you are put on a server or you choose one, depending on how you started. If you have to choose, only the first and fifth tabs are available at the start. The first tab holds the standard low-rank servers and the fifth a special set of newbie servers. See the newbie server below. Our own worlds are listed on the worlds page.
First login and settings
When you are in a server, you see your character walk into town and an instructor NPC greets you. Mash through what he says: it is not important. Then you get a message about the Hunter Guide, which works as both a set of achievements and a basic progression guide.
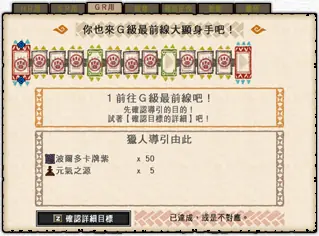
- Press confirm to open the guide menus. You can open the HR Tasks section and the Other Tasks section.
- Open the HR section with confirm (E, left click, or the right face button on a controller). It has two tabs of tasks.
- In the first tab, press Z (or the left face button) to view the details of the tasks. This automatically completes five of them and lets you claim a basic set of starter items (potions, meat, whetstones) for your first quests.
- Do the same in the second tab and in the Other section for items that are useful later.
- Dismiss the pop-ups with back or confirm. You end up where the long string of prompts began.
Options worth changing now
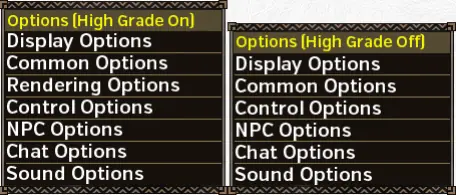
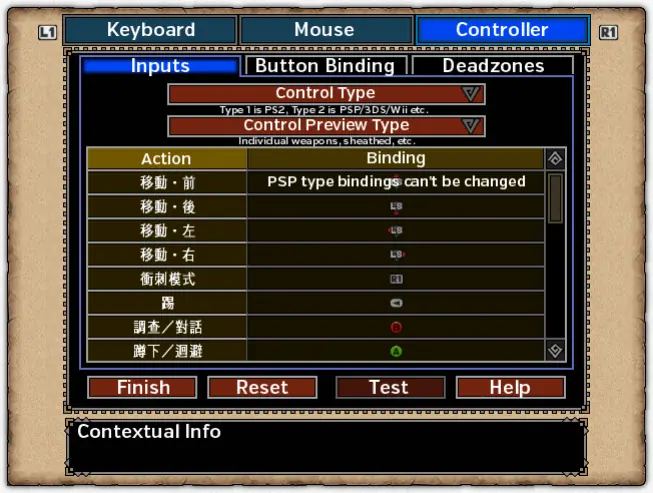
- Controller type: change it to match modern console Monster Hunter games instead of the PS2 series. Go to Options > Control Options > Key Settings.
- Display Options (Quests, General): turn off the Direction Arrow (the mouse-control direction indicator) and the Controls Guide overlay, which is not much use if you cannot read Chinese. HP Display can be Fixed Length or Stretched to full screen width, as you prefer.
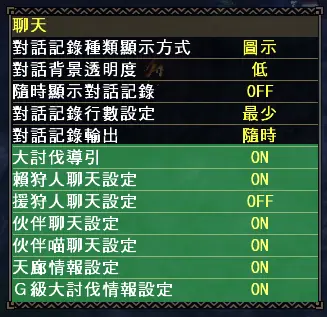
- Chat Options: disable all options from the bottom up if you do not want NPCs shouting at you in chat and making sound effects.
The tutorial quest
When you talk to the instructor you may end up on a Gogomoa quest. Skip through the text prompts as they appear (press whichever button is cancel) and choose No when asked a question. Then:
- Use the Blue Box and take the coin from it.
- Deliver the coin to the Red Box. This lets you leave to the north.
- Kill the Gogomoa, which ends the quest.
You then see a normal quest end screen where you can take rewards, followed by a list of the HRP you gained, monster stats and so on.
The town and Hunter Rank 1
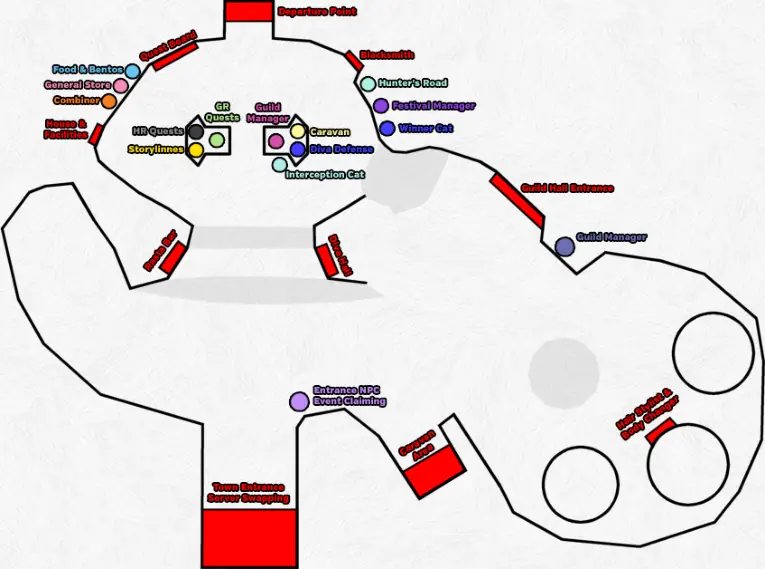
The town layout is simple. The map above shows the key locations, including the places named later on this page.
HR1 quests
Weapons: the starter weapons are built to push you through the trial as fast as possible. They are not very strong in Frontier terms (very early HR5 weapons) but are notably stronger than the basic weapons you can craft. If you want to craft a weapon from scratch and learn to gather, see Items and Materials. Finding materials is then entirely on you, with no hand-holding.
- Go to the guild girl in black at the middle counters in the town square. She may prompt you to return to the Hunter Guide; you can ignore this and keep talking to her until you get the quest menu.
- Choose Hunter Quests (raise HR) > 1 star. Key quests are sorted to the top and have an obvious star icon.
- Finish the three key quests. An obvious Urgent Quest section then appears under Hunter Quests (raise HR) > Urgent Quests. Complete it to progress to HR2.
The instructor NPC shouts a lot during these quests and makes whistling sounds even if you switched messages off. He stops appearing in your quests after you reach HR2.
Hunter Guide tasks
Hunter Guide tasks work like most modern achievement systems: you complete a task and get items. Most tasks are simple and most are worth doing. Open the Hunter Guide tasks window in town with Shift+C on keyboard or R1+R2 on a controller. The challenges are split into sections ordered by progression.
Open every section you can, press Square (or Z on keyboard) to view the detailed information, then press your normal confirm button. This claims a batch of tasks that are just "Read This", which gives you free items, including the cheques you sell below. The guide recommends working through all the tasks, because the rewards are very useful and most do not take you far out of your way. The Google Document has the details on each task.
Hunter Rank 2
Zeny and box space
When you finish the HR1 Urgent, you move up to HR2 automatically when you return to town. The instructor greets you, upgrades your house so you can get a partner, and gives you a stack of GCP tickets.
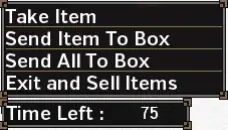
Now open one of the boxes and sell about 150 of the Cheques the Hunter Guide gave you. Choose Sell in the box, then Items, then the yellow ticket (a cheque; its name is Chinese-only in the guide) and sell around 150 of them. This puts you at about 7.5 million zeny, enough to buy all the items and upgrades you need for a long time. Selling this many items is fine: they exist only to be sold, and the Hunter Guide tasks across HR1 to HR7 give you hundreds more.
Then go to the Shop NPC (the pink guildie) and buy the Power Charm, Armour Charm and the box upgrades.
| Shop section | Item | Price |
|---|---|---|
| Section 1 (basics, recovery items) | Powercharm | 36,000z |
| Section 1 | Armor Charm | 24,000z |
| Section 2 (books) | Book of Storage 1 | 1,500z |
| Section 2 | Book of Storage 2 | 5,000z |
You could also buy stacks of potions and other items in Section 1, but you should not need much until HR5, and the guide covers that there. For how boxes grow, see Getting more box space.
Caravan Gem
The Caravan Area (also called Pallone) is next to the town entrance. Go there and get your Caravan Gem as soon as possible after reaching HR2. Walk in and talk to Kashira, the woman near the bonfire. A new icon of a random colour then appears next to your name: that is your Caravan Gem.
The gem adds a new option to your equipment box (in the Equip menu, Caravan Skills). At first it holds only Recovery Items Up. Equip it when you can: it raises the healing of Potions and Mega Potions to 1.10x their normal amounts. For more on the Caravan see the Caravan section.
Your Partner
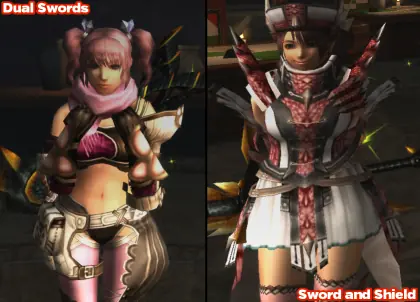
At HR2 you should get a Partner. Enter the bar on the stairs of the town and talk to the waiter NPC in blue at the counter. This lets contracted NPCs go on quests with you and lets you start your own Human NPC companion.
- Talk to the Legendary Rasta who uses the weapon type you want your Partner to use. Tonfa and Switch Axe are unlocked separately at G Rank. If you are unsure what weapon a Legendary uses, talk to them and choose the second option to see their gear.
- Choose Partner (Take Partner / Unlock Weapon) to start creating one.
- Choose a gender, then a personality.
- Confirm your choices. After this, go to your House. The NPC you talked to greets you there and you can customise your Partner as you did your own character.
The best choices for AI and actual damage are Dual Swords or Sword and Shield. Great Sword is also not too bad. The other weapons have AI that is pretty stupid and spends more time doing nothing than attacking monsters.
The personality types are listed below (male on the left, female on the right). Personality only decides the manner of speech and does not matter much.
| Male | Female |
|---|---|
| Hot Blooded | Energetic |
| Callous | Callous |
| Delicate | Serious |
| Bad | Naive |
| Refreshing | Temperamental |
| Manly | Focused |
| Magnificent | Introverted |
You cannot change gender without paying real money for restyle points or recreating the Partner. The name and personality can be changed with specific rare items. If you make a mistake, talk to the cat next to the bar: this deletes your Partner completely and lets you start again with a new name, gender and personality. To change only the face or voice, you can use Premium Restyle Points from the Item Shop (these cost real money on the official servers).
Partners have much more to them, but you can ignore it until G Rank unless you plan to spend a long time at HR5. At G Rank, read Partner on the House and AI Companions page.
Felyne Partnyaas
Partnyaas are Felyne companions like those in MHFU and MHP3rd. You manage them in the same area as the Halks (go to your house and choose the heart icon). To hire one, talk to the Halk and My Support Manager (the only human in the zone) and choose his Partnyaa option. This starts Airou creation mode.
There are five tabs for the look: Pattern, Eyes, Ears, Fur Colour and Tail. After you confirm, you name your Partnyaa and it appears on the island over the bridge. You can have 1 to 2 Partnyaas at first (2 if you are in a guild, 1 if not), and you can get more when one is at Rank 300. More is on the Partnyaa section.
For the fastest clearing of the first quests, open Options > NPC Options and move your Partnyaa to the lowest priority. This stops it joining your quests and replacing a normal NPC.
HR2 quests
The HR2 keys are straightforward. The one thing to know: in the Rathian hunt, go to Area 6 and wait, because Area 10 is closed to hunters at night in the jungle.
Hunter Rank 3 and 4
House and Transcend
At HR3 you can buy a second house expansion in the books section of the pink NPC's shop. This adds more box capacity. You also unlock the Transcend System: a customisable, time-based buff that augments your hunter's abilities. Like Wystones in MH4U, Transcend appears as a usable item among your consumables. Unlike a Wystone, the Transcend state starts with little charge and has to be powered up over time on quests.
It starts as a slight increase to elemental and raw damage and becomes fairly powerful over the game. Full details are on the Transcend page.
Newbie guild and lunchboxes
The game wants you to join a newbie guild at HR3. Talk to the guild manager and answer positively to every prompt; he railroads you into a guild. After that you can enter the guild hall next to him and buy several useful food items that give +50 health and +25/+50 stamina on every quest. Guild Hall details are on the guild page.
| Guild store section 1 (basics) | Price |
|---|---|
| Spirit Mushrooms | 980z |
| Frost Tomatoes | 450z |
| Pugi Crackers | 10z |
As an alternative you can apply to the English Guild, but acceptance is not automatic: you may have to wait until someone with permission accepts your request. You can also join the newbie guild, leave immediately after buying food, and then apply to the real guild.
Lunchboxes and bentos
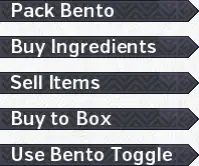
A lunchbox (or bento) is a buff meal that you set to go with your quest when you post it. You can buy many foods and combine them in many ways. Pack a bento at the right NPC: the dedicated food store in town, the Caravan area, or the Guild Store Cat in the Guild Hall.
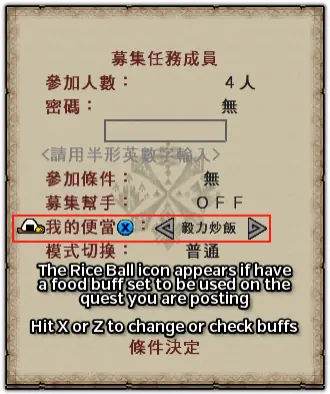
After you make any one meal it is added to a quick list by default. You can instantly prepare any meal on that list by pressing X on a controller or Z on a keyboard while posting a quest. The meal is remembered between quests, so once you choose the right food you do not need to choose again, unless the season changes.
| Season | Standard combination | Result |
|---|---|---|
| Warm season | Fist Rice + Spirit (Demon) Mushrooms | +50 HP / +50 Stamina |
| Cold season | Fist Rice + Frost Tomatoes | +50 HP / +50 Stamina |
| Breeding season | Fist Rice + Power Lard | +50 HP / +25 Stamina |
| Food | Price | Sold at |
|---|---|---|
| Spirit Mushrooms | 980z | Guild Cat Store |
| Frost Tomatoes | 450z | Guild Cat Store |
| Fist Rice | 275z | Lunchbox NPC |
| Power Lard | 200z | Lunchbox NPC |
More meals are on Quests, Food Buffs and Bentos.
HR3 quests
The HR3 quests are simple. HR3 is technically High Rank by the old rating system, so you no longer get supplies and you spawn at random spots in quests that support it. The Urgent is against the Elder Dragon Rukodiora, who uses Magnetism. This lets him move your hunter around while you have the Magnetised status.
Pugi Farm
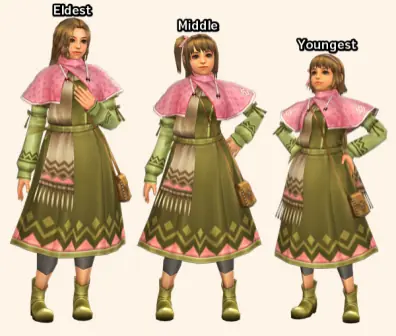
At HR4 you can start getting a Pugi. Enter your Pugi Farm from the house door next to the shops (pig icon). Inside, talk to the NPC in front of you. She asks a series of questions that assign one of three farm managers. Use the table if you have a preference for their looks.
| Answers | Manager assigned |
|---|---|
| NYY | Random |
| YYN | Youngest |
| YYY | Middle |
| YNY | Eldest |
After the questions you wait until midnight (Taiwan time, on the official servers) to progress, so the rest is on the House and AI Companions page under the Pugi Farm. A Pugi, with its outfits and cuffs, is Frontier's version of Talismans or Charms.
Item presets
Item presets save your pouch for a quick restock. Set up your inventory exactly as you want it saved, open any box, choose Item Presets then Register Preset, pick a slot and optionally name it. Slots 1 to 4 have shortcuts: L1/L2/R1/R2 or F/Ctrl/C/Shift while you interact with a box. So after a quest, run to a box, interact and press L1 or F to equip the preset from slot 1 at once.
On the official servers, subscribers got an extra 20 preset slots (slots 5 to 24), under Item Presets > Equip Preset. These slots have no keyboard or controller shortcuts and must be equipped by hand. More in Equipment and Item Boxes.
HR4 quests
The HR4 key quests are standard. The Urgent is against Akura Vashimu, who uses the Frontier-exclusive Crystallisation status.
- Crystallisation coats you in crystals and instantly drops your stamina bar to 25.
- After a short time the crystals explode and hurt you and anyone near you.
- You can shatter them by mashing and waggling the analog sticks, or by taking a hit from another hunter.
- NPC companions automatically try to break you out if they are not crystallised themselves.
Hunter Rank 5: where the game starts
HR5 is where the game really starts, a step up like reaching High Rank in the mainline games. All the Frontier exclusives added in recent years are HR5 or higher, so there is plenty of variety if you want to stay a while before G Rank. Monsters have bigger health pools, adjusted hitboxes and hit harder. Your free weapons are the baseline: some of the least powerful HR5 weapons. From here, expect Keys and Urgents to be much closer to Online Quests in a typical Monster Hunter game. Hunter Rank and Style Rank goes deeper.
Weapon styles
HR5 unlocks Style Rank, which gives your weapon new styles, and lets you fight Hardcore versions of monsters. Many of these are big changes beyond what you see even in Sub or Rare species, and are worth trying.
- After reaching HR5, walk up to the Guild Master to begin Style Rank. You interact with her automatically after talking to her, which grants SR and turns it on.
- To enable the new movesets, use any large box that lets you change gear (such as the one at the Blacksmith). Go to the equipment section and choose the new last option, SR Book.
- Pick your weapon type, then the second option, then your preferred style.
At HR5 you have Heaven Style and Storm Style. Storm Style is the best for most weapons at this rank, with some variation. You can swap styles at any time and are not locked into any of the three styles available at first. The table rates the three styles for each weapon.
| Weapon | Style 1 | Style 2 | Style 3 |
|---|---|---|---|
| Sword and Shield | Good | Good | Good |
| Dual Swords | Decent | Good | Good |
| Great Sword | Decent | Bad | Good |
| Long Sword | Decent | Good | Usable |
| Hammer | Decent | Bad | Good |
| Hunting Horn | Decent | Decent | Good |
| Lance | Decent | Good | Good |
| Gunlance | Good | Good | Good |
| Heavy Bowgun | Decent | Good | Good |
| Light Bowgun | Good | Bad | Good |
| Bow | Decent | Good | Bad |
The guide does not label these three columns. It also says styles marked Bad are strictly downgrades of Heaven or Storm and so there is no reason to use them, and that Storm Bow has a crouch-shot gimmick that is worth trying once but is not actually good. See Style Rank and Weapons.
Freebies for reaching HR5
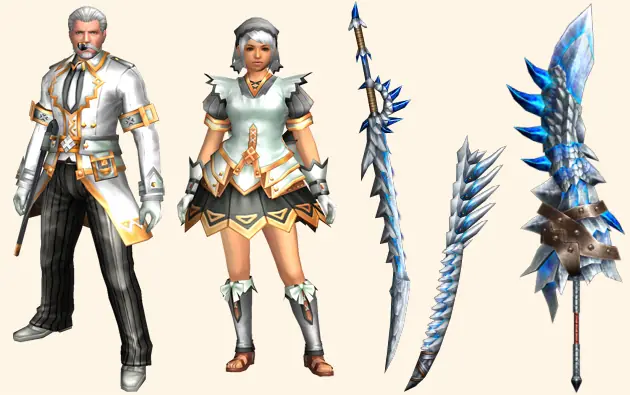
Just for hitting HR5 you get a booster pack. Talk to the NPC at the town entrance and choose Claim Event Rewards > Receive Items (the section for items of all kinds), and claim everything you can. The HR5 Booster holds a free set of armour, decorations and many materials.
- The armour is a full set of Coordination FY. It gives Earplugs and Wind Pressure, which make future content much easier.
- The materials are those used to craft Zerureusu weapons. These are very likely equal to or better than whatever you have equipped, so use them to speed up progress.
If you have done extra content or have little box space, you may be unable to claim the freebies. See Items and Materials for how to expand your house and box.
Store items
On the official servers you had to be subscribed at HR5, so the guide suggests stocking up on all core shop items now. Some are limited to subscribers, which is why they are listed here and not earlier.
| Shop section | Items (price) |
|---|---|
| Section 1 (basics, recovery) | Energy Drinks (60z), Nutrients (760z), Whetstones (40z), Farcasters (150z), Honey (45z), Nullberry (60z) |
| Section 6 (sundries) | Dragon Toadstool (200z), Catalysts (240z), Life Crystals (296z), Wyvern Claws (29z), Power Seed (140z), Armour Seed (110z), Psychoserums (300z) |
These enable you to combine: Mega Potions, Mega Nutrients, Max Potions, Ancient Potions, Lifepowders, Demondrugs, Power Pills, Armourskins and Armourpills.
Gunners should buy all their standard shots and coatings, plus the materials below to combine into the ammo and coatings they use. These are spread between the normal store NPC and the Combiner NPC next to her.
| Where | Items (price) |
|---|---|
| Combiner | Huskberry (2z), Rumblefish (38z), Needleberry (22z), Scatternut (82z) |
| General Store | Sleep Herb (25z), Wyvern Fang (29z), Empty Bottle (3z), Nitroshroom (30z), Toadstool (37z), Parashroom (75z), Sm Bone Husk (50z) |
These cover Normal, Pierce and Pellet shots up to Lv3. You can use GCP to get materials for Elemental shots, but after G Rank you should not use shot types other than Pierce unless you run out of both shots and materials. Elemental damage scales on a formula based on attack, while critical hits and bullet modifiers affect raw damage far more. Typically, using elemental you deal about 50% of the damage of simply using pierce shots. The guide author's database has a full combination list for ammo and coatings.
Charms, talons and claws
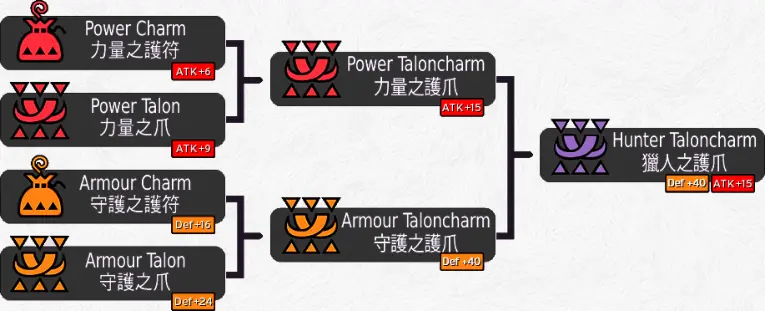
At HR5 you have GCP tickets. Trade them for GCP at the pink General Store NPC: choose Exchange Guild Contribution P, then Obtain Points. The tickets give 300 GCP, which you should save for now.
Spend the GCP first on 2x Lao Shan Claws: Exchange Guild Contribution P > Exchange for Points > Materials (HR1-4) > Page 44 > Lao Shan Claw, 90 GCP each. Combine them with the Power and Armour Charms to make talons, combine those talons with a second set of charms to make claws, and combine the claws together a final time. This gives you the effects of all four items in one (Attack +14, Defense +40) in a single item slot.
Armour upgrades
You may not have needed to upgrade armour yet. For HR armours the game uses Armour Spheres, as the mainline games do. You get them as fixed extra rewards that depend on the tier of quest, from mining, and from several daily quests that give batches of 30 of two tiers each.
Claim your Daily by talking to the pink General Store NPC and choosing the last option, Claim Daily. This also gives you some Halk Pots, which reduce damage taken during a quest but have a daily use limit.
For Coordination FY armour, take the HR5 Daimyo Hermitaur daily. It gives stacks of True Armour Spheres and Heavy Armour Spheres, which let you push all 5 pieces to FY Lv7. The daily quest is in the standard HR quest giver's Limited-Time Quests > Daily Quests. Normally the only Daimyo quest is the correct one, but you can also look for the sphere names in the quest name and on page four of the quest details.
Now you have the materials for most upgrades. You can safely buy these from the GCP store:
- 5x Secret Proof [Low]
- 5x Secret Proof [Mid]
- 5x Secret Proof [High]
They upgrade each piece to HS level. Four of the pieces can then go to Lv7 HS: upgrade every piece except the head to maximise defence. You can go further by grinding more items, but it is not necessary.
Slot the upgraded Coordination armour with the Attack Up decorations (called Gallery Decorations in the guide, Chinese name 剛力珠) from the HR5 booster pack. Run the HR3 Gypceros quest that gives more (in Other Quests > Special Material Quests, High Rank Decoration [Attack Up]) and slot one extra. That pushes your Attack Up from Medium to Large. For more on decorations and skills, see Decorations and Skills.
Further upgrades
If you plan to spend more time at HR5 or are struggling, there are a few more upgrades.
Guts decorations
These stop you from being one-shot above certain health levels, and give some points in Status Res and Evasion.
- 15x raw gem (Chinese name 海棠原珠) from the HR4 Abiorugu "Guts Deco G and Abiorugu [High Rank]" quest in Other Quests > G Deco Quests (quest 76/90). The quest gives 4 of the material each run, and can roll extra stacks of 2 (common) or 4 (rare).
- 5x wyvern hide (literal translation of the Chinese name): a material from Khezu, Espinas or Gurenzeburu. Also buyable for 50 GCP.
- 5x wyvern scale (literal translation): a material from HR5 Rathian, Rathalos or Tigrex. Also buyable for 50 GCP.
Skill points: Guts +5, Evasion +5, Status Res +5. Two of them activate Guts, Status Halved, Evasion +1 and Guts, which stops you dying if you are above 90 health. Four of them (and more gallery decorations lost) activate Status Immunity, Evasion +2 and Great Guts, which lowers the health requirement to 70.
Fencing decorations
For a big damage upgrade, Blademasters can get Fencing +2 for a 1.20x multiplier on all their damage.
- Basic Fencing Decoration (Chinese name 劍技珠G): 15x raw gem (水柿原珠) from the HR2 Chameleos "Fencing Deco G and Chameleos [Low Rank]" quest in Other Quests > G Deco Quests (13/90), 5x Toa Tesukatora ice scales (HR5 Toa Tesukatora, buyable for 50 GCP) and 5x Toa Tesukatora shells (same source, also 50 GCP). Skill points: Fencing +5, Stamina +5, Weapon Handling +5.
- Stronger Fencing Decoration (避劍珠G): 15x raw gem (水柿原珠) from the HR5 Kushala "Evasion Deco G and Kushala [Gou]" quest (90/90), 5x Toa Tesukatora ice scales and 5x Toa Tesukatora shells (50 GCP each). Skill points: Evasion +5, Fencing +5, Sharpening +5. The Kushala is a full normal HR5 Kushala with a unique moveset adapted from HC Rusted and Normal Kushala.
It is highly recommended to buy the Toa Tesukatora materials before fighting it, so you can fight it with the skill. To get the widest skill spread, farm two of each of the decorations above: that grants Evasion +2, Fencing +2, Speed Sharpening, Weapon Handling, Guts and Status Halved.
If you play Great Sword or Hammer you may want to give up some decorations for Focus +2. The Stronger Fencing Decoration variant for this needs 15x raw gem (鱉甲原珠) from the same Kushala quest (90/90), 5x Gasurabazura hide (HR5 Gasurabazura, 50 GCP) and 5x Yama Kurai hide (HR5 Yama Kurai, 50 GCP). Skill points: Focus +4, Caring +5, Defense +5. They are only +4 in Focus and have mediocre extra skills. A better option may be any Gore Magala piece, which grants Focus +2 by itself, but then you need to farm Gore Magala.
Zerureusu weapon upgrades
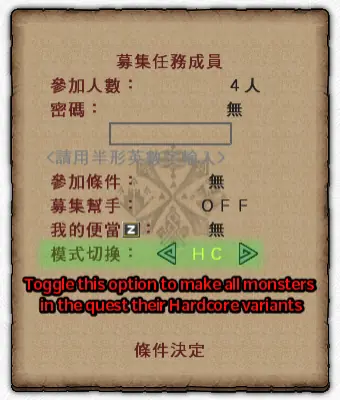
Upgrading Zerureusu weapons needs a Hardcore Carve and Weapon Souls.
- Hardcore carves: either work out which monster gives the HC carve you need and farm it with HC on (see Items and Materials for identifying carves), or do the fixed Zerureusu quest in Other Quests > Special Material Quests called Heavenly Storm Weapon Upgrade [Zerureusu] (quest 44/67), which gives all the various HC carves as rewards.
- Weapon Souls: find a quest with the Goushu (Gou) branding on a monster that has an HC variant (shown by a flame in the quest list). Toggle HC in the same section where you confirm players, before you post the quest.
Weapon souls are per weapon type. To make a Long Sword you must use a Long Sword on your hunts to get Long Sword Souls.
HR5 progression and monsters
Outside the key quests, Taikun Zamuza and HC Rusted Kushala Daora are still unique to HR5. It is worth fighting both with level-appropriate gear before you push to G Rank.
If you seriously struggle with anything in HR5 or higher, use the tools the game gives you, such as Halk Pots. A Halk Pot gives a flat 70% reduction in damage taken, so you can facetank almost anything except the hardest content. You can use only five a day, so use them as a crutch only when you need to. You get them from your Daily Quest (the last option on the pink store NPC) and from the Halk Area in your house.
Gou equipment
Gou equipment needs a few types of materials: Monster Proofs, Gou Elder Materials and Gou Monster Materials. As an example, a Voljang Long Sword needs:
| Amount | Material | How to get it |
|---|---|---|
| 5x | Voljang Proofs | Hunt HR5 Voljangs. You get single tickets, with chances of extras. |
| 5x | Elder Dragon Top Tails | Hunt certain HR5 Elders and carve their tails. Best rates on Kushala and Rukodiora. |
| 3x | Voljang Shells | Hunt HR5 Voljangs: carves, and breaking the tail and arms. |
| 3x | Voljang Fangs (the original labels this "Shells" again; the Chinese name means fang) | Hunt HR5 Voljangs: carves, and breaking the head. |
Armours follow the same logic, but the first craft always needs 1x Elder Dragon Gem. It comes specifically from Rukodiora breaks and tail carves, but is also on daily quests and several event quests. Look on page 4 of the Event Quests in Limited-Time Quests, or in Other Quests > Special Material Quests for the Gou armour production and upgrade quest. Monster Proofs are simply tickets you get for slaying the monster the weapon is made for.
Monster types
HR5 has three standard monster types: Goushu (Gou), and Henshu and Kishu. In a fight there is not much difference between them, but most Goushu monsters have equipment that upgrades to G Rank relevance, while most Henshu and Kishu do not.
HR5 also gives access to Exotic Monsters: monsters imported from newer mainline games, and some of the harder monsters at this rank. They give Exotic Weapons and Armours. Exotic Weapons give Speed Eating when used. Exotic Armours instantly give a skill if you have even one piece equipped. For example, a single piece of Nargacuga armour (such as just the chest) grants Evasion +2 without using skill slots or needing skill points. These Zenith skills cannot stack with themselves or with the skill they grant.
Hardcore monsters
If you spend a while at HR5 you will likely need Weapon Souls and Hardcore Carves for upgrades. You get them by fighting monsters in a rank band with the HC option on. HC turns a monster into its Hardcore variant, adds a new 5% carve item and gives a weapon soul based on the type of monster.
| Weapon Soul | Rank band |
|---|---|
| Low Soul | HR1-2 |
| Mid Soul | HR3-4 |
| High Soul | HR5, non-Gou |
| High Soul (the Gou version) | HR5, Gou |
For example, fighting an HR17 HC Volganos with Sword and Shield gives you an SnS Soul (Low). You can tell if a monster is Gou by looking at the bracketed part of the quest name, which reads "Goushu Quest".
Hunter Rank 6 and 7: the road to G Rank
Hunter Rank 6
At HR6 you get 6-star quests. They are notably harder than all earlier content and once were the absolute endgame (except Unknown, who was nerfed heavily). They fall into two groups: Repels and Slays. Repels are generally a joke compared with the true slay, but you do not need to do any slays to progress. Players who want an old-school HR6 experience need better upgrades and gear than this section covers.
The monsters with Supremacy variants are Pariapura, Unknown, Doragyurosu, Teostra and Odibatorasu. Volganos has Aruganosu and Goruganosu as its supremacy form: a pair of a Silver and a Gold monster that you must always fight as a duo. They use combo attacks with Ice and Thunder, and both must be reduced to 1 HP before either can die.
Supremacy monsters are mostly powerful and can make even G Rank players cart instantly if they are careless. They count as HC for HC armour regen and HC bonuses. Odibatorasu and Unknown are likely the easiest of them.
There is no Urgent at HR6. After you finish the 6-star key quests you are promoted straight to HR7. This gives you access to new SR Skills, and most players should immediately switch their main weapon to Affinity +20% instead of any other SR skill.
Hunter Rank 7 and the G Rank Urgent
Talk to the G Rank guildie, the girl with the umbrella, to post the G Rank Urgent. It is a Shantien repel. Collect some ballista shots from the box on the airship deck so you can fire the ballista binders later in the fight. The fight is fairly straightforward and has three phases.
After the repel, talk to the Guild Master a number of times and she starts you at G Rank, progresses your weapons to GSR and unlocks Extreme Style for all your weapons. Collect the bundle of free conquest materials from the purple entrance NPC now: it helps with the Hunter Guide-based progress at G Rank.
G Rank is free-form compared with Hunter Rank: everything except G Rank Exotics and Zeniths is available at once. Read Starting G Rank to avoid mistakes and learn what the rushed flow of HR1 to HR7 does not teach you. Then see G Rank.
One key point: the star rating of a quest actively reduces your defence at G Rank.
| Quest rating | Defence |
|---|---|
| 1-star quests | Full defence |
| 2-star quests | -150 |
| 3-star quests | -300 |
| 4-star quests | -450 |
| 5-star quests | -600 |
| 6-star quests | -750 |
| 7-star quests | -900 |
| 8-star and Zenith quests | -1050 |
At G Rank each weapon is ranked up individually for GSR. Each rank adds special skills and buffs, including an always-active +100 extra Attack for that weapon type. For Switch Axes and Tonfa you can start GSR as soon as you have crafted a single weapon of that type. All weapons get Extreme Style at GSR1 once you have made one of the weapon. A free Tonfa or Switch Axe F delivered straight to the box does not count towards that.
About your first quests
The weapon your character starts with is an HR5 Gou Weapon. For a proper experience, swap to the weapon you craft in the sequence above. There is very little difficulty until HR5: about the equivalent of Low Rank at best in the current version of MHF-Z.
After the tutorial (or ignoring it), talk to the Black Guildie to start your quests. The game uses the standard Key Quests into Urgent system of the mainline games. Key Quests always sort to the top of the quest list with a star icon. Choosing Hunter Quests on this NPC shows the star ratings. An unlocked Urgent is shown by a red exclamation mark above the NPC, and you choose Urgent Quests instead of a star rating.
Start with the Key Quests (star icon), then the first Urgent Quest, an Abiorugu. The guide also tells you to read the Detailed Weapon Information part of its Weapons section, because Frontier changed weapon movesets and some actions are not ones you would try by accident. See Weapons and Sigils.
The newbie server and subscriptions
The newbie server
On the official servers there was a fifth tab of servers with quests for new and returning players who wanted to catch up to G Rank. They give massive rewards for very little effort compared with normal quests. Access was time limited, shown by an icon, with the expiry date on your Guild Card. Make the most of them: they only give materials for things that are not hard to get otherwise and nothing beyond early G equipment. The GRP quests are especially worth grinding, so you are not locked out of GR100 or higher content when you want your first proper set.
When to subscribe (official servers)
On the official servers the trial lasted until HR4, so you only needed to subscribe from HR5. The guide's author recommended subscribing at HR4 at the latest, because HR4 opens the Pugi Farm. The Pugi Farm is directly needed to get Frontier's equivalent of Talismans or Charms, and you gain points from it daily only while subscribed. After subscribing you could restart the game, or choose the "update usage rights" option on the NPC in purple by the town entrance.
Payment on the official servers (points, MyCard codes, PayPal, the Item Mall and PSN) is not reproduced here. Nothing is paid for on our server, so none of this applies; see the note below.
Controls, menus and chat
Controller
Xbox One controllers on Windows 8 or 10 can cause input problems, and you may have to install other drivers by hand to use them. If you want the game to play like newer Monster Hunter games, set the layout to match the PSP or 3DS games: right analogue and D-pad for the camera. The default is like the PS2 games: right analogue for attacks, D-pad for the camera.
Keyboard and mouse
The default bindings are:
- W A S D for movement
- Q for item use
- R for block and similar actions
- The mouse for the camera
- Number keys, numpad or mouse buttons for attacks
Chat and gestures
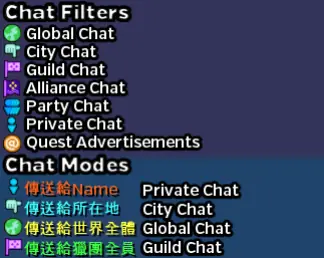
Open in-game chat with Insert (or by holding L2 and R2 on a controller). There are various filters and modes. Toggle the filters with the buttons at the top of the chat pane and change modes with Shift+Up/Down/Left/Right. To whisper a player, press Square while you are in front of them, or click their name in the chat window. For gestures, press # and then the F keys (6 opens the second page of gestures).
Chat commands
| Command | What it does |
|---|---|
@here | Posts a link to the server you are on that other players can click. |
@re | Inserts the number of free spots left on your quest. |
@dice | Posts the result of a dice roll from 1 to 100. |
@clr1 / @clr2 / @clrall / @clrpast | Clear the chat. |
@help | Shows all available commands. |
@a / @f / @p / @g / @u | Send a message to Global, Local, Party, Guild and Alliance chat, in that order. |
<act1> to <act24> | Perform a gesture. |
<act25> to <act48> | Perform any legendary gestures you bought with Tower Medals (in town only). |
Pasting into the game
If you paste text straight into the game, it may show a string of ???? instead of Chinese characters. To fix this, paste into an office suite, a browser or the Windows Character Map tool first. Microsoft Office, LibreOffice and Apache OpenOffice should all work. Any browser can work, with Edge giving the best results on Windows 10.
Menus
The Chat menu is where you get event items, purchased items and so on. The Options menu is shown above in Options worth changing now. Detailed guides to the other menus are on Menus and Town NPCs.
Daily routine
Quests and quest stamps
You take the main quests from the Guild Master when you start the game, and later from the Guild Girl in the black outfit. There are various quest types. On the official servers, without a subscription, the only quests you could take were those with cyan-coloured names. See Quests, Food Buffs and Bentos for the quest types.
After quests you get stamps. When you complete a card you get 1x 4,000 HRP ticket, and for a second card 3x 4,000 HRP tickets. This repeats in that pattern forever. Claim the tickets from the Guild Girl in the Blacksmith by choosing her last option. Taking one on a quest gives an extra 4,000 HRP when you finish it (not on gathering quests and similar). At this point in Frontier they are only useful for boosting your Partner's or Partnyaa's rank.
Things to do each day
- Daily: claim NP from the pink store guildie (last option), and do a daily quest after claiming it. The same option that gives you NP gives you the Daily Quest. On the official servers you needed a subscription for full NP and for Daily Quests. It reset at 12:00 AM Taiwan time.
- Daily: take a Halk Pot from the Halk / Partnyaa area.
- Daily: talk to the Guild Cat and get the daily gift (fourth item up from the bottom).
- After quests: use the Gook Farm if you like.
- Daily (HR3): collect points from the Pugi Farm girl, give her gifts and talk to her.
- After a quest (HR3, Pugi on the quest): check the dirt pile on the Pugi Farm for extra items.
- Daily (HR5): check the sign near the Blacksmith for which monsters give boosted numbers of SR weapon tickets and similar.
- Daily: check the purple guildie at the town entrance for event rewards. She does not always have items, so it is worth checking now and then.
AI companions
Like the portable titles, Frontier has AI companions who fill the role of other hunters in a quest. You control four types: your Halk, Partnyaa, Rasta and Partner. See House and AI Companions.
Daily Bonus
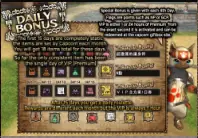
When you complete a Quest Stamp Card, or take your Daily Bonus (the first login each day, after midnight Taiwan time), you get 1 to 3 HRP tickets or a bonus item. These are sent to the Warehouse NPC in the Blacksmith. On the official servers the VIP part of the Daily Bonus, and possibly other rewards, went to the main website's Giftbox.
Log In Boost
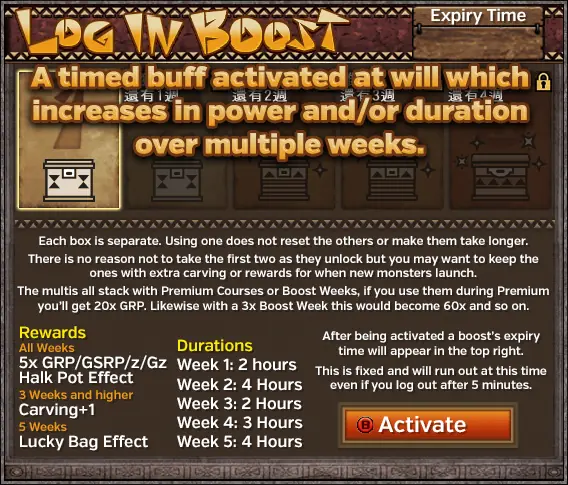
The Log In Boost is five separate boosts on individual timers: you gain the first weekly, the second every two weeks and so on. They are completely separate. Taking the weekly one does not reset the timer on the two-week or higher ones, so there is little reason not to use the lower-tier ones as you get them. You may want to keep the ones with extra carving or rewards for when new monsters launch. Once activated, a boost's expiry time is fixed and runs out even if you log out after 5 minutes. The multipliers also stack with Premium Courses: with a premium course the 5x GRP becomes 20x, and with a 3x Boost Week it would be 60x.
| Boost | Duration | Rewards |
|---|---|---|
| Week 1 | 2 hours | 5x GRP/GSRP/z/Gz and Halk Pot effect (all boosts) |
| Week 2 | 4 hours | Same as above |
| Week 3 | 2 hours | Same, plus Carving +1 (3 weeks and higher) |
| Week 4 | 3 hours | Same, plus Carving +1 |
| Week 5 | 4 hours | Same, plus Carving +1 and the Lucky Bag effect (5 weeks) |
Hunter Guide tasks
The Hunter Guide tasks (see above) stay worth doing all game. The guide says all of them are worth doing. Open the window with Shift+C or R1+R2.
Subscriptions, courses and paid items
Courses on the official servers
Subscriptions were time blocks: buying 30 days gave an expiry 30 days later. They stacked, and were not recurring. You did not lose progress when a subscription ended, you simply could not do content that needed one. There were two main kinds, the Main subscription and the Premium Courses.
- Core Subscription (30 Days). Not premium: required to play the game properly. It includes Hunter Life (all non-premium quests, needed to rank to HR5 and beyond and to take part in events) and EX (extra town functions including town boxes, extra store items such as Honey, Energy Drinks and Power Seeds, and many Caravan conveniences). Without it you were limited to HR4 content or lower, even at HR5 or maxed G Rank. It cost about 9.90 USD a month, with the first month half price (April 2017 rates). The NetCafe Course cost the same, so the guide told players to read what they were buying.
- Premium Course (1 Day pass or a 7 Day pass). Optional. The 1 Day pass included 24 hours of every course including the Core Subscription; the 7 Day pass included only the VIP parts, so you needed to already be subscribed to get the most from it.
Premium Course benefits
- PRP/HRP/GRP/SRP/GSRP x2
- Halk Pot effect (disabled in a few quests)
- 4x GCP on quests; 3x Caravan Points; 4x Caravan Gem colours
- Always +2 Hiden Materials, +5 on Priority Quests
- HC rates doubled (5% to 10% on HC, 2% to 4% GHC)
- An extra carve on everything carvable
- Most common materials on monsters can be rerolled (see below)
- 4 fixed partner carve slots and 4 extra Legendary Pugi carve slots
- Great Luck effect always active; free Diva Song buffs at max level
- Legendary Rasta and Pugi
- 1.25x damage dealt to monsters (disabled in some quests)
- Doubled Raviente G or Gg Gems; doubled Diva Defense and Caravan Festival Points
- Halks can only drop Skill Books
- Access to Premium Quests (mostly outdated)
Reroll: with Premium (and a certain Caravan Gem skill), when you carve the most common material from something there is a chance to reroll it. That removes the rerolled item from the pool and makes the lower-percentage items more common. It is not always a benefit if you actually want the most common carve; the guide estimates it at about 10% chance at best. The example is Monoblos: normally 50% for the most common shell, 46% for another shell, 3% and 2% for horns. After a reroll the common shell is removed and the numbers become 92%, 6% and 2%.
Legendary Rastas
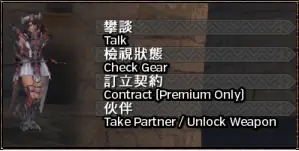
On a Premium Course, Legendary Rastas are powerful AI companions. They do not disappear like other AI companions, ignore monster attacks and attack infinitely. To get one, enter the bar, choose the 3rd option on them and confirm. You can only have one at a time but can swap freely while you have VIP. After contracting one, new options appear to control the items they use on quests (Throwing Knives, Powders, Flutes) and their weapons.
NetCafe Courses and N Points
- NetCafe Course (also called Super VIP or the Grace Course): all the Premium benefits with PRP/HRP/GRP/SRP/GSRP x5, 1,200 N Points, NetCafe store items, the NetCafe Item Booster Set and materials to make special headpieces. The booster set holds items you can otherwise only get as Guild Daily Rewards, such as Starving Wolf pots that push your maximum stamina down to 25. You can claim it per character slot.
- NetCafe Boost Course (Ultra VIP or the Grace Boost Course): everything above, plus 3,300 N Points, 25,000 fixed GRP on quests, two Legendary Rastas and Soul Resurgence. Soul Resurgence works like a Great Guts Ticket: once per quest it saves you and restores you to full health, but it can still fail against some multi-hit attacks such as Zinogre's nuke.
N Points are NetCafe Points, and pay for much of the game including HC and GHC carves and the exclusive materials for NetCafe gear. NetCafe gear is among the best in the game. You get 5 NP a day from your daily, and the Daily Bonus gives 200 N Points a month, with 15 rolls with a low chance of giving 400 NP extra for the last 15 or so days of a month. On the official servers the NetCafe Course gave 1,200 to 2,400 N Points, and events sometimes raised this to 3,600 and 4,800 (3,300 and 5,700 for the Boost Course in events). The Boost Course gave 6 NP per TWD compared with 4 NP per TWD.
| What | NP price |
|---|---|
| Consumables | 1 - 4 NP |
| Gathered materials | 1 - 26 NP |
| Standard carves | 9 - 80 NP |
| G3% carves | 100 NP |
| HC carves | 100 - 170 NP |
| GHC carves | 200 NP |
| N Weapon materials | 100 NP |
| N Armour materials | 500 NP |
An N Weapon needs up to 835 material items to max out. N Armour needs 12 items per piece and 60 per set. A single armour piece costs about 6,000 NP and a full set 30,000. Making an N Point weapon usable took about 52,000 N Points, and about 73,600 to reach Lv49 G Finesse; the final upgrade alone costs 9,900.
Pugi outfits and cuffs
A Pugi Cuff plus a Pugi Outfit is the Frontier equivalent of a Talisman or Charm: cuffs are like decorations that slot into the outfits to give skill points. You can get a Pugi after HR50 from the Pugi Farm (see House and AI Companions). G Cuffs need you to be GR50 and to have bought a G Cuff License for 60P, so 120P in total on the official servers. Premium Pugi Cuffs need a Premium Outfit. The guide lists the G Aid Package as giving 60P in one place and 90P in another, and does not recommend buying it. For Pugi outfits and cuffs in practice, see Starting G Rank.
- Premium Pugi Cuff I: lets you craft 1x PA, 2x PB and 5x PC cuffs from the first Pugi Cuff package.
- Premium Pugi Cuff II: lets you craft 1x II PA, 2x II PB and 5x II PC cuffs.
- Premium Pugi G Cuffs: lets you craft 1x PA, 2x PB and 5x PC G Rank level cuffs. There is only one set of G Rank tickets, so you can craft any cuff in the G Rank Premium sections.
Premium kits
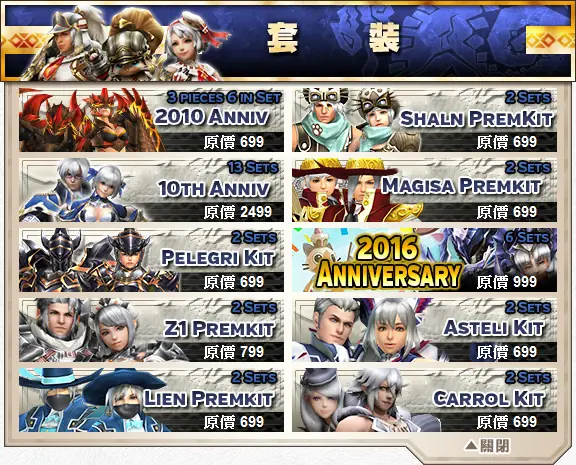
Premium Kits are sets of equipment you can only get by buying the kit. Most kits give the materials for 2 armour sets, one Gunner and one Blademaster. Kits do not include materials to upgrade the gear. G Rank upgrades need G Tickets, which some kits include and some do not (no kit includes enough to push everything to G Rank). G Tickets can also be bought, or got by exchanging the tickets most premium kits give at the Combiner. The weapons in kits are generally only suitable for early G Rank. G Rank is still needed to craft kit Tonfas. All Zenith-level premium weapons and armour pieces need GR200 Zenith Hypnoc Materials, which are common and needed in small amounts but act as a barrier until GR200.
The guide's recommendation, from best to worst: 10th Anniversary Kits >>> Lien > Pelegri Heads = Duremudira Sets >> Carrol >> Asteli = Z1 > Magisa > Pelegri Others > Shaln. The 10th Anniversary kit contains 13 sets with relevant meta skills and is still used by top time-attack players. The Pelegri headpieces suit Gunlance and Great Sword only (and Gore pieces and the 10th Anniversary sets reduce the Great Sword case). Magisa is only for the Hunter's Road, to get All Res UP +20. The ratings use the ZP versions of the sets; the GP versions of Asteli, Carrol and Lien are lacking.
Other paid items
- Item Packs / Aid Packages: consumable packages that cost too much to be sensible. The exception is the G Aid Package, which has 90P: enough for a G Pugi Cuff License at G Rank if you lack points (or convertible to 9,000 GCP).
- Restyle Points: a single premium restyle point changes Voice, Face or Inner clothing at 1 point each. Three are needed to change a character or Partner completely. Redeem them at the Cat Hairdresser (second option), which also previews voices and faces.
- Character slots: you can have up to three characters on one account, of any genders. The Post Felyne on the farm moves any standard box item between characters, but equipment cannot be transferred. G Rank items need G Rank to be removed from the box, but all decorations, including G Rank ones, can be extracted at any rank, which lets you become very overpowered while powering through early ranks.
- Premium Sigil Tickets: paid sigils with Attack (9-30), Elemental (12-30), Crit Up (6-30), Elder Dragon Attack (12-45), Dowsing (15-45) or Money Expert (6-15). The low end is more common, and perfect rolls need three rolls of 5-20% chance each. They are worse than Heavenly Conquest sigils but only roll the listed types. See Sigils.
Lotteries (gacha) and Frontier Points
Lotteries (Gachapon) use coins to gamble for items. Odds vary a lot, and most lotteries mainly offer armour suited to the meta of the time. You can also roll consumables (Superior Tickets for quests with preset rewards, special G2 pots that fill your HP bar), weapon materials and N Point items (usually N Blocks, used for the first upgrades of some NetCafe gear). Weapons are mostly bad, except special Evolution weapon lotteries, which are very good but need as many Raviente Gems to max as standard ones, which means hundreds of hours of grind.
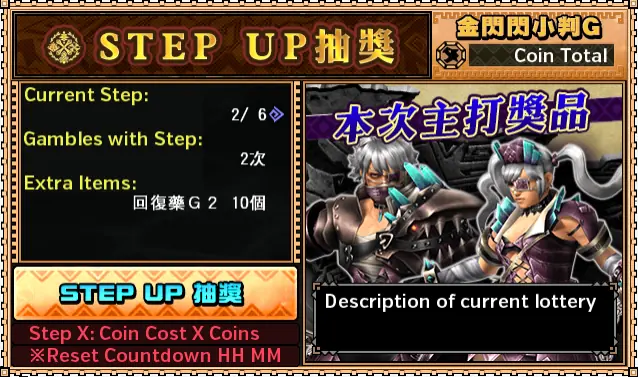
There are two types: the Standard lottery and the Step Up (Lottery G). Both use the same coins, sold in packs of 1 to 170. Collaboration lotteries (Madoka, Evangelion and similar) use their own coins, but internal Capcom collaborations (such as Breath of Fire) used standard coins. Tickets such as the Lottery G Ticket and the two Evangelion tickets are redeemed at the lottery cat in the Blacksmith.
- Standard lottery: coins only work on their own lottery. Talk to the Lottery Cat and choose Standard Lottery. Press the detail button (or Z on keyboard) to see each prize's odds.
- Step Up lottery: a linear series of steps that resets every day at 12:00 (Taiwan time). Each step gives a different number of rolls and different extra rewards. Going higher than Step 2 always starts wasting coins, and doing Step 3 across several days gets more rolls than higher steps. Newer lotteries sometimes tie extra armour tickets to Step 6; the guide says that is nearly the only time going that high is worth it, and that these pieces cost between 60 and 200 USD each. Claim rewards in Rewards Storage, which shows a red exclamation mark when it holds items. Step 6 uses 80 coins at the typical rolls-to-coins ratio.
- Coins are account wide and visible on any character's Guild Card. Each character has its own Step Up steps, so with several characters you can do every step up to three times without waiting for a reset. Doing Steps 1 and 2 on several characters is better than pushing one character to Step 6 repeatedly.
- A Lucky Box lottery works differently: each prize is removed as you roll it, so you can guarantee every prize by paying for all of the rolls.
Frontier Points
Frontier Points (FP) come from higher Step Up lottery steps and from cashing in tickets for premium equipment. Weapon Tickets convert into 1 FP each and Armour Tickets into 3 FP. The weapons you can buy are mostly poor, so converting them is fine. Do not convert Armour Tickets if you might want to use them. Spend FP at Exchange Points (Obtain Points).
| Item | FP cost |
|---|---|
| Yukumo Exotic Armour ticket (Great Luck) | 500 FP |
| Rhopessa Exotic Armour ticket (Status Attack Up) | 500 FP |
| Guild Exotic Armour ticket (Wide Area +3) | 500 FP |
| Bnahabra Violin (Hunting Horn) ticket | 300 FP |
| Cha-Cha and Kayamba (Dual Swords) ticket | 300 FP |
| Shark Warning (Lance) ticket | 300 FP |
| Felyne Blowgun (Light Bowgun) ticket | 300 FP |
| Tri (Sword and Shield) ticket | 300 FP |
| Gaiasp Hammer ticket | 300 FP |
| Corn Gunlance ticket | 300 FP |
| Arca Raptora (Bow) ticket | 300 FP |
| Windeater (Long Sword) ticket | 300 FP |
| Great Meteor (Heavy Bowgun) ticket | 300 FP |
| Vulcanis (Great Sword) ticket | 300 FP |
| Hairtail's Hairblade ticket | 300 FP |
| FP Sigil Ticket | 10 FP |
| 2x Raviente 100 G Gem | 1 FP |
FP Sigils seem biased to roll individual weapon tech-change and boost skills, with a 75% chance of attack, affinity or elemental rolls. A Lv100 HR5 weapon needs 17,528 Raviente gems; this does not cover G Rank upgrades and the gems cannot be used for them, so spending FP on these is mostly not worth it. A single ticket maxes out any one Exotic piece, so a full set costs 2,500 FP. Despite how Great Luck sounds, the armour is not very practical for skill points: Rhopessa has niches in status sets, and the Guild set suits support sets but wastes slots. The guide also says FP appear to have been retired for new equipment, with new Lottery Exotics given for multiple Step 6 rolls instead.
Japanese-server tips
On the Japanese server, you follow the same flow as the Taiwanese one up to GR1. Japan has a couple of even easier gearing options that make the Hunter Guide tasks almost pointless.
Easy early gear
Do the Event Silver Rathalos quest, the first event quest in the first section (a G 7-star event quest named after Silver Rathalos). It gives at least 50x Mercury Books per run, which make a full set of Dounru GX. All Dounru pieces start at GX level when crafted, so upgrading is optional.
For easy decorations, go to the Road with a carry (or facetank the easier monsters). The Road has strong Furious decorations that need one floor of progress and cost 500 points:
| 500 RP decoration | Skills |
|---|---|
| G Lion Blood Jewel | Furious +2, Vampirism +3, Vigorous +2 |
| G Lion Thunder Jewel | Furious +2, Thunder Clad +2, Flash Conversion +2 |
| G Lion Strike Jewel | Furious +2, Stylish Assault +2, Strong Attack +2 |
| G Lion Fierce Jewel | Furious +2, Rush +2, Drawing Arts +3 |
| G Lion Sword Jewel | Furious +2, Sword God +2, Issen +2 |
| G Lion Shot Jewel | Furious +2, Steady Hand +2, Issen +2 |
The decoration names above are translations of the Japanese names. A solid base: 5x Blood, 1x Thunder and 1x Fierce, which leaves room for your free Hiden decorations. See Hunter's Road.
Freebies
- Determination decorations: once a day you can roll a gacha for Raviente decorations: 50% for 1x Basic Raviente Decoration, 45% for 2x Violent or Berserk Raviente Decorations, 5% for 3x Extreme Raviente Decorations. Talk to the Gacha Cat in the Blacksmith and choose the Normal lottery. It costs 4,000 HRP tickets (from quests, or in huge quantities from the Hunter Guide). With very good luck it takes 2 days to get Determination.
- True Hiden decorations: trade 50k Gzeny cheques at the Gacha Cat for True Hiden decorations. Go to Box Lottery, then Event Box Lottery, then True Hiden Box Lottery. This is a Lucky Box style lottery: keep rolling and you get every variant of every True Hiden decoration.
- Hiden cuffs: claim the materials for up to four Hiden cuffs by reaching G Rank requirements or owning certain gear (see below).
| Requirement | Reward |
|---|---|
| Reach GR500 | Kill Dyuras or Gogomoas |
| Own the Prototype Magnet Spike (alpha) | Bone Magnet Spike: unlock the weapon type and buy the prototype materials at the General Store |
| Own a Ketsui Series Switch Axe [X] or Tonfa [X] | GR200 Hypnoc in Bamboo Forest with Beak Break |
You create the cuffs at the Combiner. You hand in the Hiden Soul, Ribbon and Merit Stones in their own quests with the HR and GR NPCs. Depending on how you spend the materials, you can make either 7x G or True Hiden cuffs or 50x Standard Hiden cuffs. A good balance is 6 G or True and 8 Standard to cover all weapon classes. This table in the original was only partly readable, so check the details in game.
The ZZ update: Magnet Spike, Zenith Sigils, GR999 and more
The ZZ update adds a new weapon class, new sigil types, a new monster mode and raises the G Rank limit to GR999. It was released like a "Z3": no new Exotics were added. The original guide kept a translated changelog, which we do not link.
Magnet Spike
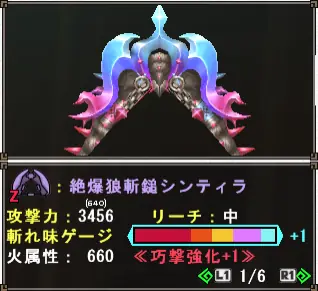
Magnet Spikes have two modes you can morph between: cutting and impact. They deal the damage type they are named for and use those hitboxes. The name comes from being Magnets in a game full of Spikes; they are not spikes.
Unlocking it
A short story unlocks the weapon with a number of solo-only quests. At the end you unlock Magnet Spikes and get the materials for a Prototype MS for both you and your partner. The quests are not very hard, but being G Rank you will want at least your first free GR set. Short guide:
- Talk to the smithy and ignore what he says.
- Enter the legendary bar and talk to the new NPC, Graham.
- Go out to the entrance and talk to the cat you have ignored many times.
- Go back in, talk to Graham and do the G Rank Gougarfs in the top section.
- Talk to Graham, then the Combiner in the town square.
- Hunt the G Rank Rebidora in the same section as the Gougarfs.
- Go back and talk to Graham, the Smith, Graham again and the Road NPC.
- Post the new G Rukodiora in the topmost section and kill it.
- Talk to Graham after returning, then the Smith.
Stats
Magnet Spikes have no phials and no length. Their attack multiplier is 5.4: divide the displayed attack by 5.4 and round up to get the true raw.
Using them

- Both modes can be swapped to and unsheathed into at any time from idle, and neither depends on a meter. From any horizontal attack in one mode you can swap into a horizontal in the other.
- Cutting mode has fast attacks and evasions like Dual Swords. Impact mode is slower with heavy single attacks, but still has quick swipes and a very fast charge.
- In either mode you can toggle aiming mode. It lets you shoot a Magnetic Marker at a monster, or attract towards or repel away from a placed marker.
- Attract or repel depends on distance. Too close allows only Repel (blue). Too far allows no action (white). The right distance allows Attract (red). Attraction chases a monster as long as you follow a straight path towards it and can be cancelled into an evade or a powerful falling attack.
- Both modes charge as you use them. When the icon turns red you can magnetise the weapon: all attacks get 1.1x, like a power phial, with extra hits on some attacks, for 80 seconds. After it ends you cannot gain progress towards it again for a short time. Both modes charge separately and can stay at red charge indefinitely.
- Both modes have a gauge used for evasions, attracting, repelling and the Magnetic Pin attack. It recharges over time and while attacking. Each action uses a single bar.
Magnetic Pin
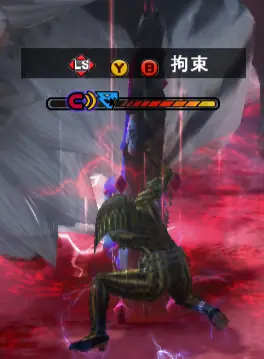
The pin builds up like a normal status effect: hit the monster enough and a moving magnetism effect on its body shows it is ready to be pinned. You can pin out of Magnetic Double Slash or Double Swipe. You leap and slam your Magnet Spike down, which pins the monster and starts a QTE that holds it in place until you either perform the pin or fail the QTE.
The QTE shows which directions and buttons to mash. If you mash well enough, the monster icon's face turns red and you can perform a Pin Finisher. It has an incredibly high motion value, makes the monster fall over, and holds it for a bit longer because the finisher animation is long. The finisher targets the spot where your magnetic marker is attached, so you can choose the best hitbox or the part you want to break. On tails it deals cutting damage but can only reduce a tail to 1 HP, so any single cutting hit then severs it.
Moveset
The flow chart below is the official one from Capcom's manual. It is mostly complete but misses a few less obvious combos, such as the Magnetic Assault Leap in cutting mode flowing into Upslash and then Vertical 2, which allows a Finishing Slash earlier than otherwise possible.
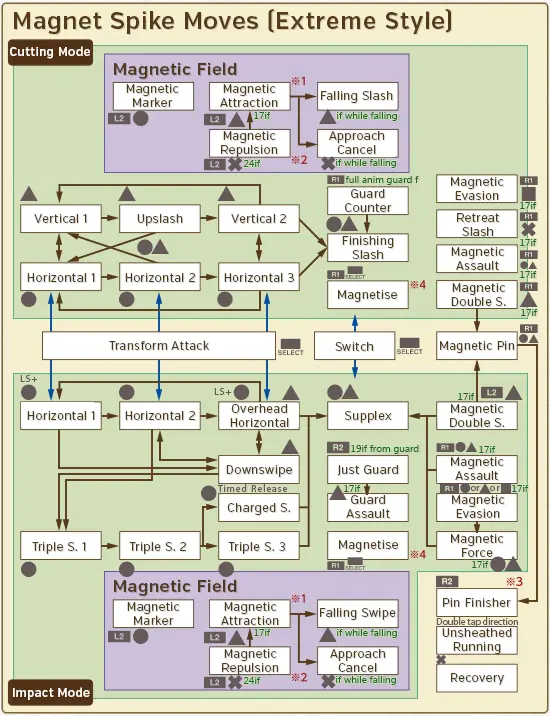
Motion values. In impact mode, the number in brackets is the damage part that is not cutting. "(iframes)" marks a move with invincibility frames.
| Cutting mode move | Motion value |
|---|---|
| Unsheathe Vertical | 61 |
| Vertical 1 | 43 |
| Upslash | 35 |
| Vertical 2 | 46 |
| Horizontal 1 | 56 |
| Horizontal 2 | 46 |
| Horizontal 3 | 64 |
| Finishing Slash | 120 |
| Finishing Slash (Magnetised) | 120, then 10x3 |
| Guard Counter | 30 |
| Guard Counter (Success) | 30, then 80 |
| Magnetic Double Slash (iframes) | 44, then 54 |
| Magnetic Evade into Upslash | 55 |
| Retreat Slash (iframes) | 20, then 20 |
| Magnetic Assault (Leap) (iframes) | 80 |
| Falling Downslash (iframes) | 200 |
| Magnetic Pin | 1 |
| Magnetic Pin Finisher | 600 |
| Impact mode move | Motion value (non-cutting part) |
|---|---|
| Horizontal 1 | 44 (30) |
| Horizontal 2 | 53 (30) |
| Overhead Horizontal | 100 (45) |
| Down Swipe | 46 (25) |
| Triple Strike 1 | 51 (10) |
| Triple Strike 2 | 58 (20) |
| Triple Strike 3 | 130 (50) |
| Charged Strike | 338 (190) |
| Charged Strike (C.UP+1) | 363 (190) |
| Charged Strike (C.UP+2) | 373 (190) |
| Supplex | 96, then 121 (50, then 65) |
| Guard Assault (iframes) | 73, then 90 (35, then 45) |
| Magnetic Double Swipe (iframes) | 42, then 52 (30, then 35) |
| Magnetic Shock (Whiff) | 75 (30) |
| Magnetic Shock (Iframed) | 125, then 5x3 (60, then 5x3) |
| Magnetic Assault (Leap) (iframes) | 40, then 50 (35, then 35) |
| Falling Swings (iframes) | 25, then 80, then 120 (20, then 35, then 75) |
| Magnetic Pin | 1 |
| Magnetic Pin Finisher | 600 |
Zenith Sigils
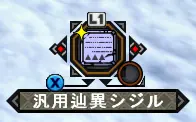
Zenith Sigils, new in ZZ, are used actively for a base duration of 15 to 25 seconds, rather than being always-on passives like standard Sigils. There are two kinds: Standard and AoE Zenith Sigils. They drop from doing any rank of Zenith. The overall drop rate is not known, but it is at the low end and probably follows the rare carve reward rate for each Zenith tier (1%, 3%, 5%, 7%). On your item bar a new sigil-shaped item appears. You can use it any time you are not mid-action, with the use button. Using one makes you do the Smoke Bomb animation and applies the buffs. More Sigil information is in Sigils.
Standard Zenith Sigils
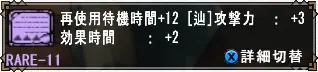
A Standard Zenith Sigil gives you a number of buffs. The duration is a base of 15 seconds plus the sigil's duration value (for example +4 duration is 19 seconds). The recharge is a base of 2 minutes (120 seconds) minus the sigil's value (for example +14 recharge is 1:46, or 106 seconds). The sigil values do not map directly to the buffs and are far stronger than low rolls look: +15 Attack is really +330 attack. With good management a decent roll ends up as good as a top roll on a normal sigil.
Area of Effect Sigils
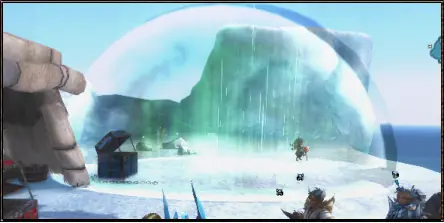
An AoE Zenith Sigil makes a dome on the ground where you use it, for a set duration of about 25 seconds and a recharge of 2 minutes. It can buff Attack, Elemental, Status, All Resistance, Affinity and Stun output, and give passive healing. You can roll several buff types on one sigil, and the dome alternates between colours to show which buffs are active. The values do not match the buff directly either: a sigil with +1 elemental and +14 to Resistances actually gives Elemental +100 and All Resistances +28. Higher rolls give much more.
GR999 and Unlimited Mode
GR999 is the new maximum rank, reached with a total of 13,716,950 GRP. If you are already GR899, you need 2,331,451 GRP. You can stack many buffs to multiply the gain: Diva Song, Log In Boost, Hardcore Mode and any Premium Courses. A GRP quest against a Gogomoa for 8,000 GRP shipped with ZZ. Reaching GR999 adds box pages, SR food at the standard Food NPC and old Event Armours at the Warehouse Manager NPC in the Blacksmith. These sets are of little use unless you rushed to GR999 on premium without building a real set.
Unlimited Mode (UL)
GR999 unlocks Unlimited Mode, a per-quest toggle on some monsters that works much like Hardcore. It sets the monster's Attack, Health and similar values to around those of 3-4 star Zenith. Monsters with a hardcore variant use their hardcore moveset; monsters that never had one (such as Pokaradon) use their base moveset. Quests you can toggle are marked with a Blue Flame icon and cover all standard G star ratings. There are no Burst, Origin or Exotic monsters in UL mode.
| Star rating | UL monsters |
|---|---|
| 1 star | Pokaradon, Yian Kut-Ku, Bulldrome, Breeding Season Hypnoc |
| 2 stars | Farunokku, Blue Yian-Kut Ku, Gypceros, Cephadrome, Congalala |
| 3 stars | Purple Gypceros, Gogomoa, Shogun Ceantaur, Basarios |
| 4 stars | Green Plesioth, Black Diablos, Red Khezu, Pink Rathian |
| 5 stars | Abiorugu, Berukyurosu, Azure Rathalos, Gougarfs |
| 6 stars | Volganos, Red Volganos, Kuarusepusu, Black Gravios |
| 7 stars | Rebidiora, Akura Jebia, Akantor, Yian Garuga, Espinas, Gurenzeburu, Dyuragaua, Forokururu, Poborubarumu |
With a proper ZX set, expect the harder monsters to be able to one-shot you with some attacks from 150 health, and with most attacks if you use Adrenaline.
UL rewards. The main reward is the strong new per-weapon-type Up Sigils, such as Dual Swords Up. This skill gives its value to Attack, Affinity and Elemental at once: a Dual Swords Up +10 sigil gives 10 true raw, 10% affinity and 100 elemental. Since they can roll two other values at the normal range (up to +15), one sigil can have up to 75 effective points, which is very good for anyone not filling every weapon slot with decorations.
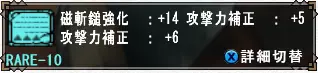
The materials for these sigils drop at a low rate, but three featured monsters each day give boosted rates. The items are unique per weapon, so this is a long-term goal. UL monsters also give doubled Transmog Lotto points and Hiden Souls, Ribbons and Merits, so they are a good source of Hiden materials. Sigil details are in Sigils.
GR999 armour store
Reaching GR999 opens an armour store of old event sets at GX level. The set names are listed by their look; the original shows Japanese and Chinese names only.
- Beginner G Set; White Nun; Black Nun; Purple Nun
- Gray and Green Samurai; Green Demon Blademaster; Green Demon Gunner
- Butler / Maid Guildie; 2015 Event Armour
- Red Silver Abomination; Green Purple Abomination
- White Indian Set; Pink Indian Set; Pure White Indian
- Yellow Kimono (Blademaster and Gunner)
- Purple G Starter Set; 2015 Swimsuit; 2016 Swimsuit; Pink Azure Event Set
- Viking Event; Eruki Robot Helm; Black Burukku; Red Burukku
- Unreleased Purple Set; Rave Event; Dounru
New ZZ monsters
Bogabadorumu
A blast monster that comes with the new skill Furious and the new Zenith skill Rush Up. Cuffs for both use his materials, not any standard G monster's. His weapons have Blast Element, which post-rework still does not seem very good, but they have Rush Up: free infinite stamina and +70 true on top of the usual Rush buffs, which makes them good Raw choices. He has Ultra Quake and Roar, Blast, and can stun you into an on-your-knees stance even with stun immunity. His Zenith Parts are his forelegs, which only become Zenith parts midway through the fight; both must be broken. His tail can be cut and his head and back can be broken.
Zenith Gravios
Comes with the new skill Trained, a hybrid skill with Focus, Martial Arts and the equivalent of Caring +3. Its Zenith Part is the chest. The head can also be broken and the tail severed. It can inflict Extreme Fireblight and has Ultra Roar and Ultra Quake. The weapons are Fire and Blast with different Zenith skills per weapon class; they are not very good. The armour is mediocre, with points in Trained but needing more pieces than is reasonable to reach +2.
Zenith Baruragaru
Can pin you, cause sharpness loss and defence down, cause extreme water blight and has an Extreme level Roar. Its Zenith Part is the head, extending to the tongue. The armour is mostly mediocre, with standouts in the Blademaster Chest (+10 Charge Attack Up, +6 Trained) and the Gunner Helmet (+10 Mounting). More about Zenith monsters is on Zenith.
New and changed skills
See also Skills.
| Skill | Points | What it does |
|---|---|---|
| Trained (new) | 10 or 15 | Grants Focus and Martial Arts at levels equal to the skill level, and stops you launching players with attacks. |
| Furious (new) | 10 | Raises Attack, Affinity, Elemental and Status as you evade, attack and perfect guard. Needs both evades and attacks to advance in stages, and resets when you take damage. At the maximum level of 3: Attack +180, Elemental 1.20x, Status 1.20x, Affinity +40%. |
| Magnet Spike Tech [Magnetic Star] (new) | 30 | Attack Up, ESP, Ultra Earplugs. Successful evasive motions boost attack and gauge recovery. Movement speed up. The magnetic target marker does not disappear. |
| Strong Attack +6 (changed) | 50 | 200 true raw. |
| Sword God +3 (changed) | 25 | Includes Sharpening Artisan. |
| Steady Hand +2 (changed) | 20 | Adds the effect of Precision +2 or Critical Shot's +5 hitbox bonus. Works on both Bowguns and Bows. |
| Gentle Shot +3 (changed) | 20 (was 30) | Points required lowered. |
| Mounting +3 (changed) | 20 (was 30) | Points required lowered. |
| Mounting +2 (changed) | 15 (was 20) | Points required lowered. |
| Recoil +3 (changed) | 20 total | Lowered to 20 points in total. |
| Exploit Weakness (changed) | 30 (was 35) | The requirement for the raw hitbox buff is lowered. |
| Auto-Guard (changed) | - | No longer activates Reflect, Obscurity or Rush. Does not fill the lance guard gauge. |
PZ cuffs
ZZ adds PZ cuffs: upgraded versions of the SZ cuffs, with a single Zenith Skill and up to 5 points in a meta skill. Unlike earlier Premium Cuffs they are only in a Lucky Box style gacha that costs 30 coins up front and rolls for 10 cuffs. You cannot roll duplicates, since each cuff is removed as you roll it, so 150 coins (about 90 USD) guarantees every cuff. There are a fair number of useful cuffs but more mediocre and brick rolls, so you could easily spend 90 coins before seeing one you want. Five series of PZ cuffs have launched since ZZ. Using a PZ cuff is always the best choice, especially with Hiden Cuffs launching in the same update cycle.
New Tower weapons
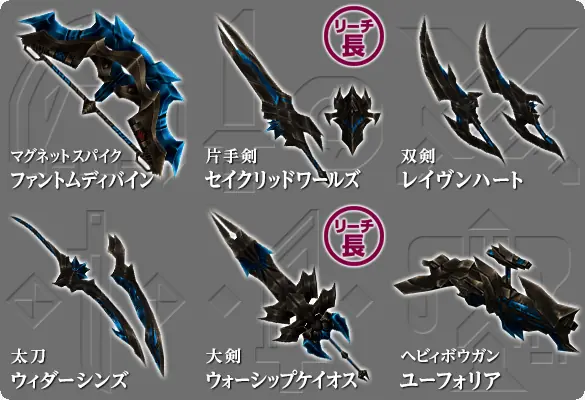
New Tower weapons arrived a couple of weeks into the ZZ update, just before Zenith Gravios. They are extremely strong, with very high potential Raw, Element and Status values. They only have Tower Sigil Slots (no decorations), but their stats outclass any weapon that is not a Raviente or Road weapon, and they are best in slot outside a handful of Raviente weapons, even for the hardest content. You can craft one weapon a week, and upgrade them with standard tower gems from the Road Store plus a small number of Zenith Materials. They remove almost any reason to grind normal weapons: all new Zenith monsters have launched with bricked weapons since this series. Their one downside: Tower weapons do not have the Zenith Partbreaker effect.
ZZ Update 1
- New monsters: Zenith Taikun Zamuza, Zenith Harudomerugu, Musou Zerureusu. The weapons from the new Zeniths are useless on day 0 because of Blue Tower Weapons, but the armour pieces are good.
- New Zenith skill Ceaseless Up: relaxes hit requirements, makes the skill's buff stages go down one at a time instead of resetting to zero, and adds a third stage with more Affinity and Crit Multiplier.
- New Road and Tower weapons: GS and Hammer get Very Long versions of the Blue Tower series, and Lance gets a Long version (more usable than the very long one). Crimson Demon Road weapons are added, one weekly from the Road Store; they are globally pretty bad, worse than the Burning Zero Series and the Festival Chroma Series.
- Other changes: UL Mode adds Zenaserisu, White Hypnoc, White Espinas, Silver Rathalos and Gold Rathian. Legendary Rastas completely ignore all Zenith Blights, Ultra Roars, Wind and Quake. New options rebind the interact-with-NPC key and let you always run in town. The Hunter's Road has new equipment and lets you earn medals more easily, including a new skill for extras. Diva Defense has new weapons, including a Magnet Spike. Weekend Carnival has new transmog masks.
New Hiden Cuffs
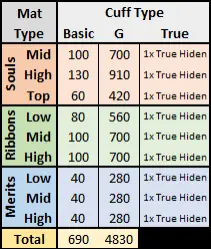
New cuffs give Hiden points and stop the Hiden using a skill slot. They are separate from normal skill cuffs and take no actual outfit slots. You can equip a single Hiden cuff alongside any other cuff. There are three power levels:
- Basic Cuffs: +6 points in a Hiden and the Hiden does not use a skill slot.
- G Cuffs: +12 points in a Hiden and the Hiden does not use a skill slot.
- True Cuffs: +12 points in a Hiden, +2 points in a Meta Skill and the Hiden does not use a skill slot.
The first two levels use standard Hiden materials; you cannot exchange HL Hiden tickets for them. A True cuff needs a single True Hiden decoration. There are 8 versions of these cuffs for each weapon type, and any True Hiden decoration can make any of them. The guide says it cannot be understated how enabling these are for building sets, and how much power creep they bring.
Zenith nerfs
This update nerfs all GR200 to GR400 Zeniths considerably, which changes the difficulty of entry-level Zeniths a lot.
- GR200 monsters: standardised to about 86% of their original health and 80% or less of their attack.
- GR400 monsters: standardised to about 80% of their original health and 90% or less of their attack.
- At both GR200 and GR400, weaker outliers such as Tigrex only lost about 93% of their health but took the same attack cut as the others.
As a result, some standard G Rank monsters now have more HP and Attack than their "Zenith" versions, and a GR100 Shagaru Magala has more HP than every GR200 Zenith except Taikun. On the plus side, you can ignore the old non-Zenith content more easily. The guide's last words on the update: Monster Hunter Frontier as a whole was being shut down on the official servers.
Written from the Monster Hunter Frontier guide by Fist (as saved in January 2022). That guide describes Capcom's old official servers; we reworded it, laid it out for Hunsterverse and added the "On Hunsterverse" notes (all of them: Hunsterverse vs the old servers). The pictures are from the original guide.