
Frontier guide · Gear and items · 8 of 18
Armour, Decorations and Skills
How to craft and upgrade armour, what each armour family does, how to unlock armour colours and transmog, and a full reference of decorations and armour skills.
Making armour
When you have a Partner, the Blacksmith first asks whether you are making equipment for them or for yourself. You can tell which you chose at once: your Partner takes your place on screen when you craft for them.
At the Blacksmith, open the Armour section and pick the kind of armour to make. The main Blacksmith menu is Weapons, Armour, Decorations and Pugi Cuffs. Menu names may differ slightly in our client.
| Menu | Entries |
|---|---|
| Armour Crafting | Standard Armour, Upgrade Armour, Transmog, Gou Armour, G Rank Armour, Convert G Armour to Deco, Exotic Armour, Zenith Armour, Special Armour, Premium and GCP Armour |
| Special Armours | Guild and Festival Armour, Event Armour, SP Armour, SR and Hiden Armour |
| Premium Armours | Prem Kit Armour 1, Prem Kit Armour 2, Lottery Armour, NetCafe Armour, HL/EX Armour, GCP Armour, Event/Promo Armour, Exotic Armour |
| Armour pieces | Helmet, Chest, Arms, Waist, Legs |
Upgrading armour
All armour made before G Rank works like the current mainline games. You craft the base armour from materials, then upgrade it with Armour Spheres. At level 7 you may be able to move to a second tier of the same armour (F, FX, HS and so on). That tier uses items again, but levels 2 to 6 always use Armour Spheres. You find Armour Spheres by hunting or by mining.
| Sphere | GCP / NP / Festi Points | Mining | Quest rewards |
|---|---|---|---|
| Armour Sphere | 30 / 6 / 20 | HR1-2 | HR1-2 quests |
| Armour Sphere+ | 40 / 8 / 30 | HR1-2 | HR1-2 quests |
| Adv Armour Sphere | 50 / 10 / 35 | HR3-4 | HR3-4 quests |
| Hard Armour Sphere | 60 / 12 / 40 | HR3-4 | HR3-4 quests |
| Heavy Armour Sphere | 70 / 14 / 50 | HR5 / G Rank | HR5 standard quests |
| True Armour Sphere | 80 / 16 / 55 | HR5 / G Rank | HR5 standard quests |
| Strong Armour Sphere | 90 / 18 / 65 | Rewards only | HR5 Gou or Exotic quests, HR6 Supremacy quests |
| Divine Armour Sphere | 100 / 20 / 70 | Rewards only | HR5 Gou or Exotic quests, HR6 Supremacy quests |
G Rank armour uses materials for every upgrade. There are no Armour Spheres to make it easier.
Armour stats and skills
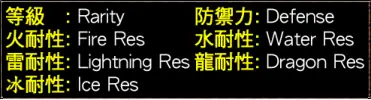
Each piece shows its rarity, defense and the five elemental resistances (fire, water, thunder, ice, dragon).
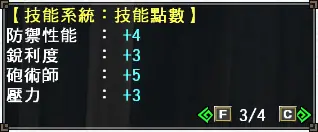
To see a piece's skills while crafting, press Square on a PS controller or Z on a keyboard, then change pages with L1/R1 or F/C. The skills are on about the third page. The number of decoration slots is on the second page of an armour or weapon's information.
To work out what a skill tree does, look it up in the skill reference below. The original guide's author also made a Skill Hunter tool that identified most skills from a screenshot, which we do not link.
Armour types
Standard armour
Standard armour is the same as in the mainline games, except that you both craft and upgrade it with materials instead of Armour Stones.
SP armour and SP gems
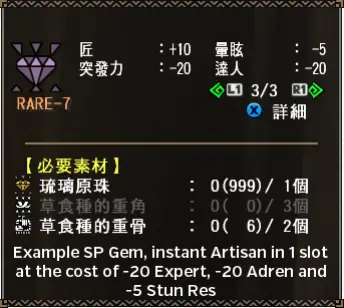
SP armour is mostly out of date. Its main use now is collecting sets. At HR5 you can craft SP armour and SP gems. They are meant to be used together: SP armour has no natural skill points, so it needs SP gems to be useful. It has a single decoration slot for these gems.
SP gems usually give many points in a few skills, such as +10 Hearing Protection and +15 Psychic, which switches on Autotracker and Earplugs at once. You craft both from the normal armour and gem menus. They need materials that only drop in HR5 quests.
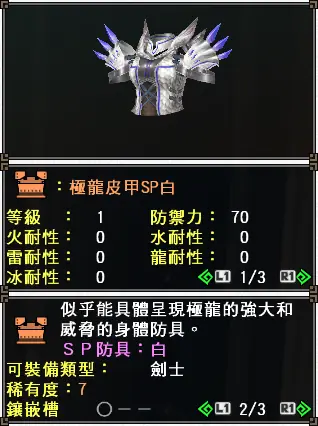
Each SP piece comes in several colours. The colours are cosmetic and need coloured grasses to make. You can trade grasses to the Veggie Elder (in the Gorge) for colours you are missing.
HC armour
HC (Hardcore) armour is an upgraded version of standard or Premium armour. It is mostly the same, but on any HC quest it regenerates health while your health bar is above 50%. It also needs some stamina, depending on how many pieces you wear.
| Pieces | Stamina needed | Regen speed |
|---|---|---|
| 1 piece | 150 | 1 HP / 8 seconds |
| 2 pieces | 125 | 1 HP / 4 seconds |
| 3 pieces | 100 | 1 HP / 2 seconds |
| 4 pieces | 75 | 1 HP / 1.5 seconds |
| 5 pieces | 50 | 1 HP / 1 second |
HS armour
HS (Hunting Safeguard) armour is an upgraded HC armour. It has every HC effect. On an HC quest with either an HC weapon or a weapon of Heavenly Storm or higher, it also adds defensive buffs.
| Pieces | Stamina needed | Regen speed | Defense buff |
|---|---|---|---|
| 1 piece | 150 | 1 HP / 8 seconds | +20 Def / 10% damage reduction |
| 2 pieces | 125 | 1 HP / 4 seconds | +40 Def / 14% damage reduction |
| 3 pieces | 100 | 1 HP / 2 seconds | +60 Def / 24% damage reduction |
| 4 pieces | 75 | 1 HP / 1.5 seconds | +80 Def / 27% damage reduction |
| 5 pieces | 50 | 1 HP / 1 second | +100 Def / 30% damage reduction |
G Rank armour
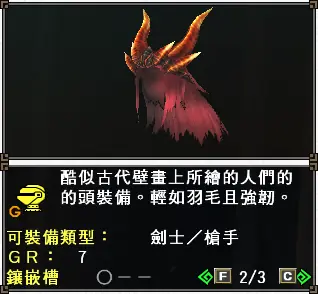
G Rank armour is the standard armour of G Rank. It works much like standard armour, but gives two bonuses based on how many G Rank pieces you wear. A higher skill limit is how you fit 11 or 12 skills on one set.
| Pieces | Attack bonus | Skill limit |
|---|---|---|
| 1-2 pieces | none | 10 |
| 3-4 pieces | +30 true raw | 11 |
| 5 pieces | +30 true raw | 12 |
G Rank armour is also the main source of G Rank decorations. When a piece reaches level 7 in its upgrade tier (G, GF or GX) you can convert it into a decoration. See G Rank decorations below and G Rank.
GS and GP armour
GS, GP or G Hunting Safeguard armour is the G Rank upgrade of Premium armour. Only Premium armour can take this path, such as armour from Premium Kits or lotteries. These pieces keep every advantage of HS armour (same table as above) and also count as normal G Rank armour pieces for the G Rank bonuses.
GP armour is usually a little worse than standard GX armour in defense, but it makes up for it with a wider choice of skills and is easy to fit into "clownsuits" (sets that mix pieces from many families).
Gou armour and its upgrades
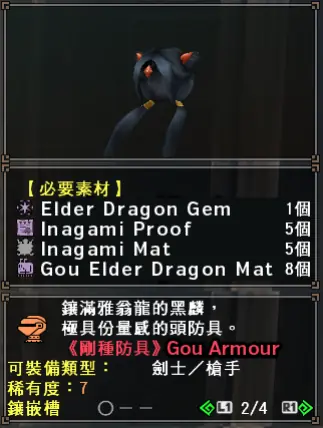
Gou (Goushu) armour opens at HR5. Every piece needs proofs from its monster (a ticket you get each time you slay a Gou monster) and 1x Gou Elder Dragon Gem (the Chinese name is 古龍種的稀玉). The gem comes from Gou Rukodiora breaks and tail carves, at 10% each for tail carves and horn breaks. Some quests that cycle in give the gem 100% of the time, which is ideal for making Gou armour. You also get 3 of the gems when you make your first Gou weapon.
Gou armour gives a Boost (or Muscle) effect. While it is active, certain skills go up one full level. For example, 50 points in Attack give Attack Up (Very Large); with the Boost it becomes Attack Up (Absolute), worth 30 free points of Attack. Not every skill can be boosted. A skill that can be boosted shows a light blue arrow next to its name on your Guild Card. See also Muscle Boost.
The Boost needs a certain amount of health (and 26 stamina), depending on how many Gou-line pieces you wear.
| Pieces | Gou and Heavenly Storm | Supremacy and G Supremacy | Burst and Origin |
|---|---|---|---|
| 1 piece | 100% health | 67% health | Always active |
| 2 pieces | 90% health | 34% health | Always active |
| 3 pieces | 83% health | 1% health | Always active |
| 4 pieces | 76% health | Always active | Always active |
| 5 pieces | 70% health | Always active | Always active |
Gou armour itself has no extra effects. Its upgrades add buffs, as described below.
- Heavenly Storm (Tenran) opens at SR100. It is an upgraded Gou piece.
- Supremacy opens at SR300. It is the same as Heavenly Storm, but the Boost needs much less health.
- G Supremacy opens at GR1. It works like Supremacy, with higher defense, and its upgrade needs G Rank materials.
- Burst is the second G Rank upgrade of Gou armour and opens at GR1. Its upgrade needs materials from G Rank Burst monsters and GHC materials.
- Origin is the third G Rank upgrade and opens at GR1. Its upgrade needs materials from G Rank Origin monsters and GHC materials.
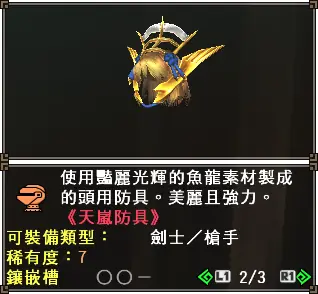
The extra buffs below only work on Gou HC, Supremacy and G Rank quests when you use a Gou or higher weapon. They also lower the rarity needed for the HC multiplier on HC quests.
- Blademaster weapons: sharpness goes up one colour level (green becomes blue, white becomes purple, and so on). This needs 2 or more pieces (1 piece at Origin level).
- Ranged weapons: Critical Distance multipliers go up (by +0.3x), so shots at the right range hit harder. This needs 2 or more pieces (1 piece at Origin level, on all weapon types).
- Bows: Power Coatings are stronger. The guide gives 1.7x, up from 1.5x, which is +0.1x on the coating multiplier. This needs 2 or more pieces (1 piece at Origin level).
- All weapons: more attack and attribute, and a lower rarity requirement for each piece.
| Pieces | Heavenly Storm, Supremacy, G Supremacy, Burst | Origin |
|---|---|---|
| 1 piece | +15 Atk / +2% attribute / -1 rarity req | +20 Atk / +3% attribute / -1 rarity req |
| 2 pieces | +30 Atk / +4% attribute / -2 rarity req | +40 Atk / +6% attribute / -2 rarity req |
| 3 pieces | +45 Atk / +6% attribute / -3 rarity req | +60 Atk / +9% attribute / -3 rarity req |
| 4 pieces | +60 Atk / +8% attribute / -4 rarity req | +80 Atk / +12% attribute / -4 rarity req |
| 5 pieces | +80 Atk / +10% attribute / -5 rarity req | +110 Atk / +15% attribute / -5 rarity req |
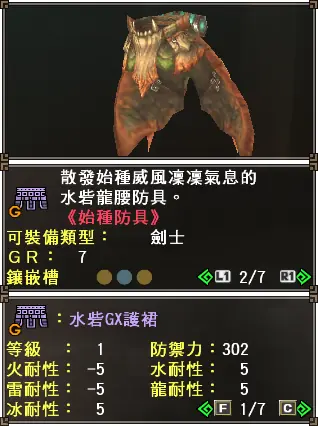
G Supremacy, Burst and Origin armour do not count as standard G Rank pieces. They do not add to your skill limit or give the +30 raw on G Rank quests, even though they carry G Rank skills. Wear at least 3 real G Rank pieces if you want those bonuses.
Tenrou (Tower) armour
Tenrou (also called Customisable Tower armour) is made and upgraded with items found only in the Tower (Sky Corridor). It works much like standard armour and upgrades all the way to GX. The big difference is that you can slot special Tower decorations into it. They give the properties of other armour types.
| Tower decoration | Effect | Slots |
|---|---|---|
| Skill Boost (Muscle) | Muscle Skill Boost | 3 |
| Sharpness Up | Gou+ sharpness level up | 3 |
| Attack Up | Origin attack up | 1 |
| Element and Status Up | Element / attribute up | 1 |
| Distance Up | Critical Distance multiplier up | 2 |
| Power Coating Up | Bow Power Coating up | 1 |
| Defense Up | Defense up | 1 |
| Damage Reduction | HC damage reduction | 1 |
| Auto-Regen | HC health regeneration | 1 |
| G Rank Armour | G Rank armour (for the 11+ skill limit) | 2 |
Tenrou pieces do not count as real G Rank pieces at GX level, even though they carry G Rank skills. To make them count you must use a Tower decoration slot on the G Rank Armour decoration. If you plan to use them at endgame, build around three other real G Rank pieces.
Exotic armour
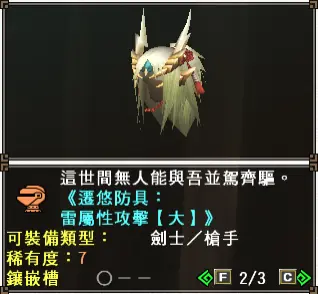
Exotic armour is imported from the mainline games. Each piece has a skill built in that is always active, whatever your skill limit or other factors. You need GR500 to upgrade an Exotic piece to G or higher, because Exotic monsters are GR500 in G Rank. When upgraded to G or higher, Exotic armour counts as a standard G Rank piece for the skill limit and for the extra raw.
Zenith armour
Zenith armour comes in two kinds, Standard and Premium. Both carry a Zenith skill (see Zenith skills).
- Standard Zenith armour is made from a specific monster (such as Khezu Z Series) or from certain events (such as Katante Z Series from Diva Defense). It has four tiers. Z and ZF have one upgrade each, and ZY and ZX have 7. The letters match the GR rating of the Zenith monsters you hunt to make them: GR200 for Z, GR400 for ZF, GR600 for ZY and GR800 for ZX. It has its Zenith skill from Z on, but only reaches maximum skill points at ZX.
- Premium Zenith armour is made by upgrading Premium pieces past GP to ZP. Every ZP upgrade needs Zenith Hypnoc parts. Lottery armour needs 2 extra tickets, which you must have kept from earlier lottery rolls or win again. The gain varies from a complete rework (Lien GP to ZP changes every skill and becomes one of the best kits in the game) to simply adding a Zenith skill while keeping the old stats (Cielo ZP).
Premium Zenith armour cannot be turned into decorations. Both kinds also give the biggest Origin benefits for gunners: with 2 or more pieces, Critical Distance multipliers go up on all ranged weapons, and bows get Power Coatings of 1.7x, up from 1.5x.
Transmog
MHF-Z lets you apply the look of one armour piece to another. Talk to the Blacksmith and give the items for the exterior you want. What you need varies. Standard armour wants monster materials (G1% items, normal carves and so on). Some exteriors are tied to events, and lottery armours are tied to lottery rolls.
An armour in the "Billing" list is not necessarily for sale. Some premium exteriors are limited to events, and others came only from timed lotteries that may never return (for example the Nier 2B exterior).
| Menu | Entries |
|---|---|
| Transmog | Apply Transmog, Unlock Transmog, Remove Transmog |
| Transmog sub-menu | Standard Exteriors, Event Exteriors, Billing Exteriors, Unlocked Exteriors |
An armour with a transmog applied shows a new green medal symbol, so you can tell it has been reskinned.
Armour and icon colours
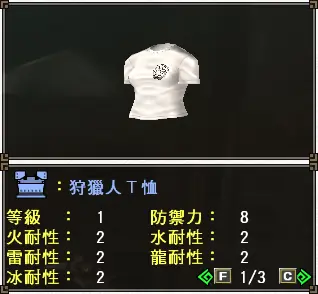
In Frontier you unlock armour colours by doing various tasks. The colour is also the one shown behind your weapon icon in town. Colours other than Green, Red and White need at least HR3 to use.
The colour menu itself unlocks when you make or get any armour piece that lets you set its colour. The easiest is the T-shirt sold by the NPC with glasses in the Blacksmith.
| Colour | How to unlock it |
|---|---|
| Green | Complete many Delivery quests: each Delivery quest adds +3 points, and you need 100. |
| Red | Complete many Slaying quests: slaying a main objective adds +2 points, sub-quests +1, and you need 100. |
| White | Capture many monsters: each capture adds +3 points, and you need 100. |
| Blue | Have 50 friends on your friend list at once. |
| Dark Blue | Have 20 or more Rare-7 (or higher) weapons of each type, excluding tonfas. |
| Light Green | Make 35 of any armour piece needed for the Well Dressed title. |
| Purple | Win a single PVP match. |
| Orange | Complete many Hunter Guide challenges. |
| Yellow | Get 15 or more Large Gold Crown monsters. |
| Grey / Black | Eat 100 times in your house. |
| Pink | Contribute 5000 Souls during the festival. |
| Rainbow | Unlock all the other colours. |
Short unlocking guides
White, Red and Green. Green is easy while you work on your Caravan Gem: delivering 3 iron ore counts the same as killing a monster and takes seconds, and all deliveries count, so about an hour is enough. Red you will almost certainly unlock just by playing. It is likely your first colour. White is hard now, because newer content is all monsters you cannot capture. The best route is to buy 2x Capture Gem G (捕獲珠G) from the Road store. They give Capture Guru, which makes monsters blink on the mini-map when they can be captured. You can also get Autotracker from 3x Insight Gem G (洞察珠G), but that is much less practical. Paintballs and psychoserums work just as well.
Blue. The friend list is one-sided and does not send a prompt, so you can add 50 random players and delete them afterwards. Do delete them, or you will spam them with messages whenever you sign in.
Dark Blue. You must craft 20 Rare-7 weapons of each type to unlock the Weapon Maniac titles. Duplicate weapons do not count. G Rank weapons do not count as over Rare-7, and the tonfa and switch axe titles are not considered. Pure raw SP weapons upgrade to Rare-7, and bowguns can be made at Rare-7 or higher, unlike most other weapons. Make whichever type you have the most materials for.
Light Green. Make 35 of the Chef chest piece (廚師服飾). It needs only raw meat and items from the Pugi Farm store:
| Item | Amount | Source |
|---|---|---|
| Grilled meat (熱烤肉) | 105 | Buy at the Pugi Farm store, level 3 |
| Herb (辣椒) | 210 | Buy |
| Raw Meat (生肉) | 210 | Carves |
| Seasoned Raw Meat (調味生肉) | 105 | Combine Raw Meat and the bought herb |
Purple. You need a pet monster. Talk to the Blue NPC in town and choose Hunter Dojo, then Select Training, then Arena Training (獵人道場 > 選擇演習 > 鬥技演習). This lists Arena quests with preset gear. Do the first 3 to unlock pets: hunt 2 Velocidromes, hunt 1 Gypceros and hunt 1 Rathian.
After that you can keep certain monsters as pets by capturing them while you host the quest. You then get a "do you want to keep this monster" screen and choose one of 3 slots. Dromes have a very high capture rate, and many other monsters are fairly easy.
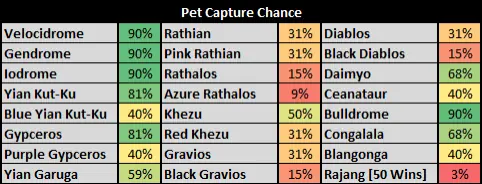
When you and another player both have a pet, choose the Arena Tournament (鬥技大會) at the same NPC to set up a fight. After you win one match you get Purple.
Yellow. Hunt monsters until it unlocks. There are so many monsters that trying their normal and HC versions makes it likely.
Grey / Black. Eat in your house a lot. There is no way to speed it up.
Pink. Take part in the festival. Cappuccino needs 5000 Souls, which is the amount required for this colour.
Decorations
As in the mainline games, decorations give points in armour skills and fit in any armour piece or weapon with a free slot. You create them at the Blacksmith. The decoration menu has Create Decorations, Insert Decorations and Remove Decorations.
Standard decorations
Standard decorations are the most basic kind. You make them at the Blacksmith from normal materials. They usually give about 5 points in total and may have negative points in some skills. For example, the standard Artisan Deco (匠珠) gives +2 Artisan, +2 Auto-Reload and -1 Adrenaline.
Many have more than one recipe. The Artisan Deco can be made from 1x Rajang Fur and 3x Monoblos Horn, or from 2x Lunstra Horn and 3x White Monoblos Horn. You will rarely need standard decorations beyond HR7.
G decorations
G decorations are stronger standard decorations. You make them by improving existing decorations, or by collecting special materials made just for them.
| Decoration | Skills | Materials |
|---|---|---|
| Expert Deco | Expert +4, Attack +1 | Bloodrun Jewel x1, Garuga Beak x1, Diablos Horn x2 |
| Expert G Deco | Expert +5, Status +3, Quake Res +3, Attack -5 | Expert Deco x3, Piscine Blood+ x15, Carapaceon Carapace x15, F. Wyvern Carapace x15 |
| Dodging Sword G Deco | Evasion +5, Fencing +5, Sharpening +5 | Dodging Sword Specific Jewel x15, Toa Ice Scale x5, Toa Shell x5 |
When a G decoration needs a special jewel item, that item exists only to unlock the decoration. For example, the Dodging Sword G Deco appears in the crafting list as soon as you have the 15 jewels, and the jewels have no other use. Each special jewel has its own quest. The one above comes from an HR5 Kushala Daora quest, which usually gives between 2 and 8 of the jewel.
G Rank decorations
Most G Rank decorations can be crafted directly from a handful of materials: usually a couple of lower-percentage standard carves and a GHC carve. They are almost always available from sources such as the Road, Festival or GCP stores. A few need you to craft and upgrade armour, such as White Fatalis, Keoaruboru or Hiden decorations, but they are a small minority. Even event decorations now use only their base materials. G and GF decorations can still only be made from armour pieces, but you are unlikely to use them in a modern G Rank set.
The G decoration crafting menu has sections to make a specific decoration easier to find: Direct Crafting, Show All, Monsters, Hunter Festival, Regular Event, Event and Other.
Making G Rank gems from armour
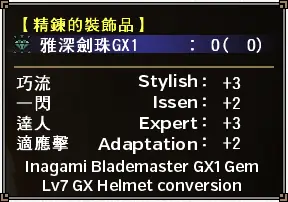
The older way to get G Rank gems is to refine level 7 G Rank armour. Each piece gives a single gem and is destroyed. You will only rarely need to do this, as most gems can be made from the menus above.
- A level 7 G piece refines into one G decoration.
- A level 7 GF piece refines into one GF decoration.
- A level 7 GX piece refines into one of GX1 to GX5, depending on the piece: helmet GX1, chest GX2, arms GX3, waist GX4, legs GX5. This matches the order at the Blacksmith.
A few armours have more than one G or GF gem. They use the same numbering, so a GF3 decoration needs level 7 GF arms of that armour.
The skills of a gem are roughly based on the piece you convert. The Inagami GX Blademaster helmet itself gives Stylish +4, Issen +3, Expert +7, Three Worlds +4 and Adaptation +3; the gem it makes is shown here.
As an example of every gem one monster gives, here is G Rank Silver Rathalos armour:
| Gem | Total upgrades | Piece needed | Skills |
|---|---|---|---|
| G | 7 levels | Any piece | Edgemaster +2, Exploit Weakness +1, Expert +2 |
| GF | 14 levels | Any piece | Edgemaster +2, Exploit Weakness +2, Expert +3, Vitality +2 |
| GX1 | 21 levels | Helmet only | Edgemaster +2, Exploit Weakness +2, Expert +3, Vitality +2 |
| GX2 | 21 levels | Torso only | Edgemaster +2, Exploit Weakness +2, Expert +3, Evade Distance +2 |
| GX3 | 21 levels | Arms only | Edgemaster +2, Exploit Weakness +2, Expert +3, Rage +2 |
| GX4 | 21 levels | Waist only | Edgemaster +2, Exploit Weakness +2, Expert +3, Movement Speed +2 |
| GX5 | 21 levels | Legs only | Edgemaster +2, Exploit Weakness +2, Expert +3, Issen +2 |
Most armours follow a similar pattern: GF is a straight upgrade over G, and GX has the same points as GF plus a couple of points in an extra skill. Some gems differ. On G Black Fatalis, the last two skills change per GX gem. Gougarf armour has a GF1 gem for helmets and a GF2 gem for all other pieces at GF level.
G Class decorations
Some G Rank level decorations can be made straight from monster materials that are not tied to one monster. You can get most from the 7-star Elder Dragons or the 8-star GR100 Exotics. Two Hypnocs under 1 star give materials for two of these decorations. They are easier to get than Gurenzeburu decorations and are excellent for a Rasta once armour stops being useful. New monsters from Amatsu onwards give materials for newer versions that go beyond standard GX decorations.
Most of these are low-effort, G Rank level decorations. Their main use is in a Rasta, because of the skill sets they give.
| Decoration | Skills | Materials |
|---|---|---|
| G級·護閃珠 | Issen +2, Three Worlds Protection +2, Rage +2 | Hypnoc Quest Jewel x15, GR1 Break Jewel x1, Everlasting Ice Cube x1 |
| G級·怒剛珠 | Strong Attack +2, Three Worlds Protection +2, Rage +2 | Hypnoc Quest Jewel x15, GR1 Break Jewel x1, Everlasting Ice Cube x1 |
| G級·護痛珠 | Three Worlds Protection +2, Issen +2, Exploit Weakness +2 | Teostra Dragon Scale x5, Teostra Heavy Shell x5, GR1 Break Jewel x1 |
| G級·閃血珠 | Issen +2, Three Worlds Protection +2, Vigorous +2 | Stygian Zinogre Cortex x5, Stygian Zinogre Hardclaw x5, GR1 Break Jewel x1 |
The names above are the Chinese names, as no English name was given. Our client may show other names.
Other kinds
Gallery gems are not crafted. You get them as rewards for a good gallery layout, by trading tickets after the Furniture NPC at the Combiner evaluates it (the guide had no walkthrough for this), or from quests.
Building sets
Set building matters mostly in G Rank. Sets you use before then are not very important or long-lasting.
Unlike the mainline games, skills in Frontier are very important. You are expected to carry a certain core set of skills to clear normal content in a decent time. The original guide had a separate page on picking skills for each weapon type, which we do not link; our armour set builder finds sets for the skills you pick.
The sets in the original guide are old, built for the Z1 release, and the guide says better and more modern ones exist. They covered every weapon except Hunting Horn with varied decoration set-ups, a Hunting Horn set with Encourage+2 and Horn Maestro, a generic bowgun set and a generic bow set. Bows always want Auto-Reload, which is terrible on bowguns, so never use a bow set with a bowgun.
Skills
Skill basics
Skills switch on when the points on your armour pieces and decorations reach a threshold. The default limit is 10 active skills. In G Rank it can rise to 11 or 12, depending on the armour you wear (see G Rank armour).
Every skill has a hidden priority that decides whether it activates. You can check what a set will really give in the MHSX2G Set Generator. Priority matters late in the game, because it is easy to switch on skills you do not want. This is especially true of sets with Focus (Quick Charge), which has the lowest priority of all skills: nearly anything else pushes it out.
Hybrid skills
As in the newest mainline games, Frontier has skills that combine other skills. If you have one of the skills that a hybrid gives, it shows grey on your Guild Card. A grey skill is disabled but still uses one of your 10 to 12 skill slots. At G Rank you normally run 11 to 12 active skills, so a wasted slot is very bad: avoid it.
| Hybrid skill | Contains |
|---|---|
| Sword God +2 | Sharpness +1, Fencing +2, Razor Sharp +2 |
| Gentle Shot +3 | Load Up, Recoil Reduction +3 |
| Blazing Majesty +2 | Adrenaline +2, Red Soul, Bombardier, Fire Res +30, Artillery God, Summer Person, Terrain Damage Decreased (Large), Fire Attack Up (Large), Flame Sword +3, Bomb Sword +3 |
Sometimes a skill is grey in town but still works on quests. That happens when you have the real skill and a boost on it, and also have it inside a hybrid. For example, with Sword God +1 and Fencing +1, Fencing +1 shows disabled in town. On a quest the Muscle Boost raises Fencing to +2, so it is active. Boosts are explained below.
Exotic, Tower and weapon skills
Exotic, Tower, Burst and Origin skills are not shown on the Guild Card. They are always active, and they can make skills on the list look greyed out. From Z1 on they appear in a new section of Hunter Status.
- Exotic armour pieces always activate a certain skill, with any number of pieces equipped. A Zinogre Helmet always gives Thunder Attack Up (Large), ignoring skill limits and every other piece, and wearing all 5 pieces still gives it once.
- Burst and Origin weapons have fixed skills that work the same way. They are fixed versions that higher versions replace, and extra skill points do not add to them. A weapon that gives Issen +2 simply gives the skill, not 20 points, so you still need 30 points in your skills for Issen +3: you cannot just add 10.
- Tower weapons take decorations that add armour skills in the same fixed way. You choose which skills to slot instead of the base weapon deciding. These skills still add no points. Even with Good Luck slotted, you would still need 20 points in Fate to get Great Luck.
Other sources of skills
Outside equipment there are two sources: Skill Fruits and Guild Cooking.
- Skill Fruits are a premium item. Eating one activates a skill for the whole quest, and it ends when you finish or fail the quest. Retiring returns the item, as with all others. You buy them with Lottery G Coins from the Pink Shop NPC at 30 fruits for 3 coins. Events and other purchases can also give them. They are not worth going out of your way for, unless you are a speedrunner at a fully maxed endgame who wants to shave more time.
- Guild Cooking opens to guilds once they reach a certain level. You use ingredients in a cooking minigame to make food that gives the skill you cooked for, on every quest you take during its duration. Easy recipes include Wide-Area +3, Adrenaline +2 and Goddess' Embrace. See English Guild and Guild Hall.
Muscle Boost
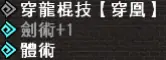

Gou armour and its upgrades cause a Boost (or Muscle) effect. It raises a skill by one level. With Evasion +1 under the Boost you would have Evasion +2, saving 10 points. If you wear the right armour type, a skill that can be boosted has a light blue arrow next to its name on your Guild Card. It goes up a level on a quest while you meet the armour's conditions, and the skill's name turns blue while it is really boosted. In the example, Martial Arts and Fencing are boosted. Fencing was grey because another skill gave +1, but it becomes active on the quest as +2 overwrites it.
The conditions are health and stamina amounts that depend on the armour type; they are in the Gou armour table above. The Boost needs 26 or more stamina.
Its upgrades also add, per piece, Attack +15, Attribute +2% and HC rarity requirement -1 (Origin: Attack +20, Attribute +3%, rarity -1). For the sharpness, Critical Distance and Power Coating bonuses, see Gou armour and its upgrades.
Skill reference
Each table lists the skill tree, the skill you get, the points needed and what it does. A negative number of points gives the penalty skill. Names are as in the English version of the guide, so menu and skill names in our client may differ slightly. Skills the guide marks as changed in the ZZ update say so in the effect.
Health and stamina
| Skill tree | Skill | Pts | Effect |
|---|---|---|---|
| Health | Health +50 | 40 | Maximum health +50 |
| Health | Health +40 | 30 | Maximum health +40 |
| Health | Health +30 | 20 | Maximum health +30 |
| Health | Health +20 | 15 | Maximum health +20 |
| Health | Health +10 | 10 | Maximum health +10 |
| Health | Health -10 | -10 | Maximum health -10 |
| Health | Health -20 | -15 | Maximum health -20 |
| Health | Health -30 | -20 | Maximum health -30 |
| Recovery Speed | Recovery Speed +2 | 20 | 4x health recovery speed |
| Recovery Speed | Recovery Speed +1 | 10 | 3x health recovery speed |
| Recovery Speed | Recovery Speed -1 | -10 | 3x slower health recovery |
| Recovery Speed | Recovery Speed -2 | -20 | 4x slower health recovery |
| Recovery | Recovery Items Improved | 10 | Recovery item effect x1.25 |
| Recovery | Recovery Items Weakened | -10 | Recovery item effect x0.75 |
| Vampirism | Vampirism +2 | 20 | About 80% of hits on monsters recover HP and add Attack. Leeches about 1.70x the health of Vampirism +1 (less than it sounds, e.g. 6 becomes 10 HP). See the notes below. |
| Vampirism | Vampirism +1 | 10 | About 60% of hits on monsters recover HP and add Attack. Attack is gained even if you leech no health: at full health you still get the leech animation and gain attack each time it plays. See the notes below. |
| Herbal Medicine | Medical Sage | 10 | Instantly recovers any red HP when you use a healing item. With more party members who have the skill: 2 players, recovery items apply to the whole party; 3 players, also +20 extra HP; 4 players, also +50 extra HP. Stacks with Recovery. Only pure recovery items work party-wide (Max Potions do, Ancient Potions do not). |
| Stamina Recovery | Stamina Recovery Up (Large) | 20 | 200% stamina recovery |
| Stamina Recovery | Stamina Recovery Up (Small) | 10 | 150% stamina recovery |
| Stamina Recovery | Stamina Recovery Down | -10 | 50% stamina recovery |
| Hunger | Hunger Negated | 15 | The stamina bar does not shrink over time |
| Hunger | Hunger Halved | 10 | The stamina bar shrinks at 0.5x speed |
| Hunger | Hunger Up (Small) | -10 | The stamina bar shrinks at 1.5x speed |
| Hunger | Hunger Up (Large) | -15 | The stamina bar shrinks at 2.0x speed |
| Stamina | Peerless | 20 | Stamina drop rate x0.5 and stamina use on actions x0.5. This also lowers Combat Supremacy's stamina use by 50%. |
| Stamina | Marathon Runner | 10 | Stamina drop rate x0.5 and stamina use on actions x0.75. This also lowers Combat Supremacy's stamina use by 25%. |
| Stamina | Short Sprinter | -10 | Stamina drop rate x1.33 and stamina use on other actions x1.2. This also raises Combat Supremacy's stamina use by 20%. |
| Eating | Speed Eating | 10 | Item use speed greatly increased (potions, food, seeds and so on) |
| Eating | Slow Eating | -10 | Item use speed greatly reduced |
| Gluttony | Scavenger | 15 | Items give an extra 25 stamina |
| Gluttony | Gourmand | 10 | Eating meat gives an extra 25 stamina |
Vampirism notes. Vampirism adds attack for each leech, by weapon type (the number in brackets is how many leeches reach the maximum buff of +80): Dual Swords, Tonfa, Light Bowgun +3 (27x); Sword and Shield, Long Sword, Lance, Gunlance, Switch Axe, Heavy Bowgun, Bow +4 (20x); Hammer, Hunting Horn +5 (16x); Magnet Spike +6 (14x); Great Sword +7 (12x with Vampirism +2, 11x with +1). The attack buff resets when monsters damage you, apart from small hits like vespoid stings. Every hit of a motion can leech, including the extra hits from Fencing +2 and every hit of a single Pierce Shot or Pellet Shot. At maximum buff the leech animation is red instead of green. Health recovered is based on true damage dealt and is about 2 to 4% of it, with a minimum of 1 HP. The bigger the hit, the less you leech, and you leech less against tankier monsters. Vampirism +2 only raises the leech chance and the health recovered. It does not raise the maximum attack or the amount added per leech, so going above +1 is optional if you want it for attack. Vampirism does not heal or add attack with Dual Swords in True or Extreme Demon Modes (until Z2.2).
Offensive
| Skill tree | Skill | Pts | Effect |
|---|---|---|---|
| Strong Attack | Strong Attack +6 | 50 | True attack +200 |
| Strong Attack | Strong Attack +5 | 40 | True attack +150 |
| Strong Attack | Strong Attack +4 | 30 | True attack +80 |
| Strong Attack | Strong Attack +3 | 20 | True attack +50 |
| Strong Attack | Strong Attack +2 | 15 | True attack +35 |
| Strong Attack | Strong Attack +1 | 10 | True attack +20 |
| Attack | Attack Up (Absolute) | 80 | True attack +50 |
| Attack | Attack Up (Very Large) | 50 | True attack +30 |
| Attack | Attack Up (Large) | 25 | True attack +20 |
| Attack | Attack Up (Medium) | 15 | True attack +10 |
| Attack | Attack Up (Small) | 10 | True attack +5 |
| Lone Wolf | Lone Wolf | 10 | True attack +100 when there are no hunters, Partners, Rastas or Partnyaas in the area. Halk do not count, and other players may stay in other zones: with 3 hunters in areas 1 and 2 and you in area 6 with a monster, you have +100 attack. |
| Issen | Issen +3 | 30 | Affinity +20%, critical hit modifier +0.25x. Stacks with Starving Wolf +2. |
| Issen | Issen +2 | 20 | Affinity +10%, critical hit modifier +0.15x. Stacks with Starving Wolf +2. |
| Issen | Issen +1 | 10 | Affinity +5%, critical hit modifier +0.10x. Stacks with Starving Wolf +2. |
| Expert | Critical Eye +5 | 50 | Affinity +50% |
| Expert | Critical Eye +4 | 35 | Affinity +40% |
| Expert | Critical Eye +3 | 20 | Affinity +30% |
| Expert | Critical Eye +2 | 15 | Affinity +20% |
| Expert | Critical Eye +1 | 10 | Affinity +10% |
| Flash Conversion | Critical Conversion | 10 | Adds 30% affinity and turns affinity above 100% into extra attack: the square root of the excess affinity times 7, rounded down (126% affinity: root of 26 x 7 = 36.37, so +36 attack). Up to 149% it is roughly 1 attack per point of affinity, then it flattens to about +1 per 3 to 4% extra affinity. |
| Exploit Weakness | Exploit Weakness | 15 | Adds +5 to a monster hitzone's raw value when it is 35 or higher. Stacks with Sniper/Precision, Thunder Clad, Acid Shots, Hunting Horn Sonic Bomb debuff and Point Breakthrough, and the resulting value is used for the check. ZZ change: only needs a hitzone of 30. |
| Exploit Weakness | Reduce Weakness | -10 | Takes -5 off a hitzone's raw value when it is 35 or higher. If other skills such as Thunder Clad or Critical Shot change the hitzone, that value is checked (a 30 hitzone with Thunder Clad stays at 30). |
| Stylish Assault | Stylish Assault | 15 | Evading through attacks gives +100 true raw for a time that depends on the weapon: Sword and Shield, Dual Swords, Tonfa 15 s; Heavy Bowgun 25 s; all others 20 s. |
| Elemental Exploit | Dissolver | 10 | Raises a monster hitzone's elemental value when it is 20 or higher, by weapon: Sword and Shield, Great Sword, Long Sword, Hammer, Hunting Horn, Lance, Switch Axe F, Magnet Spike +15; Dual Swords, Gunlance, Light Bowgun +10; Tonfa, Heavy Bowgun, Bow +5. Hits on an adjusted hitzone produce a different element effect. |
| Elemental Exploit | Elemental Diffusion | -10 | Lowers a hitzone's elemental value by 5 when it is 20 or higher. |
| Status Assault | Status Pursuit | 10 | Dealing status damage to a monster that is already under that status causes extra flat damage (Poison, Paralysis) or +10 physical weakness values (Sleep). Values depend on weapon class and status value. Drug Knowledge guarantees every hit adds flat damage. The original guide's author had a Damage Calculator that gave values for Poison and Paralysis, which we do not link. On fast, high-status weapons expect about 20% more output, depending on hitzones. |
| Drug Knowledge | Drug Knowledge | 10 | Status damage is dealt on every hit. The weapon's status value is set to 0.38x, and 25% of the true base status (divide by 10 for this) is turned into raw: 800 status after skills gives 0.25 x 80 = 20 true raw. Normal status application is 33% of hits, so this is a flat upgrade on pure averages. |
| Status Attack Up | Status Attack Up / Abnormal Attack Up | 10 | Poison, Paralysis and Sleep x1.125. Stacks with the Status Sigil (1.1x) and the Guild Status Pugi buff (1.125x). |
| Abnormality | Abnormality | 15 | Grants Status Attack Up, Status Pursuit and Drug Knowledge. |
| Fire Attack | Fire Attack (Large) | 20 | Fire attack x1.2 |
| Fire Attack | Fire Attack (Small) | 10 | Fire attack x1.1 |
| Water Attack | Water Attack (Large) | 20 | Water attack x1.2 |
| Water Attack | Water Attack (Small) | 10 | Water attack x1.1 |
| Thunder Attack | Thunder Attack (Large) | 20 | Thunder attack x1.2 |
| Thunder Attack | Thunder Attack (Small) | 10 | Thunder attack x1.1 |
| Ice Attack | Ice Attack (Large) | 20 | Ice attack x1.2 |
| Ice Attack | Ice Attack (Small) | 10 | Ice attack x1.1 |
| Dragon Attack | Dragon Attack (Large) | 20 | Dragon attack x1.2 |
| Dragon Attack | Dragon Attack (Small) | 10 | Dragon attack x1.1 |
| Elemental Attack | Elemental Attack Up | 10 | All elements x1.1 |
| Elemental Attack | Elemental Attack Down | -10 | All elements x0.9 |
| Bomb Boost | Bomber | 10 | Bomb strength x1.5, and 100% bomb combination rate |
| Gunnery | Artillery God | 35 | Raises blast damage. Ballista x1.3. Tonfa Ryuuki Detonation x1.6. Gunlance: shelling raw attribute x1.3, Wyvern Fire raw attribute x1.4. Bowguns: Crag/Cluster S raw attribute x1.5, Heavy Bowgun Fire Beam x1.3. |
| Gunnery | Artillery Expert | 20 | Ballista x1.2. Tonfa Ryuuki Detonation x1.4. Gunlance: shelling x1.2, Wyvern Fire x1.3. Bowguns: Crag/Cluster S x1.5, Fire Beam x1.2. |
| Gunnery | Artillery Novice | 10 | Ballista x1.1. Tonfa Ryuuki Detonation x1.25. Gunlance: shelling x1.1, Wyvern Fire x1.2. Bowguns: Crag/Cluster S x1.5, Fire Beam x1.1. |
| Encourage | Encourage +2 | 20 | Horn Maestro, plus party-wide Evasion +2 and Stun Negate. You do not need to be in the same area, and NPCs with this skill always share it, even while waiting to revive. |
| Encourage | Encourage +1 | 10 | Horn Maestro, plus party-wide Evasion +1 and Stun Halved. Same sharing rules as +2. |
| Horn Maestro | Horn Maestro | 10 | 50% less chance of horns breaking. All horn durations x1.5 (including Hunting Horn songs). |
| Martial Arts | Kickboxing King | 20 | Your kick deals 15 damage and becomes a roundhouse kick while standing or a drop kick while moving. Tonfa kick attacks deal more damage and add more air time to aerial attacks. |
| Martial Arts | Taijutsu | 10 | Your kick deals 15 damage. Tonfa kick attacks deal slightly more damage. |
| Survivor | Tenacity | 20 | Attack and Defense go up for every cart on a quest (only on quests with standard carting rules: not Raviente or the Tower). 1 cart: Attack +15, Defense +100. 2 carts: Attack +20, Defense +150, True Guts. |
| Survivor | Fortify | 10 | As above, smaller. 1 cart: Attack +5, Defense +50. 2 carts: Attack +10, Defense +100, True Guts. |
| Rage | Buchigire | 20 | True Guts and Adrenaline +2 |
| Rage | Wrath Awoken | 15 | True Guts and Adrenaline +1. Adrenaline +1 is replaced by +2 if you get it elsewhere, for example from Blazing Majesty. |
| Adrenaline | Worry | 30 or more | When health is 40 or lower: Attack x0.7, Defense -42 |
| Adrenaline | Adrenaline +1 | 21 to 29 | When health is 40 or lower: Defense +90 |
| Adrenaline | Adrenaline +2 | 15 to 20 | When health is 40 or lower: Blademaster and Bow attack x1.5, Light Bowgun and Heavy Bowgun attack x1.3, Defense +90 |
| Adrenaline | Adrenaline +1 | 10 to 14 | When health is 40 or lower: Defense +90 |
| Adrenaline | Worry | -15 or less | When health is 40 or lower: Attack x0.7, Defense -42 |
| Skilled | Skilled | 15 | Grants Speed Eating, Movement Speed +2, True Guts and Weapon Handling |
| Trained | Trained +2 | 15 | Grants Focus +2 and Martial Arts +2. Hits no longer interact with players and AI companions. |
| Trained | Trained +1 | 10 | Grants Focus +1 and Martial Arts +1. Hits no longer interact with players and AI companions. |
| Fasting | Starving Wolf +2 | 20 | While starving (stamina bar at 25, the minimum size): Affinity +50%, critical hit modifier +0.10x (stacks with other sources), Evasion +2. The stamina bar cannot be higher than 25 (a bar reduced from 50 to 25 does not count as starving). Does not work while you have infinite stamina from any source, even with 25 health (Hunting Horn buffs). Superman dives are impossible while in the required stamina range. |
| Fasting | Starving Wolf +1 | 10 | While starving (stamina bar at 25): Affinity +50%, Evasion +1. Same notes as +2. |
| Focus | Focus +2 | 20 | Charge attacks take 0.8x as long (Great Sword, Hammer, Long Sword, Heavy Bowgun, Lance, Tonfa, Switch Axe F where they apply). Gauges fill 1.2x as fast (Long Sword Spirit and Blade, Switch Axe Sword and Lightsword, Tonfa EX and Combo). Heavy Bowgun Heat Beam meter fills 2 extra units per shot. Bows are unaffected (see Auto-Reload and Sniper). |
| Focus | Focus +1 | 10 | Charges take 0.9x as long. Gauges fill 1.1x as fast. Heat Beam fills 1 extra unit per shot. |
| Focus | Distraction | -10 | Charges take 1.2x as long. Gauges fill 0.8x as fast. Heat Beam loses 1 unit per shot. |
| Charge Attack Up | Charge Attack Up +2 | 20 | Greatly raises the motion value of charge attacks (and Great Sword Shining Sword): generally at least 1.20x raw. Great Sword charges get 1.30x elemental, charges of all other weapons except Magnet Spike get 1.10x. Magnet Spike gets no elemental multiplier. Affects Great Sword, Hammer, Long Sword, Lance, Tonfa and Switch Axe F. Does not affect Heavy Bowgun or Bow charges. |
| Charge Attack Up | Charge Attack Up +1 | 10 | Notably raises charge motion values: generally at least 1.10x raw. Great Sword charges get 1.20x elemental, other affected weapons 1.05x. Same weapons as +2. |
| Weapon Handling | Weapon Handling | 10 | Sheathing and unsheathing are 20% quicker. Does not stack with the innate effect of a Master Mark or G Finesse weapons. |
| Shiriagari | Shiriagari | 15 | Attack rises with quest time: 1 minute +20, 3 minutes +50, 5 minutes +80, 10 minutes +130, 15 minutes +180, 20 minutes +200. |
| Adaptation | Adaptation +2 | 20 | At 100 health or higher, every attack checks all three hitzone types (cutting, impact, shot) and compares them using a multiplier (0.81x for melee, 0.72x for ranged). If a multiplied hitzone is higher than the weapon's own damage type, that value is used and the damage type changes to the best one. A purple effect, like a critical hit, shows it triggered. Attacks that use other damage types (Shield Bash, Stun Pellet Shots dealing impact) use their adapted type in the check. Example: a G Yian Garuga tail has 50/10/10 for cutting/impact/shot. With +2, impact checks 40 (0.81 x 50), shot checks 36 (0.72 x 50), and both beat the 10, so the tail takes cutting damage and non-cutting weapons can sever it. Adaptation moves the +5 hitzone adjustment of Sniper and Precision +2 to the end of the order, so if you need Sniper's +5 to trigger Exploit Weakness, adaptation may choose a weaker hitzone. |
| Adaptation | Adaptation +1 | 10 | Same as +2 but with multipliers of 0.72x (melee) and 0.64x (ranged). In the example, impact checks 36 and shot checks 32. |
| Combat Supremacy | Combat Supremacy | 10 | While your weapon is drawn, stamina drains constantly and attack is x1.2. Base drain is 150 stamina in about 20 seconds. Peerless or Marathon Runner double that to about 40 seconds. Mega and Power Juices last only seconds while a weapon is drawn. Guild Pugi buffs help but do not slow the drain. Attack only rises while the weapon is drawn, so the Guild Card attack shown while sheathed is lower than your real attack in combat. |
| Vigorous | Vigorous | 10 | Attack x1.15 when health is above 100 |
| Thunder Clad | Thunder Clad | 10 | A bar under your name slowly fills through actions (movement, attacking and evasions, from slowest to fastest). When full you get +5 to all raw weakness values, Movement Speed +2, Evade Distance Up, Weapon Handling and Status Immunity. Stacks with Determination, Exploit Weakness and Critical Shot. The Movement Speed works while your weapon is drawn, which gives every weapon a big mobility boost. Evading roars counts as a full evasion for the meter, even with earplugs. A hit that launches you (including from other players, such as Tonfa Ryuuki or upswings) empties the full bar. All actions, even with the weapon sheathed, fill the first bar. |
| Consumption Slayer | Lavish Attack | 10 | Attack +100, at the price of extra sharpness loss per hit with Blademaster weapons, and +0.2x on coatings (not Bomb Coatings) at the price of double use per shot. No effect with bowguns. Sharpness loss per hit: Sword and Shield, Dual Swords 2; Great Sword 6; Long Sword, Switch Axe, Lance, Gunlance, Tonfa, Magnet Spike 3; Hammer, Hunting Horn 4. Normal loss is 1 per hit. Sharp Sword +1 does not reduce this loss. Sharp Sword +2 has a 50% chance to cut it by 1 (a Great Sword's 6 becomes 5). Sword Crystals use an extra 3 sharpness with no Sharp Sword or an extra 1 with any Sharp Sword (a Great Sword's 6 becomes 9 or 7), and while crystals are loaded Sharp Sword +2 does not save the extra point. |
| Obscurity | Obscurity | 10 | Each block of an incoming attack adds attack, up to 10 times, by weapon. It resets when you are knocked down or launched, with exceptions such as some wind pressure. Sword and Shield, Lance, Gunlance, Tonfa: blocks 1-5 +40 each, blocks 6-10 +20 each, max +300. Switch Axe F, Great Sword, Magnet Spike: +30 / +15, max +225. Long Sword: +20 / +10, max +150. Blocking one attack several times does not add several levels (Pariapuria stones add only 1 level). |
| Rush | Rush | 10 | Successful attacks and guards fill a hidden meter with two stages. Stage 1: your chest flashes purple and you get +50 attack. Stage 2: it flashes again, you get +130 attack in total, and running with a weapon drawn no longer costs stamina (all Tonfa styles and all Extreme Styles). Using any item or sheathing your weapon resets it. Attacks fill the meter by motion value, even against the corpse of a slain large monster. Motion value for stage 1 / stage 2: Sword and Shield 16 / 800; Dual Swords 17 / 850; Great Sword 34 / 1700; Long Sword 23 / 1150; Hammer 16 / 800; Hunting Horn 16 / 800; Lance 27 / 1350; Gunlance 25 / 1250; Tonfa 23 / 1150; Switch Axe F 27 / 1350; Magnet Spike unknown; ranged weapons 400 / 20,000 (all multipliers count: critical, critical distance, bullet, charge and attack value); guarding 1 / 10 times. Example: Light Bowgun with 1,140 attack, Normal Lv1 shot, Origin piece, Steady Hand and Issen +3: stage 1 in one shot, stage 2 in about 46 (0.12 x 1.5 x 1.8 x 1.1 x 1140 = 400). With stage 2 you can run at Starving Wolf stamina levels, but not at literally 0 stamina. |
| Ceaseless | Ceaseless | 10 | Landing attacks raises affinity and critical multiplier, and the buff fades if you stop attacking for some seconds. Phase 1: Affinity +35%, critical multiplier +0.1x. Phase 2: Affinity +50%, critical multiplier +0.15x. Timer, hits for phase 1, hits for phase 2: Sword and Shield 10 s, 20, 46; Dual Swords 11 s, 16, 38; Great Sword 15 s, 7, 21; Long Sword 12 s, 14, 38; Hammer 15 s, 8, 28; Hunting Horn 14 s, 11, 32; Lance, Gunlance, Switch Axe 12 s, 13, 36; Tonfa 11 s, 15, 36; Light Bowgun 11 s, 36, 98; Heavy Bowgun 13 s, 28, 76; Bow 12 s, 16, 48; Magnet Spike 12 s, 11, 30. Reflect and Stylish Up count toward hits; the extra hit of Fencing +2 does not. Stacks with similar buffs (Issen +3 and phase 2 give +70% affinity and a 1.65x multiplier). |
| Point Breakthrough | Point Breakthrough | 10 | A part that you hit repeatedly gets +5 raw weakness. It lasts a limited time and only one part can have it at a time. The blood splash changes colour (normal blood gets brighter, Carapaceons get purple blood, Akuras show varied colours). A part that had the effect needs fewer hits the next time. Fencing +2 and the Gunlance Heatblade lower the hit requirements. After the effect ends, all parts are at zero build-up except the previous part, which has a lower threshold (hit the head 6 times with a hammer, then only the legs: the legs still need 6 hits after the head's debuff ends, while the head needs only 4). A green flash like a heal marks the end. See the table below for duration, first-time hits and repeat hits (Fencing in brackets). Notes: build-up decays over time like a status. Hitting the wrong part does not reset build-up; every part builds up separately. Hitting a part that already has the effect does not extend it. Hitting other parts cannot overwrite an active debuff. Multi-hit attacks (Pierce Shots, Long Sword Piercing Stab) need extra hits. It applies only to you, not your party. It does not affect either Lao Shan and only gives +2 to raw hitzones on Raviente. It stacks with and enables Determination, Exploit Weakness, Thunder Clad, Sniper, Hunting Horn debuff and Acid Shots where they apply. Reflect counts for build-up, Stylish Up does not. |
| Furious | Furious | 10 | Three stages (shown by an aura on one hand, then two, then the whole body) as you attack and evade or guard (you need both to progress). Stage 1: Attack +70, Elemental x1.05, Status x1.05, Affinity +10%. Stage 2: Attack +100, Elemental x1.10, Status x1.10, Affinity +25%. Stage 3: Attack +180, Elemental x1.20, Status x1.20, Affinity +40%. You drop a stage when a monster hits you (not small hits). Evasions for stages 1 / 2 / 3: Lance, Gunlance, Great Sword, Hammer, Hunting Horn, Light Bowgun, Heavy Bowgun, Bow 1 / 2 / 5; Long Sword, Switch Axe, Magnet Spike 1 / 3 / 6; Sword and Shield, Tonfa, Dual Swords 2 / 3 / 7. Guards: Lance, Gunlance, Sword and Shield, Tonfa 1 / 2 / 5; Great Sword 1 / 3 / 6; Long Sword, Switch Axe, Magnet Spike 1 / 3 / 6. Perfect guards progress faster for the Great Sword, Long Sword, Switch Axe and Magnet Spike. |
| Determination | Determination (Solid Determination) | 10 | An end-of-endgame skill found only on G Raviente equipment, decorations and a handful of very expensive lottery pieces. Completely disables Guts, Great Guts, True Guts, Absolute Defense, Guts Ticket, Mega Guts Ticket and Soul Revival. Grants Attack +100, Affinity +100%, critical multiplier +0.25x, Adrenaline +2, and Exploit Weakness and Elemental Exploit without hitzone requirements. Blademasters also get Sharpness +1 and gunners +5 to raw hitzone values within Critical Distance. Even if an element weakness is 0 or -5 it still gets the weapon's addition (+5, +10, +15), and raw always gets +5 even at 34 or lower. It does not stack with Exploit Weakness, Elemental Exploit, Issen, Expert, Critical Shot, Sniper or Precision +2 themselves. Strong Attack +5 and higher works with it, lower does not stack and is replaced by the +100. In general, expect 20% to 30% more damage from a set built for it. |
Point Breakthrough. Duration, then hits needed for the first activation and for repeat activations. The number in brackets applies with Fencing.
| Weapon | Duration | First activation | Repeat activations |
|---|---|---|---|
| Sword and Shield | 30 s | 15 (12) | 9 (8) |
| Dual Swords | 30 s | 20 (17) | 12 (10) |
| Great Sword | 55 s | 6 (5) | 3 (3) |
| Long Sword | 30 s | 10 (8) | 6 (5) |
| Hammer | 50 s | 6 (5) | 4 (3) |
| Hunting Horn | 40 s | 7 (6) | 4 (4) |
| Lance | 35 s | 10 (8) | 6 (5) |
| Gunlance | 40 s | 10 (8) | 6 (5) |
| Gunlance Heat Blade | 40 s | 6 (5) | 4 (3) |
| Tonfa | 30 s | 16 (13) | 10 (8) |
| Switch Axe F | 40 s | 8 (7) | 5 (4) |
| Magnet Spike | 40 s | unknown | unknown |
| Light Bowgun (Normal S) | 30 s | 20 | 12 |
| Heavy Bowgun (Normal S) | 45 s | 8 | 5 |
| Bow (Rapid S) | 35 s | 17 | 10 |
Defensive
| Skill tree | Skill | Pts | Effect |
|---|---|---|---|
| Vitality | Vitality +3 | 30 | Defense +90, Damage Recovery Speed +2, Recovery Items Up, and 100% combination success for Potions, Mega Potions and Max Potions |
| Vitality | Vitality +2 | 15 | Defense +45, Damage Recovery Speed +1, Recovery Items Up, 100% combination success for Potions, Mega Potions and Max Potions |
| Vitality | Vitality +1 | 10 | Defense +15, Damage Recovery Speed +1, Recovery Items Up, 100% combination success for Potions, Mega Potions and Max Potions |
| Vitality | Vitality -1 | -10 | Health -10, Damage Recovery Speed -1, Recovery Items Weakened |
| Reflect | Reflect +3 | 20 | Blocking an attack triggers a special motion from the guard point with an impact motion value of 48. It uses your current attack and sharpness. Reflect motions cannot crit, inflict status or deal elemental damage. It uses 1 sharpness when it hits a monster. No benefit from Fencing +2, and it does not use loaded sword crystals. It can trigger on every part of a multi-hit attack with no cooldown. |
| Reflect | Reflect +2 | 15 | As above with a motion value of 36 |
| Reflect | Reflect +1 | 10 | As above with a motion value of 24 |
| Defense | Defense +120 | 45 | Defense +120 |
| Defense | Defense +90 | 35 | Defense +90 |
| Defense | Defense +60 | 25 | Defense +60 |
| Defense | Defense +30 | 15 | Defense +30 |
| Defense | Defense +20 | 10 | Defense +20 |
| Defense | Defense -20 | -10 | Defense -20 |
| Defense | Defense -30 | -15 | Defense -30 |
| Defense | Defense -40 | -20 | Defense -40 |
| Fortification | Fortification +2 | 15 | Hybrid: Guard +2, Peerless and Weapon Handling |
| Fortification | Fortification +1 | 10 | Hybrid: Guard +1, Marathon Runner and Weapon Handling. Higher versions of Guard or Runner replace its parts. |
| Guard | Guard +2 | 20 | Maximum blocking damage reduction. Less knockback and stamina use when blocking. Lets you block some attacks that could not be blocked (Rukodiora Beam, Unknown nukes and so on). Raises the Lance's shield aura hit limit to 6. Raises the guarding frames in Storm or Extreme Switch Axe F and Extreme Great Sword or Long Sword. No effect with a Heavy Bowgun shield. |
| Guard | Guard +1 | 10 | More blocking damage reduction. Less knockback and stamina use when blocking. Raises the Lance's shield aura hit limit to 4. Slightly raises the guarding frames in the same styles. No effect with a Heavy Bowgun shield. |
| Guard | Guard -1 | -10 | More damage taken, knockback and stamina use while blocking. Only works on weapons that can block on their own, not a Heavy Bowgun shield. |
| Guard | Guard -2 | -15 | Much more damage taken, knockback and stamina use while blocking. Same limits. |
| Auto-Guard | Auto-Guard | 10 | Automatically blocks any blockable attack while a weapon is drawn. ZZ change: it no longer activates Reflect, Obscurity or Rush, and does not fill the Lance guard gauge. |
| Breakout | Breakout | 10 | Panic run speed is higher when below 20% health |
Blademaster
The Sword skills (Bomb, Poison, Paralysis, Sleep, Fire, Water, Thunder, Ice and Dragon Sword) all let you use the matching sword crystals for your weapon. While crystals are loaded, sharpness is used at 3x the normal rate.
| Skill tree | Skill | Pts | Effect |
|---|---|---|---|
| Sharpening | Sharpening Artisan | 20 | Sharpen at 4x speed, then gain 30 seconds of infinite sharpness and Sharpness +1 (does not stack with Sharpness +1) |
| Sharpening | Speed Sharpening | 10 | Sharpen with a single stroke of a whetstone |
| Sharpening | Sharpening Speed Down | -10 | Sharpening takes twice as long |
| Sharpness | Razor Sharp +2 / Sharp Sword +2 | 20 | Sharpness loss is halved, with a 50% chance that a loss is cancelled completely |
| Sharpness | Razor Sharp +1 / Sharp Sword +1 | 10 | Sharpness loss is halved where it applies (bouncing, guarding, shelling and so on) |
| Sharpness | Blunt Edge | -10 | Sharpness loss is doubled |
| Stylish | Stylish | 15 | Recovers some sharpness when you evade through attacks. Dual Swords 12 units; Gunlance 10; Sword and Shield 8; Hunting Horn, Switch Axe F, Great Sword, Lance 5; Long Sword 5 (Blink 7); Hammer 3; Tonfa 4 (Jump 3, EX and Emergency 10, Dash Kick 6); Magnet Spike 10 (Magnetism Evade 9). The attack must really be evaded: you cannot spam rolls as with Seregios weapons in 4 or X. |
| Edgemaster | Honed Blade +3 | 20 | Attack Up (Absolute) and Sharpness +1. A stronger Attack Up or Strong Attack Up replaces the attack part. |
| Edgemaster | Honed Blade +2 | 15 | Attack Up (Very Large) and Sharpness +1. Same replacement rule. |
| Edgemaster | Honed Blade +1 | 10 | Attack Up (Large) and Sharpness +1. Same replacement rule. |
| Handicraft | Sharpness +1 (Artisan) | 10 | Maximum weapon sharpness +1 level if possible |
| Bomb Sword | Bomb Sword +3 / +2 / +1 | 20 / 15 / 10 | Allows bomb sword crystals. Bomb damage varies by weapon and is not high enough to be useful at G Rank. |
| Poison Sword | Poison Sword +3 / +2 / +1 | 20 / 15 / 10 | Allows poison sword crystals. Status values vary by weapon type. |
| Paralysis Sword | Paralysis Sword +3 / +2 / +1 | 20 / 15 / 10 | Allows paralysis sword crystals. Status values vary by weapon type. |
| Sleep Sword | Sleep Sword +3 / +2 / +1 | 20 / 15 / 10 | Allows sleep sword crystals. Status values vary by weapon type. |
| Fire Sword | Fire Sword +3 / +2 / +1 | 20 / 15 / 10 | Allows fire sword crystals. Damage values vary by weapon. |
| Water Sword | Water Sword +3 / +2 / +1 | 20 / 15 / 10 | Allows water sword crystals. Damage values vary by weapon. |
| Thunder Sword | Thunder Sword +3 / +2 / +1 | 20 / 15 / 10 | Allows thunder sword crystals. Damage values vary by weapon. |
| Ice Sword | Ice Sword +3 / +2 / +1 | 20 / 15 / 10 | Allows ice sword crystals. Damage values vary by weapon. |
| Dragon Sword | Dragon Sword +3 / +2 / +1 | 20 / 15 / 10 | Allows dragon sword crystals. Damage values vary by weapon. |
| Fencing | Fencing +2 | 20 | ESP (no bouncing) and a second hit on each attack. The second hit has 20% of the first hit's value, including raw, element, status and Sword Crystals. Sharpness and Sword Crystals are used as if you hit once. Criticals roll once, so both hits crit or neither does. |
| Fencing | Fencing +1 | 10 | ESP (no bouncing) when attacking monsters or objects such as boulders, explosive volcanic rocks and pillars in the Sky Corridor |
| Sword God | Sword God +3 | 20 | Sharpness +1, Razor Sharp +2, Fencing +2 and Sharpening Artisan in one skill |
| Sword God | Sword God +2 | 20 | Sharpness +1, Razor Sharp +2, Fencing +2 in one skill |
| Sword God | Sword God +1 | 10 | Sharpness +1, Razor Sharp +1, Fencing +1 in one skill. Fencing +2 and Razor Sharp +2 have priority and override these. |
Gunner
| Skill tree | Skill | Pts | Effect |
|---|---|---|---|
| Steady Hand | Steady Hand +2 | 20 | Normal/Rapid Up, Pierce Up, Pellet/Spread Up and +5 to weakness value within Critical Distance. Does not stack with the single Up skills, Determination, Precision, Sniper or Critical Shot. |
| Steady Hand | Steady Hand +1 | 15 | Normal/Rapid Up, Pierce Up and Pellet/Spread Up. Does not stack with the single skills. |
| Normal Shot Up | Normal/Rapid Up | 10 | Normal S and Rapid Bow arrows do x1.1 damage |
| Pierce Shot Up | Pierce/Pierce Up | 10 | Pierce Shots and Pierce Bow arrows do x1.1 damage |
| Pellet Shot Up | Pellet/Spread Up | 10 | Pellet Shots and Scatter Bow arrows do x1.3 damage |
| Normal Shot Add | Normal S All Add | 15 | Use all Normal S ammo |
| Pierce Shot Add | Pierce S All Add | 20 | Use all Pierce S ammo |
| Pierce Shot Add | Pierce S Lv1 and Lv2 Add | 15 | Use Pierce S Lv1 and Lv2 ammo |
| Pierce Shot Add | Pierce S Lv1 Add | 10 | Use Pierce S Lv1 ammo |
| Pellet Shot Add | Pellet S All Add | 20 | Use all Pellet S ammo |
| Pellet Shot Add | Pellet S Lv1 and Lv2 Add | 15 | Use Pellet S Lv1 and Lv2 ammo |
| Pellet Shot Add | Pellet S Lv1 Add | 10 | Use Pellet S Lv1 ammo |
| Crag Shot Add | Crag S All Add | 20 | Use all Crag S ammo |
| Crag Shot Add | Crag S Lv1 and Lv2 Add | 15 | Use Crag S Lv1 and Lv2 ammo |
| Crag Shot Add | Crag S Lv1 Add | 10 | Use Crag S Lv1 ammo |
| Cluster Shot Add | Cluster S All Add | 20 | Use all Cluster S ammo |
| Cluster Shot Add | Cluster S Lv1 and Lv2 Add | 15 | Use Cluster S Lv1 and Lv2 ammo |
| Cluster Shot Add | Cluster S Lv1 Add | 10 | Use Cluster S Lv1 ammo |
| Poison Coating Add | Enable Poison Coatings | 10 | Use Poison coatings |
| Paralysis Coating Add | Enable Paralysis Coatings | 10 | Use Paralysis coatings |
| Sleep Coating Add | Enable Sleep Coatings | 10 | Use Sleep coatings |
| Mounting | Mounting +3 | 30 (20 in ZZ) | Load Up and Reload Speed +3 |
| Mounting | Mounting +2 | 20 (15 in ZZ) | Load Up and Reload Speed +2 |
| Mounting | Mounting +1 | 10 | Load Up and Reload Speed +1 |
| Gentle Shot | Gentle Shot +3 | 30 (20 in ZZ) | Load Up and Recoil Reduction +3 |
| Gentle Shot | Gentle Shot +2 | 15 | Load Up and Recoil Reduction +2 |
| Gentle Shot | Gentle Shot +1 | 10 | Load Up and Recoil Reduction +1 |
| Loading | Load Up | 10 | +1 capacity for bowgun and Gunlance ammo. One extra charge level for bows. |
| Rapid Fire | Rapid Fire | 15 | Rapid Fire volleys fire one extra round, and when you load bullets that can rapid fire you load all of them. Does not apply to Ultra Rapid Fire. |
| Auto-Reload | Auto-Reload | 10 | Bowguns: you can shoot without reloading, but all shots have high recoil. Bows: charge time is 85% of normal. It is incredibly good on bows and a brick skill on bowguns, because the penalty is huge and levels in Recoil cannot cancel it. |
| Reload | Reload Speed +3 | 20 | Bowguns: reload speed +3 levels. Bows: coatings load automatically when selected. |
| Reload | Reload Speed +2 | 15 | Bowguns: +2 levels. Bows: coating load time is 75% of normal. |
| Reload | Reload Speed +1 | 10 | Bowguns: +1 level. Bows: coating load time is 85% of normal. |
| Reload | Reload Speed -1 | -10 | Bowguns: -1 level. Bows: coating load time is 110% of normal. |
| Recoil | Recoil Reduction +3 | 30 (20 in ZZ) | Bowguns: recoil reduced by 6 levels. Gunlance: you can evade after Shelling, and Wyvern Fire recoil is 30 frames shorter. |
| Recoil | Recoil Reduction +2 | 15 | Bowguns: recoil reduced by 4 levels. Gunlance: same as +3. |
| Recoil | Recoil Reduction +1 | 10 | Bowguns: recoil reduced by 2 levels. Gunlance: you can evade after Shelling. |
| Critical Shot | Critical Shot +3 | 20 | Attack Up (Absolute) (true raw +50) and Sniper (+5 to a body part's weakness when hit by a Normal, Pierce or Crag Shot or bow attack at the right critical distance). Does not stack with other Attack skills or Sniper (the attack part would be overwritten by Strong Attack +4, for example). Stacks with Thunder Clad, Acid Shots, Hunting Horn Sonic Bomb debuff and Point Breakthrough, and the resulting value is used for Exploit Weakness. |
| Critical Shot | Critical Shot +2 | 15 | Attack Up (Very Large) (true raw +30) and Sniper (also less shot deviation). Same stacking rules. |
| Critical Shot | Critical Shot +1 | 10 | Attack Up (Large) (true raw +20) and Sniper (also less shot deviation). Same stacking rules. |
| Precision | Precision +2 (Sniping) | 20 | Less shot deviation (bullet drift), and +5 to a body part's weakness (35 becomes 40) with Normal, Pierce or Crag Shots or bow attacks within Critical Distance. Stacks with Thunder Clad, Acid Shots, Hunting Horn Sonic Bomb debuff and Point Breakthrough, and the resulting value is used for Exploit Weakness. The +5 does not apply to bows: use Sniper or Critical Shot. |
| Precision | Deviation Down | 10 | Less shot deviation (bullet drift) |
| Precision | Deviation Up | -10 | Shot deviation is increased (the guide says decreased, which looks like a typo) |
| Ammo Combiner | Maximum Bullets | 10 | When combining bullets or coatings you always get the maximum back |
| Bullet Saver | Higher level (name unclear in the original) | 20 | When you fire a shot there is an 11/32 (34.3%) chance it uses no shot or coating. Every bullet in a compression shot rolls on its own (Heavy Bowgun only: from none to all loaded shots can be saved). Does not work with Ultra Rapid Fire (Light Bowgun) or Heat Beams (Heavy Bowgun). |
| Bullet Saver | Lower level (name unclear in the original) | 10 | 7/32 (21.8%) chance a shot or coating is not used. Also works with compression (Heavy Bowgun). Does not work with Ultra Rapid Fire or Heat Beam. |
| Sniper | Sniper | 10 | Auto-Reload and +5 to weakness value within critical distance. Only use it with bows. |
| Spacing | Spacing | 10 | Lowers the critical distance for Normal, Pierce, Pellet and Blunt shots and raises damage further at critical distance. Staying within it gives Movement Speed +2 and Evade Distance Up. Light Bowgun and Heavy Bowgun get larger perfect shot (3 segments) and compression (2 segments) windows. Bows get lower charge times that stack with Auto-Reload. It does not buff attacks that have no Critical Distance and is added to the first half of the Heavy Bowgun's Critical Distance buff. It builds a hidden meter, much like Thunder Clad, whose hits needed vary with attack, affinity and shot type, and it is not reset when you are launched. Bonus and duration: Light Bowgun +0.10x, 35 s; Heavy Bowgun +0.15x, 40 s; Bow +0.10x, 30 s. |
Hiden skills
Each weapon type has its own Tech skill tree with four levels. The top level (30 points) is the Hiden skill. The top level of each also gives Super High-Grade Earplugs.
| Weapon | 30 pts (Hiden) | 20 pts (Kaiden) | 10 pts (Expert) | -10 pts (Novice) |
|---|---|---|---|---|
| Sword and Shield (Sword Saint) | Attack x1.3 with a Sword and Shield, all Elemental Sword Stone skills +3, all Status Sword Stone skills +2, Bomb Sword +2, faster movement with the weapon drawn, and Fencing. The +3 crystal skills override the +2 versions inside it. | Fencing and Attack x1.1 | Fencing | Attack x0.8 |
| Dual Swords (Dual Dragon) | Attack x1.2 with Dual Swords, Fencing, 3 units of stamina recovered per hit in either Demon Mode (even with Combat Supremacy), faster Demon Mode activation | Fencing and Attack x1.1 | Fencing | Attack x0.8 |
| Great Sword (Sword King) | Attack x1.2 with a Great Sword, Fencing +1. A guard slash counter recovers half the sharpness that would be lost. Faster charging (stacks with Focus). Charge stays at level 4 longer before dropping to level 2 (Storm Style). Perfectly timed blocks cause no knockback, can be evaded out of, use no stamina and recover half the sharpness that would be lost. The sharpness recovery works with Sharp Sword and lets you recover sharpness with Sharp Sword +2. | Attack x1.1 and Fencing | Fencing | Attack x0.8 |
| Long Sword (Katana God) | Attack x1.2 with a Long Sword, Fencing, Spirit Bar use halved, Sharp Sword +2 while the Spirit Bar is full, and Attack x1.25 (was x1.15) while the Spirit Bar glows after being filled completely | Attack x1.1 and Fencing | Fencing | Attack x0.8 |
| Hammer (Blunt Beast) | Attack x1.2 with a Hammer, Fencing, and Attack x1.3 for that whole combo when you release a perfectly timed charge attack (infinite combo included) | Attack x1.1 and Fencing | Fencing (no bouncing) | Attack x0.8 |
| Hunting Horn (Flamboyant Emperor) | Attack x1.2 with a Hunting Horn, Fencing, Performance mode note colour decision 34% faster | Attack x1.1 and Fencing | Fencing (no bouncing) | Attack x0.8 |
| Lance (Heavenly Spear) | Attack x1.2 with a Lance, Fencing, 0 damage when blocking any attack, 4 hops instead of 3, and motion value +10 for the final (3rd or 4th) normal, diagonal and sky stabs | Attack x1.1 and Fencing | Fencing (no bouncing) | Attack x0.8 |
| Gunlance (Cannon Emperor) | Attack x1.2 with a Gunlance, Fencing, Wyvern Fire and Heat Blade cooldowns halved, Heat Blade activation time cut to 3 seconds, Normal Shells +2, Long Shells +1 and Wide Shells +1 (stack with Load Up, Gentle Shot or Mounting) | Attack x1.1 and Fencing | Fencing (no bouncing) | Attack x0.8 |
| Switch Axe (Edge Marshal) | Attack x1.2 with a Switch Axe and Fencing. Certain successful actions raise attack by x1.05 for a short time (morphing in Earth Style, sword attacks in Heaven Style, guarding in Storm Style). Stamina use of the infinite swing combo is halved, axe mode attacks raise the phial gauge, and phial attacks use less meter. | Attack x1.1 and Fencing | Fencing (no bouncing) | Attack x0.8 |
| Tonfa (Piercing Phoenix) | Attack x1.2 with Tonfa, Fencing, and a sixth Combo / EX meter segment | Attack x1.1 and Fencing | Fencing (no bouncing) | Attack x0.8 |
| Magnet Spike (Magnetic Star) | Attack x1.2 with a Magnet Spike, Fencing, and successful evasive motions raise attack (x1.03) and gauge recovery (x1.5) for 30 seconds. Movement speed x1.2. The magnetic target marker does not disappear. | Attack x1.1 and Fencing | Fencing (no bouncing) | Attack x0.8 |
| Heavy Bowgun (Gun Sage) | Attack x1.3 with a Heavy Bowgun, element and status ammo power x1.2, Evade Distance Up, melee attacks and Crag/Cluster shots deal 15 KO damage, Heat Beam x1.2 damage, and a perfectly timed compression gives more attack for that salvo | Attack x1.1 and Evade Extender | Evade Extender | Attack x0.8 |
| Light Bowgun (Gun Prodigy) | Attack x1.3 with a Light Bowgun, less chance of ammo bouncing off monsters, you can use items with the weapon drawn, and a Perfect Shot added to the Just Shot meter that deals extra damage | Attack x1.1 and less chance of ammo bouncing | Less chance of ammo bouncing | Attack x0.8 |
| Bow (Bow Demon) | Attack x1.3 with a Bow, arrows cannot be deflected, Power Coating modifier up to x1.6 for normal bows and x1.7 for Gou (and upgrades), Evolution (Raviente) and G Rank bows, and the Arc-Shot can be done at Charge Lv2 | Attack x1.1 and arrows are not deflected | Arrows are not deflected (Elder Dragon aura, Gou Yamatsukami, Black Rathian Rage Mode entry fire aura) | Attack x0.8 |
Resistances
Resistance skills have positive and negative levels. All gains and penalties are in resistance points.
| Skill tree | Levels | Pts | Effect |
|---|---|---|---|
| All Res | All Res +20 / +10 / +5 | 20 / 15 / 10 | All resistances +20 / +10 / +5 |
| All Res | All Res -5 / -10 / -20 | -10 / -15 / -20 | All resistances -5 / -10 / -20 |
| Fire Res | Fire Res +30 / +20 / +10 | 20 / 15 / 10 | Fire resistance +30 / +20 / +10 |
| Fire Res | Fire Res -10 / -20 / -30 | -10 / -15 / -20 | Fire resistance -10 / -20 / -30 |
| Water Res | Water Res +30 / +20 / +10 | 20 / 15 / 10 | Water resistance +30 / +20 / +10 |
| Water Res | Water Res -10 / -20 / -30 | -10 / -15 / -20 | Water resistance -10 / -20 / -30 |
| Ice Res | Ice Res +30 / +20 / +10 | 20 / 15 / 10 | Ice resistance +30 / +20 / +10 |
| Ice Res | Ice Res -10 / -20 / -30 | -10 / -15 / -20 | Ice resistance -10 / -20 / -30 |
| Thunder Res | Thunder Res +30 / +20 / +10 | 20 / 15 / 10 | Thunder resistance +30 / +20 / +10 |
| Thunder Res | Thunder Res -10 / -20 / -30 | -10 / -15 / -20 | Thunder resistance -10 / -20 / -30 |
| Dragon Res | Dragon Res +30 / +20 / +10 | 20 / 15 / 10 | Dragon resistance +30 / +20 / +10 |
| Dragon Res | Dragon Res -10 / -20 / -30 | -10 / -15 / -20 | Dragon resistance -10 / -20 / -30 |
Statuses
| Skill tree | Skill | Pts | Effect |
|---|---|---|---|
| Poison Res | Negate Poison | 20 | Immunity to Poison |
| Poison Res | Poison Halved | 10 | Poison lasts half as long |
| Poison Res | Double Poison | -10 | Poison lasts twice as long |
| Paralysis Res | Negate Paralysis | 20 | Immunity to Paralysis |
| Paralysis Res | Paralysis Halved | 10 | Paralysis lasts half as long |
| Paralysis Res | Paralysis Doubled | -10 | Paralysis lasts twice as long |
| Sleep Res | Negate Sleep | 20 | Immunity to Sleep |
| Sleep Res | Sleep Halved | 10 | Sleep lasts half as long |
| Sleep Res | Sleep Doubled | -10 | Sleep lasts twice as long |
| Status Res | Status Immunity (Myriad) | 30 | Immunity to Poison, Paralysis, Sleep, Stench, Snowman, Chat Disabled, Defense Down, Drunk, Magnetism, Crystallization and Blast |
| Status Res | Status Immunity | 20 | Immunity to Poison, Paralysis and Sleep |
| Status Res | Status Halved | 10 | Halves Poison, Paralysis and Sleep duration |
| Status Res | Status Doubled | -10 | Doubles Poison, Paralysis and Sleep duration |
| Stun Res | Negate Stun | 20 | Immunity to Stun |
| Stun Res | Stun Halved | 10 | Stun lasts half as long |
| Stun Res | Stun Doubled | -10 | Stun lasts twice as long |
| Deodorant | Antiseptic | 10 | Prevents Stench (Pariapuria, Congalala, Chameleos and others) |
| Snowball Res | Negate Snow | 10 | Immunity to Snowman |
| Vocal Chords | Vocal Chord Immunity | 15 | Immunity to Chat Disable and Fatigue. Exclusive to Chameleos. |
| Vocal Chords | Vocal Chord Duration Halved | 10 | Halves Chat Disable and Fatigue duration. Exclusive to Chameleos. |
| Def Lock | Def Lock | 10 | Immunity to Defense Down (Chameleos, Unknown and others) |
| Drunk | Heavy Drinker | 10 | Immunity to Drunk (G Rank Pariapuria and others) |
| Drunk | Drunkard | -10 | Doubles Drunk duration |
| Blast Resistance | Blast Resistance | 10 | Immunity to Blastblight |
| Magnet Res | Magnet Resistance | 10 | Immunity to Magnetism (Rukodiora, Rebidiora, Lolo Gougarf, Ray Gougarf) |
| Magnet Res | Magnet Vulnerability | -10 | Doubles Magnetism duration |
| Crystal Res | Crystal Resistance | 10 | Immunity to Crystallization (Garuba Daora, Akura Jebia, Akura Vashimu, Mi Ru) |
| Crystal Res | Crystal Vulnerability | -10 | Doubles Crystallization duration |
| Freeze Res | Freeze Resistance | 10 | Immunity to Freezing (Toa Tesukatora) |
Protection
| Skill tree | Skill | Pts | Effect |
|---|---|---|---|
| Three Worlds Protection | Unaffected +3 | 20 | Super High-Grade Earplugs, Violent Wind Breaker and Quake Resistance +2. Lower or higher versions of a part are disabled or overwritten by the matching part in this skill. |
| Three Worlds Protection | Unaffected +2 | 15 | High-Grade Earplugs, Dragon Wind Breaker and Quake Resistance +1. Same override rule. |
| Three Worlds Protection | Unaffected +1 | 10 | Earplugs, Wind Res (Large) and Quake Resistance +1. Same override rule. |
| Hearing Protection | Super High-Grade Earplugs | 25 | Blocks all monster roars (Hardcore, Raviente) |
| Hearing Protection | High-Grade Earplugs | 15 | Blocks second-tier roars (Diablos) |
| Hearing Protection | Earplugs | 10 | Blocks first-tier roars (Rathalos). Shortens the flinch from second-tier roars that are not blocked. |
| Quake Res | Quake Res +2 | 25 | Protects against large quakes (HC monsters) |
| Quake Res | Quake Res +1 | 15 | Protects against small quakes |
| Wind Pressure | Violent Wind Breaker | 30 | Protects against Violent Wind (Raviente, Unknown) |
| Wind Pressure | Dragon Wind Breaker | 20 | Protects against Dragon Wind (HC monsters, Elder Dragons) |
| Wind Pressure | Wind Res (Large) | 15 | Protects against Large Wind (Rathalos, Tigrex) |
| Wind Pressure | Wind Res (Small) | 10 | Protects against Small Wind (Gypceros, Kut-Ku) |
| Anti-Theft | Anti-Theft | 10 | Prevents items being stolen |
| Heat Res | Summer Person | 25 | Heat Cancel, and Damage Recovery Speed +1 in hot areas |
| Heat Res | Heat Cancel | 15 | Immunity to heat (health loss in hot areas) |
| Heat Res | Heat Halved | 10 | Health loss in hot areas (Volcano and Desert) is halved |
| Heat Res | Heat Surge (Small) | -10 | Health loss rises to 1 unit per 1.3 seconds in the Volcano and per 2 seconds in the Desert (default is 1 unit per 3 seconds) |
| Heat Res | Heat Surge (Large) | -20 | Health loss rises to 1 unit per second in the Volcano and per 1.5 seconds in the Desert |
| Cold Res | Winter General | 25 | Cold Cancel, Frostbite immunity and the Marathon Runner effect in cold areas |
| Cold Res | Cold Cancel | 15 | Immunity to cold (the faster stamina loss) |
| Cold Res | Cold Halved | 10 | Stamina loss (hunger) in cold areas is halved |
| Cold Res | Cold Surge (Small) | -10 | Stamina loss in cold areas x1.5 (default is -25 stamina per 6 minutes) |
| Cold Res | Cold Surge (Large) | -20 | Stamina loss in cold areas x2 |
| Light Tread | Vigilance | 10 | Immunity to monster pitfall traps (HC Gurenzeburu, HC Blue Yian Kut-Ku, Pokaradon) |
| Terrain | Terrain Damage Decreased (Large) | 15 | Health loss from terrain damage (lava) and heat auras at 1/3 speed (default 8/30 s) |
| Terrain | Terrain Damage Decreased (Small) | 10 | Health loss from terrain damage and heat auras at 2/3 speed |
| Terrain | Terrain Damage Increased (Small) | -10 | Health loss from terrain damage and heat auras at x1.5 speed |
| Terrain | Terrain Damage Increased (Large) | -15 | Health loss from terrain damage and heat auras at x2 speed |
| Evasion Boost | Evasion Boost | 15 | Grants Evasion +2 and Evade Extender |
| Evasion | Evasion +2 | 20 | Evasion i-frames rise to 12/30 of a second (default 6/30). Long Sword Evade Slash gets about 9 i-frames (up from 6). Sword and Shield Slide gets about 9. Most other evasions exclusive to Extreme Style already have standard roll i-frames or higher. |
| Evasion | Evasion +1 | 10 | Evasion i-frames rise to 10/30 of a second. Long Sword Evade Slash gets about 7. Sword and Shield Slide gets about 8. |
| Evade Distance | Evade Extender (Evade Distance Up) | 10 | The distance covered by evasive moves is increased a lot. Disabled with Heavy Bowgun Tech, which gives the same effect. |
| Passive | Passive | 10 | Invincibility time after getting up from an attack is 3x longer |
| Protection | Goddess' Embrace | 20 | 1 in 4 chance to take 0 damage from any attack |
| Protection | Divine Protection | 10 | 1 in 8 chance to take 0 damage from any attack |
| Protection | Demonic Protection | -10 | 1 in 16 chance to die instantly from any attack. It can trigger on things you may not expect, such as your own reflected arrows and bombs, vespoid stings and ice or spike-covered ground. |
| Protection | Death God's Embrace | -20 | 1 in 8 chance to die instantly from damage taken. It can trigger on the same unexpected things. It does not trigger from guarding damage. |
| Guts | True Guts | 30 | When health and stamina are 50 or higher, an otherwise lethal attack leaves you at 1 health. Does not work if you are paralysed when hit. |
| Guts | Great Guts | 20 | Same with health 70 and stamina 50 or higher. Does not work if you are paralysed when hit. Does not trigger in G Rank quests. |
| Guts | Guts | 10 | Same with health 90 and stamina 50 or higher. Does not work if you are paralysed when hit. Does not trigger in G Rank quests. |
| Absolute Defense | Absolute Defense Preparation | 20 | Adds a shield aura that completely negates a hit, including all damage and status effects it would cause. The shield vanishes for a set time after each hit blocked, and the recharge time grows with each hit. While the shield is down, physical damage is reduced to about x0.8 (80 physical and 30 dragon becomes 64 physical and 30 dragon). Recharge time is 15 + (trigger count x 5.1) seconds, or 460 frames plus 153 frames per trigger. It cannot be used with things such as Reflect or parries, because Absolute Defense has priority. |
Items and combination
| Skill tree | Skill | Pts | Effect |
|---|---|---|---|
| Combination Expert | Combination Expert +3 | 20 | Combo rate +30%, plus the effects of Bullet Combination Expert and Health Recovery Items Improved |
| Combination Expert | Combination Expert +2 | 15 | Combo rate +20% and the effect of Bullet Combination Expert |
| Combination Expert | Combination Expert +1 | 10 | Combo rate +10% and the effect of Bullet Combination Expert |
| Combination Expert | Combination Expert -1 | -10 | Combo rate -5% |
| Everlasting | Item Duration Extended | 10 | Item effect time x1.5 (Hot Drinks, Cool Drinks, Armor Seeds and so on) |
| Everlasting | Item Duration Reduced | -10 | Item effect time x0.67 |
| Wide-Area | Wide-Area +3 | 30 | Mega Potions, Blight Cure Fruits, Zenith Espinas Antitoxin and Crimson Raviente Blood affect allies in the same area, as well as the items in Wide-Area +2 |
| Wide-Area | Wide-Area +2 | 20 | Herbs, Potions, Antidotes, Cool Drinks, Hot Drinks, Armor Seed and Power Seed affect allies in the same area |
| Wide-Area | Wide-Area +1 | 10 | The same items affect allies in the same area at 50% effectiveness |
| Wide-Area | Wide-Area -1 | -10 | You cannot be healed by wide-range recovery such as Lifepowders or players with the skill active |
| Whim | Divine Whim | 15 | 50% less chance of breaking Pickaxes, Bug Nets, Horns and Boomerangs |
| Whim | Spirit's Whim | 10 | 25% less chance of breaking them |
| Whim | Spectre's Whim | -10 | 25% more chance of breaking them |
| Whim | Devil's Whim | -15 | 50% more chance of breaking them |
| Throwing | Throwing Distance Up | 10 | Throwing items go farther and the chance to lose Boomerangs falls to 1/8 |
| Strong Arm | Strong Arm +2 | 20 | Thrown items do x1.3 damage |
| Strong Arm | Strong Arm +1 | 10 | Thrown items do x1.1 damage |
| Hunter | Hunter Valhalla | 20 | Always shows the map and the location of large monsters. Easier fishing and BBQ. |
| Hunter | Hunter Life | 10 | Always shows the map. Easier fishing and BBQ. |
| Cooking | BBQ Master | 15 | Fish and meat stay brown (ready) much longer |
| Cooking | BBQ Expert | 10 | Fish and meat stay brown longer |
| Cooking | False BBQ Expert | -10 | Fish and meat stay brown for half the usual time |
| Fishing | Fishing Expert | 10 | Fish always bite on the first try |
| Combining | Combination +30% | 20 | Combo rate +30% |
| Combining | Combination +15% | 15 | Combo rate +15% |
| Combining | Combination +10% | 10 | Combo rate +10% |
| Combining | Combination -5% | -10 | Combo rate -5% |
| Alchemy | Alchemy | 10 | Grants Alchemy combinations (alternative item combinations) |
| Speed Setup | Trap Master | 20 | Trap setup time x0.66. 100% combine rate for traps, Mocha Pots and trap-related items. |
| Speed Setup | Trap Expert | 10 | Trap setup time x0.8. 100% combine rate for traps, Mocha Pots and trap-related items. |
| Iron Arm | Iron Arm +2 | 20 | Throwing Distance Up, Strong Arm +2, Throwing Knives +2. Longer blocking on Great Sword Guard Slash (Heaven and Storm Styles), Lance Shield Rush (Storm and Extreme Styles) and Tonfa Standard 1, 3 and 4, Aerial 1 to 3, Continuous Thrust 2 and Dash Tonfa Rotation. Tonfas gain 7 extra frames of guard points. |
| Iron Arm | Iron Arm +1 | 10 | Throwing Distance Up, Strong Arm +1, Throwing Knives +1, and the same longer blocking. Tonfas gain 5 extra guard frames. |
| Knife Throwing | Throwing Knives +2 | 20 | Throw 5 knives at once instead of 1, using only 1 |
| Knife Throwing | Throwing Knives +1 | 10 | Throw 3 knives at once instead of 1, using only 1 |
Map and detection
| Skill tree | Skill | Pts | Effect |
|---|---|---|---|
| Map | Map | 10 | Always shows the map |
| Psychic | Autotracker | 15 | Monster locations are always shown on the map, with a detailed icon |
| Psychic | Detect | 10 | Marked monsters are shown with a detailed icon instead of a round dot on the map |
| Stealth | Sneak | 10 | Monsters are less likely to target you |
| Stealth | Taunt | -10 | Monsters are more likely to target you |
| Incitement | Incitement | 10 | Attacking a monster forces its attention onto you instead of your fellow hunters, and damage from it is reduced for that time. The yellow eye icon that shows you were spotted turns red while it is in effect. If you stay out of the monster's range for too long the effect ends early. It has a 30 second cooldown. While you are targeted you get +40 true raw. |
Gathering
| Skill tree | Skill | Pts | Effect |
|---|---|---|---|
| Backpacking | Pro Transporter | 10 | Faster when carrying heavy items such as eggs, powderstone and soothstone, and you can fall from slightly greater heights without dropping the item |
| High Speed Gathering | Speed Gather | 10 | Faster gathering |
| Gathering | Gathering +2 | 15 | Greatly raises the chance of extra items from gathering points: 31/32 (default 27/32) |
| Gathering | Gathering +1 | 10 | Raises the chance of extra items: 29/32 |
| Gathering | Gathering -1 | -10 | Lowers the chance: 23/32 |
| Gathering | Gathering -2 | -15 | Greatly lowers the chance: 19/32 |
| Carving | Carving Expert | 15 | Number of carves +1 |
| Mindfulness | Imperturbable | 15 | You cannot be interrupted by any attack while using an item or gathering |
| Mindfulness | Fully Prepared | 10 | You cannot be interrupted by other hunters or small monsters while using an item or gathering |
| Mindfulness | Negligence | -10 | You take more damage from monsters when hit while using an item or gathering |
Rewards
| Skill tree | Skill | Pts | Effect |
|---|---|---|---|
| Fate | Great Luck | 20 | Greatly raises the chance of standard quest rewards: 29/32 (default 22/32) |
| Fate | Good Luck | 10 | Raises the chance: 26/32 |
| Fate | Bad Luck | -10 | Lowers the chance: 16/32 |
| Fate | Horrible Luck | -20 | Greatly lowers the chance: 8/32 |
| Pressure | Pressure (Large) | 20 | Monster bounty rises randomly by 30, 50, 75, 100 or 150% |
| Pressure | Pressure (Small) | 10 | Monster bounty rises by 30% |
| Monster | Come on Big Guy! | 10 | Apparently raises the chance of larger boss monsters spawning. Quite probably a placebo skill with no real effect. |
Other skills
| Skill tree | Skill | Pts | Effect |
|---|---|---|---|
| Breeder | Breeder | 10 | Poogie item drops at the Pugi Farm are more common. Halks also drop items more often. |
| Bond | Bond | 10 | When a hunter of the opposite gender is in the quest: male players get Attack +5, female players get Defense +40. |
| Inspiration | Inspiration | 10 | A random skill takes effect at the start of a quest, shown by a message. The skills and their chances: All Res +5 (30%), Heat Res and Cold Res (16%), Negate Stun (16%), Taunt (15%), Speed Eating (12%), All Res -20 (7%), Status Immunity (4%). |
| Capture Proficiency | Capture Guru | 20 | Monsters blink on the map when they can be captured |
| Capture Proficiency | Capture Proficiency | 10 | Chance of a captured monster becoming a pet +30% |
| Relief | Relief | 10 | Rastas, Fostas, Partners and Halks recover 50% faster after disappearing. Legendary Rastas never leave, so they are not affected. |
| Caring | Caring +3 | 25 | All quests: human players cannot interrupt you with their attacks, nor you them. All quests: NPCs cannot be interrupted by human players and roll when hit instead. This is not party-wide: NPCs only roll when hit by players who have the skill, or if they have it themselves. |
| Caring | Caring +2 | 15 | Non-G Rank quests: human players cannot interrupt you, nor you them. All quests: the same NPC effect as +3. |
| Caring | Caring +1 | 10 | All quests: NPCs cannot be interrupted by human players and roll when hit instead (same limits). |
| Movement Speed | Movement Speed Up +2 | 20 | Movement speed with the weapon sheathed is increased a little further |
| Movement Speed | Movement Speed Up +1 | 10 | Movement speed with the weapon sheathed is increased a little |
| Reinforcement | Red Soul | 10 | Own Attack +15. Hitting another player gives them Attack +30. If you hit a player with Blue Soul, or a player with Blue Soul hits you, you can KO monsters with any weapon when you hit their head and your own Attack rises by +30. All effects last 2 minutes. Attack is a final addition, always the stated value, and unaffected by other skills and multipliers. |
| Reinforcement | Blue Soul | -10 | Own Defense +50. Hitting another player gives them Defense +100. Hitting a player under any status ailment dispels the effect. Being hit by a player with Red Soul raises your own Defense by +100 and gives you the Goddess' Embrace effect. All effects last 2 minutes. |
| Assistance | Assistance | 10 | Your arm glows red and nearby hunters get +20 Attack, +50 Defense, Damage Recovery Speed +2, Status Immunity and Peerless. Affected players' arms glow yellow. Radius is 3 rolls, or 2 with Evade Distance Up. You get the +20 Attack and +50 Defense but not Peerless, Status Immunity or Damage Recovery Speed. The skills overwrite lower versions if an affected hunter has them: a hunter with Status Halved gains Status Immunity in range, while one with Status Immunity (Myriad) keeps theirs. Attack is a final addition unaffected by other skills and multipliers. |
| Grace | Grace +3 | 30 | When there are 3 or fewer active skills: Attack Up (Absolute), Issen +3, High-Grade Earplugs, Wind Res (Large), Quake Res +1, Evasion +1, Guard +1, Goddess' Embrace and Weapon Handling are active |
| Grace | Grace +2 | 20 | The same, when there are 2 or fewer active skills |
| Grace | Grace +1 | 10 | The same, when this is the only active skill |
| Compensation | Compensation | 10 | Death God's Embrace, Sharpness +1, Attack Up (Absolute), Evasion +2 and Critical Eye +4. Death God's Embrace cannot be countered by Guts or by points in Divine Protection. Bowguns and bows get nothing for the Sharpness +1 part. Death God's Embrace can trigger on unexpected things such as your own reflected arrows and bombs, vespoid stings and ice or spike-covered ground. It does not trigger from guarding damage. |
| Dark Pulse | Dark Finale | 20 | When health drops to 0 you rise again with full health and stamina bars and heavy buffs, but you lose health at a steady rate that nothing can stop, and you cart after exactly one minute. Completing a quest ends the health loss, so final carts will not happen. While risen you have Adrenaline +2, Starving Wolf +2, Defense +120, Sharpening Artisan, Super HG Earplugs, Violent Wind Breaker, Tremor Res +2, Heat Cancel and Cold Cancel, plus a Super Armour effect that makes you immune to all knockback. Adrenaline and Starving Wolf are always active while risen, whatever your health or stamina. Guts Tickets and similar one-shot prevention take priority and stop this skill from triggering until they run out or stop applying. |
| Blazing Grace | Blazing Majesty +2 | 15 | Adrenaline +2, Red Soul, Bombardier, Fire Res +30, Artillery God, Summer Person, Terrain Damage Decreased (Large), Fire Attack Up (Large), Flame Sword +3 and Bomb Sword +3 in one skill |
| Blazing Grace | Blazing Majesty +1 | 10 | Adrenaline +1, Red Soul, Bombardier, Fire Res +20, Artillery Expert, Heat Cancel, Terrain Damage Decreased (Small), Fire Attack Up (Small), Flame Sword +2 and Bomb Sword +2 in one skill. Higher versions of the combined skills take priority. |
| Drawing Arts | Drawing Arts +2 | 15 | Weapon drawn: Peerless, Evasion +2, Weapon Handling. Weapon sheathed: Damage Recovery Speed +2, Stamina Recovery Up (Large). |
| Drawing Arts | Drawing Arts +1 | 10 | Weapon drawn: Marathon Runner, Evasion +1, Weapon Handling. Weapon sheathed: Damage Recovery Speed +1, Stamina Recovery Up (Small). |
| Ice Age | Ice Age | 10 | When you attack a monster an icy aura surrounds you. It damages every monster in the area and gives skills. It has three stages and rises with more hits. Everyone in the aura gets Stamina Recovery Up and Sharp Sword, and you also get Winter General. Damage is dealt once per second. Stage 1: 0.042 x true raw x defence rate per second, lasts 11 to 18 s (7 s when dropped back to it). Stage 2: 0.098 x true raw x defence rate, 14 to 25 s (10 s when dropped back to it). Stage 3: 0.14 x true raw x defence rate, 6 to 9 s. Hits needed (stage 1 > 2 > 3): Great Sword 1 > 8 > 17; Hammer, Hunting Horn 1 > 9 > 21; Long Sword, Lance, Gunlance, Switch Axe, Heavy Bowgun 1 > 12 > 26; Sword and Shield, Light Bowgun, Bow, Tonfa 1 > 17 > 38; Dual Swords 1 > 32 > 75; Magnet Spike unknown. The true raw is the weapon's value in 4, 3 and 1. Typical damage is 800 to 1600 per minute depending on level, more than poison on most G Rank monsters. Several instances of Ice Age each do their own damage, so a group of four with the same gear does 3200 to 6400. |
Zenith skills
How Zenith skills work
You get a Zenith skill by equipping a piece that carries it. Zenith skills mainly buff existing skills. Apart from Skill Slots Up, they have no effect of their own. They are added on top of the normal skill points: a maxed Zenith armour piece has its usual points in 5 skills and a Zenith skill as well.
Zenith skills appear on Cuffs, weapons and armour pieces. Both Premium (ZP) and normal Zenith (Z, ZF, ZY, ZX) armour have them, and you always have to hunt real Zenith monsters to get them. Cuffs are standard cuffs, so you can use them without a Premium Pugi outfit.
Having more than the limit of a Zenith skill adds nothing. Dissolver Up has only 1 level, so having it on 5 pieces is the same as on 1. Hybrid skills count as their parts: Fortification +2 counts as Guard +2 for Guard Up, and Three Worlds Protection +3 counts as the maxed Wind Pressure, Hearing Protection and Quake Resistance. There is no limit on how many different Zenith skills you can have: with 7 different ones across your cuff, weapon and armour, you get all 7 as long as the skills they buff are active.
Example: Guard Up +1 raises Guard by one level, and with Guard +2 already active it adds the extra Zenith effects shown below. With no Guard skill at all, Guard Up does nothing.
Skill Slots Up
Skill Slots Up is always active, on top of any other source of extra slots. Pieces of Z, ZY, ZX or ZP level count towards the G Rank piece requirements for slots. You can find it on armour pieces, weapons and cuffs, for a maximum of 7 extra slots. It stacks with the +1 or +2 slots from having 3 or 5 standard G Rank pieces (Z, ZF, ZY, ZP and ZX included).
| Set | Natural slots | Maximum slots |
|---|---|---|
| 5 G Rank, 0 Zenith, 0 Origin | 12 | 14 |
| 4 G Rank, 1 Origin, 0 Zenith | 11 | 13 |
| 2 G Rank, 3 Origin, 0 Zenith | 10 | 14 |
| 4 Zenith, 1 Origin, 0 G Rank | 11 | 17 |
| 5 Zenith, 0 G Rank, 0 Origin | 12 | 19 |
The 2 extra slots that do not come from armour pieces come from a Zenith weapon and cuff. Realistically you will not get a set with 19 skills. For early Z sets, expect a practical maximum of about 15. Gunners benefit most, because they still want the single Origin piece for the +0.3x Critical Distance and +0.2x Power Coating multipliers.
Zenith skill list
| Zenith skill | Skill buffed | Level | Effect |
|---|---|---|---|
| Skill Slots Up | always active | +1 to +7 | Available skill slots go up by the level (1 to 7). Stacks with the slots from 3 or 5 standard G Rank pieces. |
| Flash Conversion Up | Flash Conversion (Critical Conversion) | +2 | Adds attack based on your weapon's natural affinity: 10 x the square root of base affinity, rounded down (50% base affinity: 10 x 7.07 = +70). It uses only the true base affinity of the weapon. Sigils, skills, SR skills and the +5 to 10% from sharpness above blue do not count (the sharpness bonus is always shown, so deduct 10% from most weapons). It does not need over 100% affinity: with 80% total, 50% of it from the weapon, you still get +70 true raw. |
| Flash Conversion Up | Flash Conversion | +1 | The same with 5 x the square root of base affinity (50% base: +35) |
| Stylish Assault Up | Stylish Assault | +2 | +40 attack per evade up to +220. The buff time resets with each evasion. The aura turns yellow when your attack is overbuffed. |
| Stylish Assault Up | Stylish Assault | +1 | +20 attack per evade up to +220. Same rules. |
| Dissolver Up | Dissolver | +1 | Lowers the elemental hitzone requirement for Dissolver (15 weakness instead of 20) |
| Thunder Clad Up | Thunder Clad | +2 | Thunder Clad lasts 120 seconds (+60) |
| Thunder Clad Up | Thunder Clad | +1 | Thunder Clad lasts 80 seconds (+20) |
| Ice Age Up | Ice Age | +1 | Raises the longest time the Ice Age aura can stay at a stage by 3 seconds. Only affects the top stage (stage 3 goes from 9 to 12 seconds, but if it falls to stage 2 that stays 10 seconds, not 13). |
| Hearing Protection Up | Hearing Protection | +3 | Earplugs can block Ultra Roars |
| Hearing Protection Up | Hearing Protection | +2 | Raises Hearing Protection by two tiers. High-Grade Earplugs can block Ultra Roars. |
| Hearing Protection Up | Hearing Protection | +1 | Raises Hearing Protection by one tier. Super High-Grade Earplugs can block Ultra Roars. |
| Wind Res Up | Wind Pressure | +4 | Wind Res (Small) can block Ultra Wind Pressure |
| Wind Res Up | Wind Pressure | +3 | Raises Wind Res by 3 tiers. Wind Res (Large) can block Ultra Wind Pressure. |
| Wind Res Up | Wind Pressure | +2 | Raises Wind Res by 2 tiers. Dragon Wind Breaker can block Ultra Wind Pressure. |
| Wind Res Up | Wind Pressure | +1 | Raises Wind Res by 1 tier. Violent Wind Breaker can block Ultra Wind Pressure. |
| Quake Res Up | Quake Res | +2 | Quake Res +2 can block Ultra Tremor |
| Quake Res Up | Quake Res | +1 | Raises Quake Res by 1 tier. Quake Res +1 can block Ultra Tremor. |
| Poison Res Up | Poison Res | +2 | Super Poison damage is halved. There is no immunity to Super Poison. Raises the level of the hybrid Status Immunity skill but not the skill from Assistance or Thunder Clad. |
| Poison Res Up | Poison Res | +1 | Upgrades Poison Res by 1 tier. Poison Immunity halves Super Poison damage. Same notes. |
| Paralysis Res Up | Paralysis Res | +2 | Super Paralysis is halved. There is no immunity to Super Paralysis. Same notes as Poison Res Up. |
| Paralysis Res Up | Paralysis Res | +1 | Upgrades Paralysis Res by 1 tier. Paralysis Immunity halves Super Paralysis. |
| Sleep Res Up | Sleep Res | +2 | Super Sleep is halved. There is no immunity to Super Sleep. Same notes as Poison Res Up. |
| Sleep Res Up | Sleep Res | +1 | Upgrades Sleep Res by 1 tier. Sleep Immunity halves Super Sleep. |
| Vampirism Up | Vampirism | +1 | Raises Vampirism by one level. Raises the leech rate to 100% if you already have Vampirism +2. Leeching with Vampirism +3 recovers the same health as +2, so the buff only raises leech chance and is not much compared with going from +1 to +2. |
| Drug Knowledge Up | Drug Knowledge | +1 | Status weapons always inflict 42% of their original status value (up from 38%). Does not raise the raw gained from status beyond 1/4. Normal status application is a 33% chance of 100% status points. |
| Assistance Up | Assistance | +1 | Party members in the area of Assistance get Status Immunity (Myriad). The immunity still only affects other hunters, not the person with the skill. |
Z1 First Update (February 2017) Zenith skills
| Zenith skill | Skill buffed | Level | Effect |
|---|---|---|---|
| Bullet Saver Up | Bullet Saver | +2 | Raises the rate of saving bullets or coatings to about 46.4% |
| Bullet Saver Up | Bullet Saver | +1 | Upgrades Bullet Saver by 1 tier. With Saving Master, the rate rises to about 46.4%. |
| Guard Up | Guard | +2 | Less knockback, stamina loss and health loss while guarding, and a bigger guard window. Lances and Gunlances only: guarding covers 360 degrees (rear hits still knock you down), Heavy and Ranged guards can block attacks that could not be blocked before, the Lance guard meter fills faster (3 hits per phial becomes 2), and Gunlance Wyvern Fire cooldowns are lower (10 s faster, 5 s with Hiden). |
| Guard Up | Guard | +1 | Upgrades Guard by one level. If you already have Guard +2, it gives the effects above. For Lances and Gunlances it only applies when you exceed Guard +2. |
| Adaptation Up | Adaptation | +2 | Raises the share of the adapted hitzone's value used to 90% for cutting or impact weapons and 81% for ranged weapons |
| Adaptation Up | Adaptation | +1 | Upgrades Adaptation by one level. With Adaptation +2, it gives the effect above. |
| Encourage Up | Encourage | +2 | Adds party-wide Marathon Runner and Stamina Recovery Up (Large) to Encourage |
| Encourage Up | Encourage | +1 | Upgrades Encourage +1 to +2. With Encourage +2, it gives the effect above. |
Z1 Third Update (April 2017) Zenith skills
| Zenith skill | Skill buffed | Level | Effect |
|---|---|---|---|
| Reflect Up | Reflect | +3 | Raises the Reflect +3 motion value (48 to 68). Also buffs perfect guard reflects (72 to 92). It uses your current attack and sharpness and deals impact damage. Reflect motions cannot crit, inflict status or deal elemental damage, use 1 sharpness on a hit, get no benefit from Fencing +2 and do not use loaded sword crystals. It can trigger on every part of multi-hit attacks with no cooldown. It does not buff the perfect guard reflect unless Reflect +3 is also active. |
| Reflect Up | Reflect | +2 and +1 | Upgrades Reflect by 1 tier each. Going beyond Reflect +3 gives the effect above. Same rules. |
| Stylish Up | Stylish | +1 | Successful evades make your weapon use no sharpness for a fixed number of attacks, recover the usual Stylish sharpness, and release an area attack with motion value 30. Hits that use no sharpness: Dual Swords 5; Sword and Shield, Tonfa 4; Long Sword, Lance, Switch Axe F, Magnet Spike 3; Great Sword, Hammer, Hunting Horn, Gunlance 2. Consumption Slayer lowers this to 1 hit for everything except Sword and Shield and Dual Swords, which get 2. The area attack cannot crit, inflict status or deal elemental damage, does not benefit from Fencing +2 and does not use sword crystals. |
Z2 / Anniversary Update (July 2017) Zenith skills
| Zenith skill | Skill buffed | Level | Effect |
|---|---|---|---|
| Vigorous Up | Vigorous | +1 | Attack x1.15 when your HP is over 100. Adds +100 attack for Blademasters or +50 for gunners if your HP bar is also completely full. |
Z2.2 / Anniversary Second Update Zenith skills
| Zenith skill | Skill buffed | Level | Effect |
|---|---|---|---|
| Obscurity Up | Obscurity | +1 | Cuts the attack steps for the maximum buff to 6 and lets you recover sharpness at the maximum buff. Perfect guards go up three attack steps (2 perfect guards give the maximum) and recover extra sharpness while maxed. Recovering sharpness with a Gunlance in heat blade mode lowers the sharpness loss on deactivation (20 guards or 5 perfect guards cancel all 100 sharpness loss). Attack increase by step: Sword and Shield, Lance, Gunlance, Tonfa 70 / 140 / 210 / 240 / 270 / 300; Great Sword, Switch Axe, Magnet Spike 50 / 100 / 150 / 175 / 200 / 225; Long Sword 30 / 60 / 90 / 110 / 130 / 150. Sharpness recovered (normal / perfect guard): Sword and Shield 4 / 12; Lance 2 / 10; Gunlance 5 / 20; Great Sword 5 / 15; Switch Axe 4 / 10; Tonfa 5 / 13; Long Sword 5 / 11; Magnet Spike 5 / 10. |
Z2.3 / Anniversary Third Update Zenith skills
| Zenith skill | Skill buffed | Level | Effect |
|---|---|---|---|
| Soul Up | Soul (Red Soul and Blue Soul) | +1 | Soul can be applied with items, and attacks do not stagger other players. Red Soul: +100 Attack on you and on players you hit; no stamina use for running with a weapon drawn. Blue Soul: +200 Defense on you and on players you hit; health recovery effects; removes most abnormal statuses (Zenith Blights cannot be removed). It works with every source of Soul, so you can stack Blue Soul with Red Soul from Blazing Grace and buff both. Attack is a final addition, always the stated value, unaffected by other skills and multipliers. |
ZZ skills
| Zenith skill | Skill buffed | Level | Effect |
|---|---|---|---|
| Rush Up | Rush | +1 | Adds a third Rush stage, reached from stage 2 by attacking or guarding. It is time-limited (30 seconds), adds +70 true raw (+200 in total) and gives infinite stamina while it lasts. It is shown by a stronger version of the current aura with extra lightning. Infinite stamina works with Combat Supremacy but does not refill the bar, so activate it before the bar empties if you want stamina to evade. |
ZZ January update skills
| Zenith skill | Skill buffed | Level | Effect |
|---|---|---|---|
| Ceaseless Up | Ceaseless | +1 | Adds a third Ceaseless stage (shown by a red aura instead of white) with higher affinity and critical multiplier. Every stage needs fewer hits, and on timing out the skill drops one level instead of losing all of them (stage 2 drops to stage 1, not to none). Stage 1: Affinity +35%, critical multiplier +0.1x. Stage 2: Affinity +50%, +0.15x. Stage 3: Affinity +60%, +0.20x. Reflect and Stylish Up count toward hits, but the extra hit of Fencing +2 does not. Stacks with similar buffs (Issen +3 and stage 2 give +70% affinity and a 1.65x multiplier). |
| Weapon | Timer | Hits for stage 1 | Hits for stage 2 | Hits for stage 3 |
|---|---|---|---|---|
| Sword and Shield | 10 s | 15 | 35 | 54 |
| Dual Swords | 11 s | 12 | 29 | 45 |
| Great Sword | 15 s | 7 | 16 | 26 |
| Long Sword | 12 s | 11 | 29 | 47 |
| Hammer | 15 s | 6 | 21 | 36 |
| Hunting Horn | 14 s | 8 | 24 | 40 |
| Lance, Gunlance, Switch Axe | 12 s | 10 | 27 | 44 |
| Tonfa | 11 s | 11 | 27 | 43 |
| Magnet Spike | 12 s | 8 | 23 | 38 |
| Light Bowgun | 11 s | 27 | 74 | 120 |
| Heavy Bowgun | 13 s | 21 | 57 | 93 |
| Bow | 12 s | 12 | 36 | 60 |
Written from the Monster Hunter Frontier guide by Fist (as saved in January 2022). That guide describes Capcom's old official servers; we reworded it, laid it out for Hunsterverse and added the "On Hunsterverse" notes (all of them: Hunsterverse vs the old servers). The pictures are from the original guide.