
Frontier guide · Getting started · 2 of 18
English Guild and Guild Hall
How to join a guild, and what its Guild Hall offers: a shop, Guild Pugis, a Legendary Rasta, Special Cooking, the Felyne Treasure Hunters and the Adventure Boat.
Guild chat first
To talk to your guild you must set your chat to the right mode: green, with a pink flag next to the input box. If you see anything else, you are in the wrong mode. Local chat is only seen by people in the exact same area as you, so a message to someone in the Blacksmith in local chat will not reach them.
The guide's author recommends a separate chat server over guild chat for general questions and conversation.
Joining a guild
New players may need to leave the newbie guild before joining another. Open the Guild menu, go to the second tab, press Z on keyboard (X or Square on a controller) and choose Leave Guild.
Before you can join, you must have finished the first couple of tutorial quests (see Basics) and left the newbie guild, if you were in one.
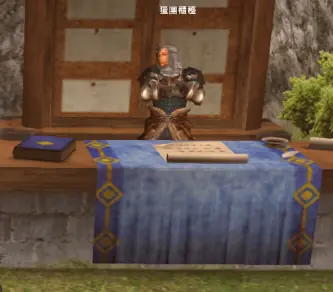
- Go to the Guild Management NPC and talk to him.
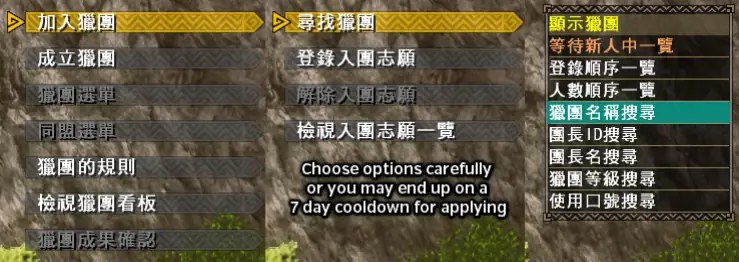
- Choose the first option, then the first option again, then the third option (the one above the option that contains "ID"). The third option is the search by guild name.
- A box opens. Type the guild's name (the guide used Cappuccino) to find it.
- Confirm the correct guild. On the next page choose the middle option. This sends a request, which the guild must approve before you are a member.

Guild chat should appear automatically. To talk in it, press Shift+Up/Down until the chat icon becomes a flag and the text turns green. If you were logged in when the guild accepted you, you may need to log out and in again before you see guild chat.
Guild requirements and meeting place
These are the rules of the guide author's guild, which are typical of an active guild:
- Log in now and then. A G Rank hunter who has not been around for about 30 days may be kicked to make space.
- Anyone still in HR is a candidate to be kicked after about 10 days, because reaching GR is now trivial and a long absence suggests the player left the game.
- Festivals (see Hunter Festival) used to need at least 5,000 points from each participant. The guild removed this rule, but it is still polite to collect as many souls as you can, and you cost yourself rewards below 5,000 anyway.
On the official servers the guild's informal meeting server was Server Tab 2 (the free area), Server 1 (Hypnoc), Room 5. This was the guide author's habit; it does not apply to a different server list.
The Guild Hall
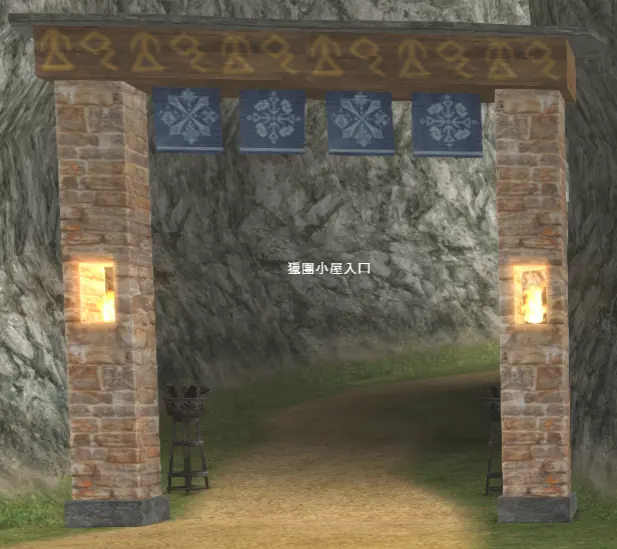
To enter the Guild Hall, walk up to its entrance and press confirm. You go into the Hall. If someone is already inside, the game asks you to change to the server the Hall is currently active on.
Quest givers
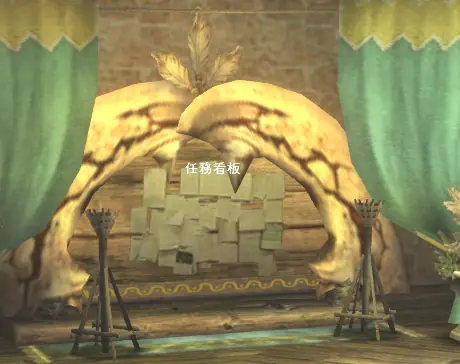
The pair of quest givers near the quest board offer every quest except Caravan quests.
Some quests only exist in the Guild Hall. They give or use up guild tickets when you take them, and have their own section. On guild ticket quests you can also take extra sub-goals, such as hunting while naked or with no weapons. These are the only way to get Additional Task Tickets.
Guild Store
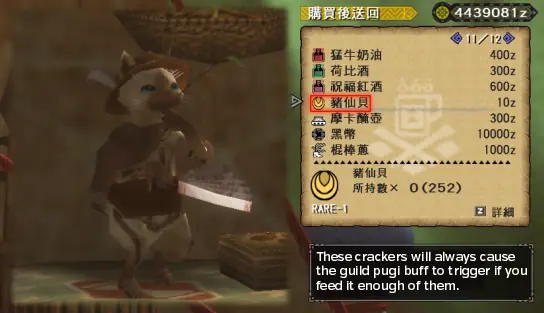
The Guild Store sells several items you cannot buy elsewhere. The most useful at first are Spirit Mushrooms (980z) and Frost Tomatoes (450z). Both are food items. Combined with Fist Rice from the Food NPC in the Town Square (next to the normal shop), they give an easy +50 HP and +50 Stamina buff. For how food and bentos work, see Quests, Food Buffs and Bentos.
Guild Pugis
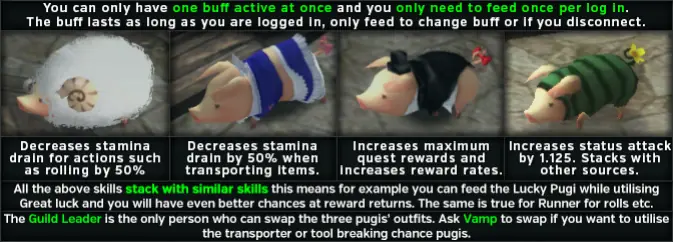
You can only have one Guild Pugi buff active at a time. You only need to feed once per log-in, or when you want to change your active Guild Pugi skill.
Guild Pugis give a bonus when you feed them. The guide says the Guild has three Pugi outfits, each granting a different skill when fed successfully; its picture lists four buffs (above) and says the Guild Leader is the only person who can swap the outfits.
- The easiest way to get the buff is to feed a Pugi lots of Pugi Crackers (10z each, from the Guild Store). A successful feed shows as the Pugi jumping up and down in a white flash.
- If you feed more than one Pugi, only the last one fed stays active. The buff lasts for the whole session and only needs renewing the next time you log in.
- All Pugi buffs stack with similar skills. You can use the Luck Pugi even with Great Luck or a Premium Course active and still gain from it.
How the Luck Pugi works: it has a 12.5% chance to reroll a failed reward roll and a 12.5% chance to add extra reward slots. With Great Luck and the Pugi active you can reach a maximum of 24 standard reward slots. It only affects the top 24 Main Reward slots. It does not change other rewards (Sub Objectives, Additional, Breaks, Partner and so on).
Guild Legendary Rasta

The Guild Hall has a single Legendary Rasta. Which one it is changes every day.
Talk to the Legendary and choose Contract. This lets you take them on any one quest you can sign in the Guild Hall, once a day. You can set all the usual options (weapons, items they use). Unlike a Premium Legendary, they do not have an infinite health pool. They do completely ignore all quest requirements, which makes them useful for quests that need specific gear that makes the quest more tedious than it should be.
Guild Special Cooking
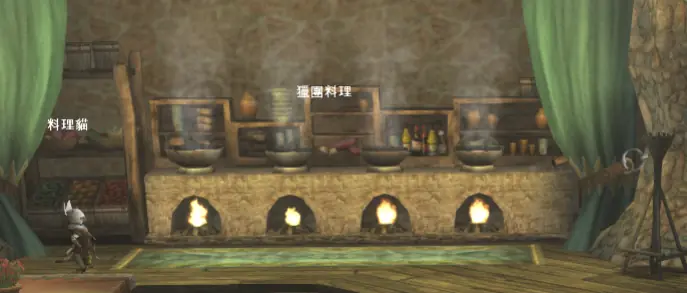
Special Food gives you a skill when it is cooked successfully. Each skill has three levels, and there is a failure result that applies a debuff instead of a buff. The finished food goes to the cat next to the facility. You can eat it for an hour after it is made.
How cooking works
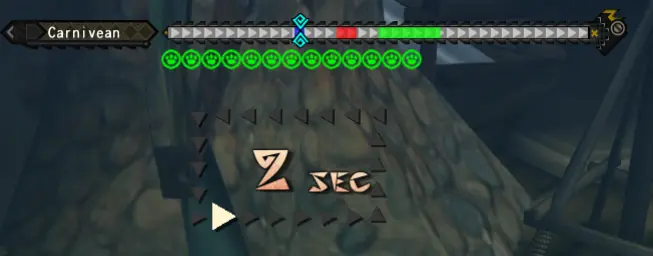
- Choose four ingredients and start. Up to four hunters can take part.
- In the minigame, press confirm to keep the icon on the meter inside the blue or green bars. Blue gives the best result, green a good one.
- Cat stamps in the top right show how you are doing until the cooking time runs out.
- When finished, the food goes to the Kitchen Cat, who looks after cooked food. You are told what buff it gives, or asked to replace an existing meal if there is no free space.
Cooked food is available to all Guild Members for one hour after it is posted on the Kitchen Cat. The buffs themselves last one hour and thirty minutes. That is a maximum of two hours and thirty minutes of the skill for each cook.
If a food has random results, keep eating it at the Cat until the skill you want triggers. The skills in the pool depend on the success level, and +20 resistance is in the normal success pool.
Results
There are four results: Great Failure, Failure, Success and Great Success. The stamps you collect in the minigame decide it: no stamps is a fixed Great Failure, red stamps give Failure, green Success and blue Great Success.
Cooking modes
You can cook normally, which costs no Guild Tickets, or use one of six Guild Ticket modes that change the minigame or the result.
| Mode | Cost | Effect |
|---|---|---|
| Secret of Success | 10 Tickets | Widens the normal green success area. |
| No Failure Allowed | 10 Tickets | Removes the red large failure area. |
| Ultimate Success | 10 Tickets | Doubles the size of the blue great success area. |
| Cooking Technique | 10 Tickets | The cursor moves backwards more slowly. |
| Secret Seasoning | 20 Tickets | Raises the level of success by one level. This should guarantee maximum returns for anyone decent at mashing. |
| Mystery Seasoning (a translation of the Chinese name; the guide's English label repeats "Secret of Success") | 5 Tickets | Randomises the results within the recipe band. For example, for Fire Res you could roll any amount of res or Hunger Up, but the results are not purely random. |
The English names of the six modes are the guide's own; menu names may differ slightly in your client.
Ingredients
Ingredients come from the Guild Store, which takes either normal Zeny or Guild Tickets, or from the Adventure Boat (see below). The Adventure Boat is mostly luck, and its rarest items need materials from the Diva Defense event. Whenever you claim Diva Defense rewards you get at least some of the materials for the Adventure Boat.
| Ingredient | Where from | Cost |
|---|---|---|
| Wabisabi Wasabi | Adventure Boat, Diva Defense route (land under tree cover) | - |
| Acid Pepper | Adventure Boat, Diva Defense route (scorching-wind land) | - |
| Monochrome Mushroom | Adventure Boat, Diva Defense route (land frozen in blizzard) | - |
| Goemon Frog | Adventure Boat, Diva Defense route (land asleep in wetland) | - |
| Demon Pepper | Adventure Boat, Diva Defense route (land reflected in a mirage) | - |
| Iron Cannon Fish | Adventure Boat, standard route (waterside tinted new green) | - |
| Star Pineapple | Adventure Boat, standard route (land of thick dark trees) | - |
| Miracle Herb | Adventure Boat, standard route (flat land with drifting hot sand) | - |
| Millenium Peach | Adventure Boat, standard route (ice cave with beautiful walls) | - |
| Bright Grain | Adventure Boat, standard route (the bottomless swamp) | - |
| Rainbow Mint | Adventure Boat, standard route (erupting volcano) | - |
| Ancient Algae | Guild Cat Store (same swamp as Bright Grain) | 20 Tickets |
| Large Belly Shellfish | Guild Cat Store (same waterside as Iron Cannon Fish) | 20 Tickets |
| Black and White Dragonfly | Guild Cat Store (same sandy land as Miracle Herb) | 20 Tickets |
| Snow Kiwi | Guild Cat Store (same dark trees as Star Pineapple) | 20 Tickets |
| Lava King Crab | Guild Cat Store (same volcano as Rainbow Mint) | 20 Tickets |
| Snow Powder | Guild Cat Store (same ice cave as Millenium Peach) | 20 Tickets |
| Mimic Vines | Guild Cat Store | 1,000z or 1 Ticket |
| Dangerous Melon | Guild Cat Store | 1,000z (no ticket price) |
| Whole Vanilla | Guild Cat Store | 1,000z or 1 Ticket |
| Magma Mango | Guild Cat Store | 1,000z or 1 Ticket |
| Onion Sticks | Guild Cat Store | 1,000z or 1 Ticket |
| Deep Sea Chub | Guild Cat Store | 1,000z or 1 Ticket |
| Ice Salmon | Guild Cat Store | 1,000z or 1 Ticket |
| Taiko Olive | Diva Defense Guild Interception reward for holding a certain number of Hexes | - |
| Spine Meat | Diva Defense Guild Interception reward for holding a certain number of Hexes | - |
The route descriptions in brackets are rough translations of the Chinese place names in the guide. For the Diva Defense routes the guide also lists a Diva Defense item for each route, but only under Chinese names, so they are left out here.
Recipes
As with normal food, there is a recipe for each effect you might want. The recipes below are the cheapest combinations in materials; the original guide kept more in its document, which we do not link. Examples of strong results are Three Worlds Protection, Adrenaline +2, Great Luck and Wide-Area +3.
For Zenith monsters, use the resistance recipes too. You need 55 of a resistance to avoid the extreme version of a blight, and you can reach +83 resistance from SR Skills combined with Guild Cooking.
Unless you are very sure you can hit Great Success every time, use only recipes made of red ingredients, and cook with the option that forces a Success to rise to a Great Success (the 20-Ticket mode above).
Every recipe below can also give the failure result Hunger Increased [Lg]. The dish names are Chinese only, so each row is listed by its ingredients. Results are listed in the order the guide gives them, from the smallest to the strongest.
| Ingredients | Possible results |
|---|---|
| Deep Sea Chub, Snow Powder, Whole Vanilla, Wabisabi Wasabi | Health +30, Rage +1, Rage +2 |
| Goemon Frog, Rainbow Mint, Onion Sticks, Mimic Vines | Health +30, Three Worlds +2, Three Worlds +3 |
| Dangerous Melon, Demon Pepper, Onion Sticks, Mimic Vines | Wind Pressure [Sm], Wind Pressure [Lg], Wind Pressure [Dragon] |
| Dangerous Melon, Acid Pepper, Onion Sticks, Mimic Vines | Earplugs, High Grade Earplugs, Super Ear Plugs |
| Dangerous Melon, Rainbow Mint, Onion Sticks, Mimic Vines | Health +30, Stun Halved, Stun Negated |
| Star Pineapple, Dangerous Melon, Whole Vanilla, Mimic Vines | Health +10, Good Luck, Great Luck |
| Deep Sea Chub, Black and White Dragonfly, Ice Salmon, Whole Vanilla | Earplugs, High Grade Earplugs, Super Ear Plugs |
| Deep Sea Chub, Monochrome Mushroom, Ice Salmon, Mimic Vines | Caring +1, Caring +2, Caring +3 |
| Lava King Crab, Whole Vanilla, Dangerous Melon, Mimic Vines | Health +20, Adrenaline +1, Adrenaline +2 |
| Deep Sea Chub, Ancient Algae, Dangerous Melon, Demon Pepper | Wind Pressure [Sm], Wind Pressure [Lg], Wind Pressure [Dragon] |
| Deep Sea Chub, Rainbow Mint, Dangerous Melon, Demon Pepper | Wind Pressure [Sm], Wind Pressure [Dragon], Violent Wind Breaker |
| Acid Pepper, Mimic Vines, Onion Sticks, Black and White Dragonfly | Health +20, Runner +1, Runner +2 |
| Snow Kiwi, Dangerous Melon, Whole Vanilla, Magma Mango | Health +20, Divine Protection, Goddess' Embrace |
| Large Belly Shellfish, Ice Salmon, Whole Vanilla, Mimic Vines | Health +20, Hunger Halved, Hunger Negated |
| Deep Sea Chub, Ice Salmon, Whole Vanilla, Mimic Vines | Wide Area +1, Wide Area +2, Wide Area +3 |
| Mimic Vines, Onion Sticks, Black and White Dragonfly, Whole Vanilla | Health +10, Terrain [Sm], Terrain [Lg] |
| Deep Sea Chub, Ice Salmon, Dangerous Melon, Mimic Vines | Health +10, Whim, Divine Whim |
| Dangerous Melon, Magma Mango, Whole Vanilla, Mimic Vines | Health +10, Paralysis Halved, Paralysis Negated |
| Demon Pepper, Dangerous Melon, Magma Mango, Mimic Vines | Health +10, Sleep Halved, Sleep Negated |
| Magma Mango, Star Pineapple, Dangerous Melon, Mimic Vines | Health +10, Poison Halved, Poison Negated |
| Whole Vanilla, Magma Mango, Dangerous Melon, Mimic Vines | Health +10, Stun Halved, Stun Negated |
| Onion Sticks, Snow Powder, Black and White Dragonfly, Bright Grain | All Res UP +5, All Res UP +10, All Res UP +20 |
| Deep Sea Chub, Onion Sticks, Magma Mango, Whole Vanilla | Fire Res +10, +20, +30 |
| Deep Sea Chub, Onion Sticks, Dangerous Melon, Whole Vanilla | Water Res +10, +20, +30 |
| Deep Sea Chub, Onion Sticks, Ice Salmon, Whole Vanilla | Ice Res +10, +20, +30 |
| Deep Sea Chub, Onion Sticks, Demon Pepper, Whole Vanilla | Thunder Res +10, +20, +30 |
| Deep Sea Chub, Onion Sticks, Mimic Vines, Whole Vanilla | Dragon Res +10, +20, +30 |
| Miracle Herb, Ancient Algae, Whole Vanilla (only three ingredients are readable in the original) | Health +30, Wide-Area +3, Herbal Medicine |
| Spine Meat, Onion Sticks, Rainbow Mint, Snow Powder | Health +30, Encourage +1, Encourage +2 |
| Taiko Olive, Rainbow Mint, Black and White Dragonfly, Mimic Vines | Health +30, Bond, Assistance |
| Spine Meat, Magma Mango, Snow Kiwi, Star Pineapple | Blue Soul, Incitement, Red Soul (the original's layout is unclear about the levels) |
| Any four ingredients (the Guild's "mystery pot") | Random results |
Felyne Treasure Hunters
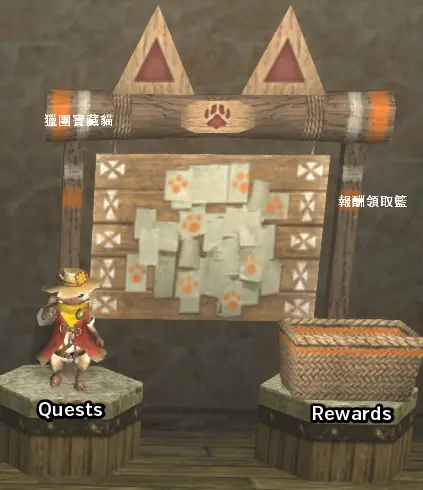
The Guild Hall may have a number of Partnyaas assigned to it. All guild members can send them out treasure hunting. A good number of items and materials come only from this system, including materials for end-game Pugi Cuffs, which can be vital for building many G Rank sets.
Among the ordinary items you can get are Quick items. They work like the normal consumable but at 200% speed, as if Quick Eating were active. They are separate item stacks and you can take them alongside normal ones (for example 10 Pots, 10 Quick Pots, 2 Max Pots and 2 Quick Max Pots).
Starting a hunt
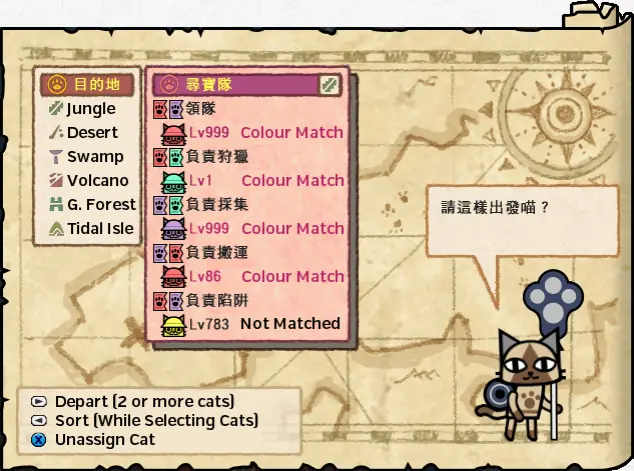
Choose the first option on the NPC to start a departure to one of six locations with up to 5 of the guild's Partnyaas. After picking the area, assign cats to the slots. Match the colours to the two shown on each slot, put the highest-level cats in the right slots and confirm.
Each hunt takes 30 minutes. After it the cats are tired until the next 12:00 AM (Taiwan time) reset. To send a tired cat out again you must spend RP: 1 RP per tired cat. You earn RP just by being in game, at 1 per 30 minutes.
Treasure types
You can get three kinds of loot: Rewards, Treasures and Souvenirs. The type is mostly luck. The reward pools depend on the location you sent the hunters to.
- Rewards are given straight away when you talk to the main Treasure Hunter NPC after a hunt ends.
- Treasures are also triggered by talking to the NPC, but a player must actively find them after the hunters have located them (see below).
- Souvenirs arrive when someone else returns from finding a treasure. A guild-wide notice tells everyone, and the people concerned claim the rewards at the Reward Basket in the Guild Hall.
Getting treasures
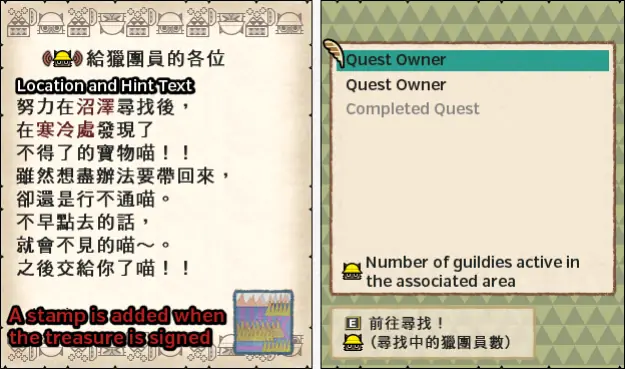
When a Treasure is found it is added to the list of active Treasure Retrieval Quests under the NPC's second option. Every guild member can pick any quest on the list. If you wait too long, another player may find the treasure first and you will only get a Souvenir.
Picking a quest gives you a stamp on the quest card. When you back out, a cat confirms the location you must visit.
If you choose to find the treasure yourself, you get a hint and must locate it within the given area. The guide points to a Japanese blog with maps of the locations. There is no simple key for the Chinese hint text, so check every area on the map to be sure you find it.
You can gather the treasure on any quest that takes place in the area where the Treasure Hunters found it. The simplest is a map delivery. The treasure appears as a giant shiny in one of several preset spots. When you interact with it you receive a Treasure Hunters Treasure, which turns into a treasure when you return from the quest. You collect it at the Rewards Basket.
Claiming treasures
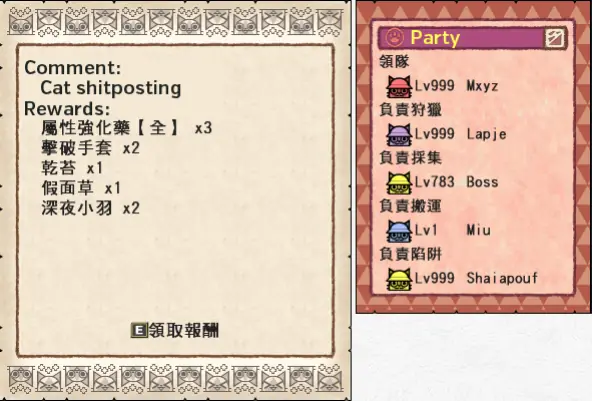
Rewards from both Treasures and Souvenirs always appear in the Reward Basket in the Guild Hall. It works almost like a quest rewards screen, except that you first choose a party that has rewards for you, and then use the send all to box option.
Felyne Adventure Boat
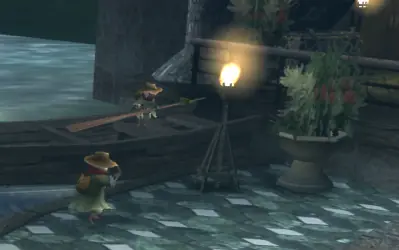
The Adventure Boat sends a Felyne to a specific location. It is the only way to get some of the items for Guild Special Cooking recipes, such as the ones used in the Caring recipes (which stop you hitting other players with attacks).
Sending the cats costs RP, which you earn at 1 per 30 minutes spent in game. The rewards depend on several factors, and you can improve them by putting Guild Tickets in. To do this, talk to the NPC on land after the boat departs.
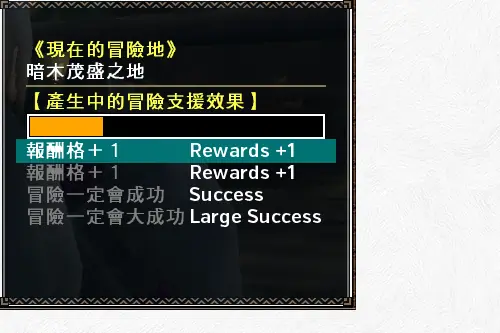
When the boat returns, claim the rewards directly in front of it. The success level of the trip decides what you see, from a pile of plain boxes and debris to shining treasures.
The boat is out for 6 hours as standard. All members of the guild can contribute and claim rewards, so if you plan to use guild cooking, it is worth pooling resources here for the best results.
Written from the Monster Hunter Frontier guide by Fist (as saved in January 2022). That guide describes Capcom's old official servers; we reworded it, laid it out for Hunsterverse and added the "On Hunsterverse" notes (all of them: Hunsterverse vs the old servers). The pictures are from the original guide.